Here’s another post with some details on the process of building a model rocket with an electronics package to do some telemetry and messaging via APRS, and LoRa, during a short rocket flight. Make sure to check out the Radio-Rocket Tag to find more posts, or check out the summary static pages on the project posted here. Some of the code is also finding it’s way to a github repo. I wrote a fairly detailed summary post as an intro to all of this, that you might want to check out as well.
The Ground Station
In order to communicate with a rocket that has radio gear on it, you need to have a way to receive, and potentially send back, radio signals of your own! I’ll talk specifics about the rocket itself in another post, but for now, the main thing to know is that the rocket currently has 2 radios on-board:
- lightAPRS tracker, which is a transmit only device (as far as the ham bands are concerned anyway)
- Adafruit Feather M0 RFM96 LoRa Radio - 433MHZ - RadioFruit. Thats a big mouthful to say “a microcontroller with cute little LoRa transceiver built-in.”
This means that the key radio functionality needed in a ground station is to:
- Receive APRS Packets
- Do both RX and TX to enable two-way communication with the transceiver on the rocket
This post will focus on the first item - I’ll detail the transcieving via LoRa part of the ground-station in another post.
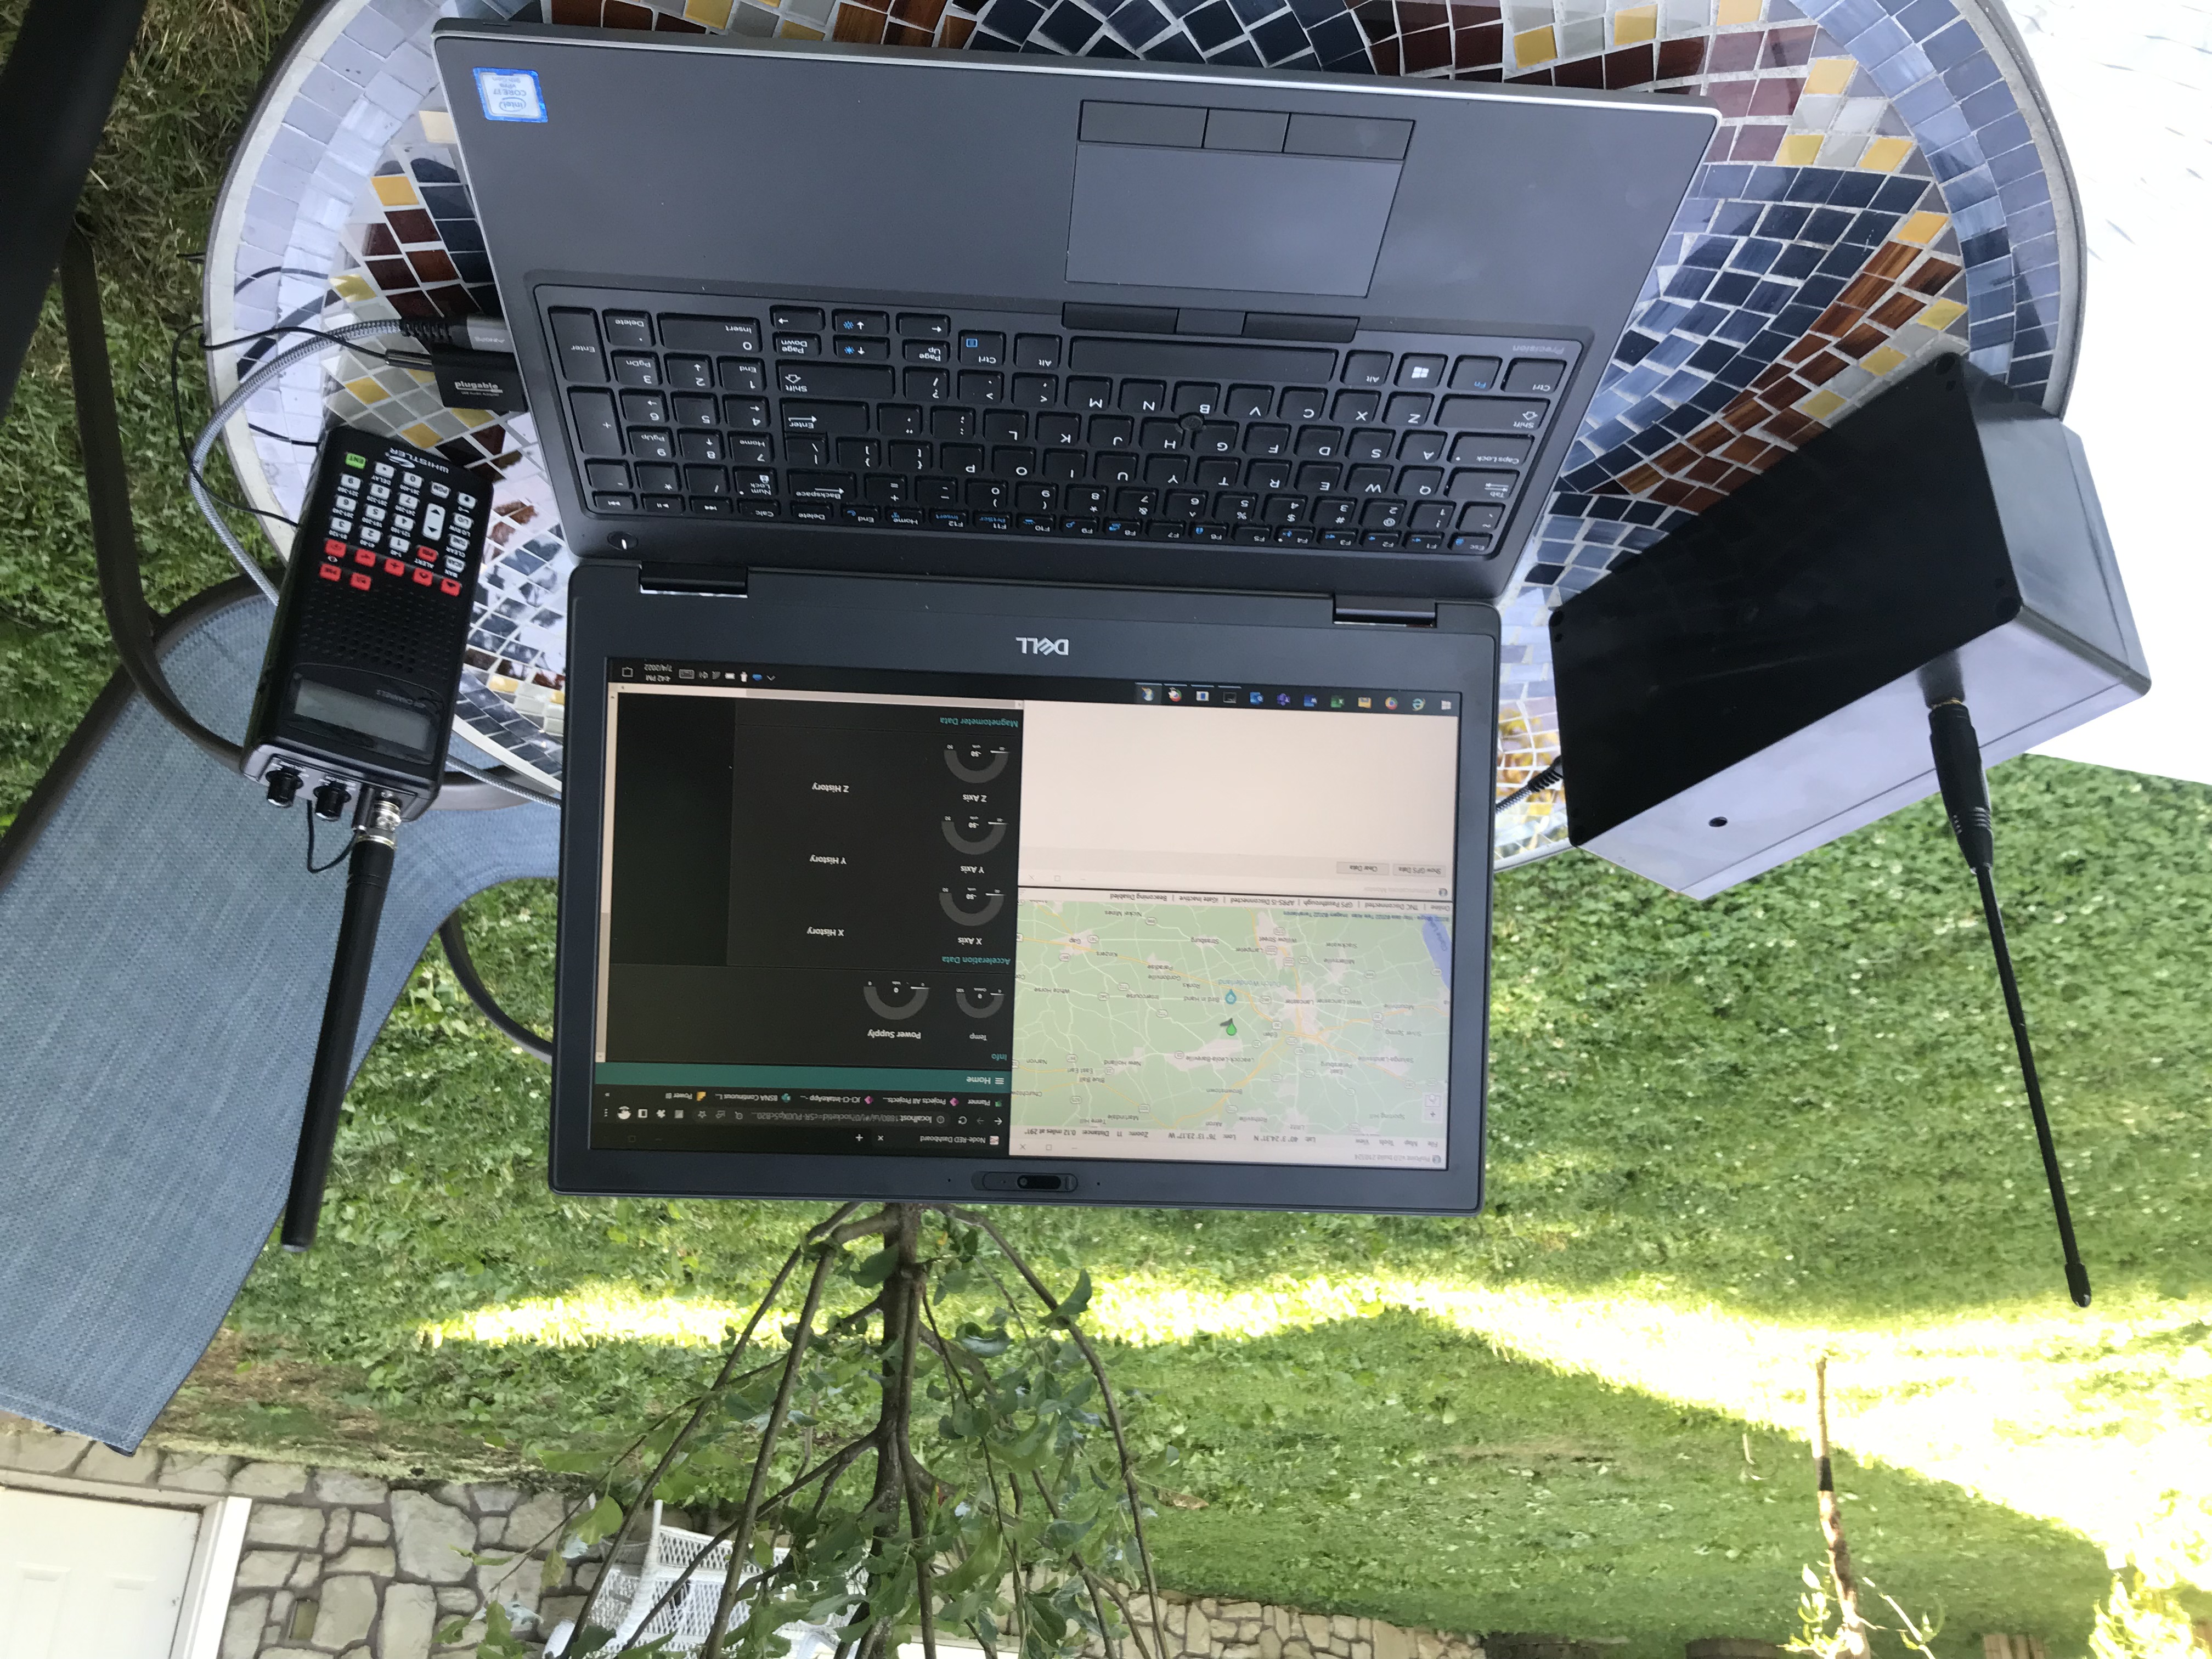
To get started with these things, I wanted to play around with stuff I had on hand, as much as possible. What I have operational right now, as a result, is pretty much a kludged together selection of things I had on hand, freebies, and things that were fairly inexpensive to purchase. We’ll call this the V1 Proof of Concept, as I’m already scheeming for the more permanent version, now that I’ve done some testing.
APRS
APRS can be a little overwhelming if you’ve never dabbled. Its a topic that is both deep and wide, so if you need general information, I’d reccomend starting at aprs.org. For my purposes though, it was pretty straightforward to break down into steps what I needed to do, in order to get set up to receive the packets.
-
Step 1 - Figure out how to receive packets. In my case, I had recently earned some ‘Shrute Bucks’ at work. When browsing the merch catalog where they can be used, I realized that I enough to get a freebie Whistler WS1010. Since I had that in hand, it’s what I used, but most hams will have an HT, mobile radio, or something similar that can receive signals on their designated APRS freqency (144.39MHz here in the states).
-
step 2 - get the signal from the radio to the computer. There are lots of ways to do this, from very basic to very complex. The most common is probably using a sound interface like the venerable signaLink. In my case however, I again went with something cheap that I had on hand, since I only needed RX for this part - a little USB sound card, and 3.5mm audio cable. Plug one end of the cable into the headphone jack on the radio, and the other end into the mic port on the usb soundcard. From there I just headed to the sound settings on my computer, and while watching the mic level, slowly adjust the volume on the radio, so as to avoid over-driving the mic input.
-
step 3 - convert analog FM sounds, into data. There are lots of software sound-modem options, but I went with Direwolf. It was pretty straight-forward to install on my windows laptop. Following their directions, I downloaded the zip file and unzipped it to a location on my hard drive. For simplicity sake, I threw a shortcut to direwolf.exe on my desktop. Double clicking that opens up the program in a terminal window.
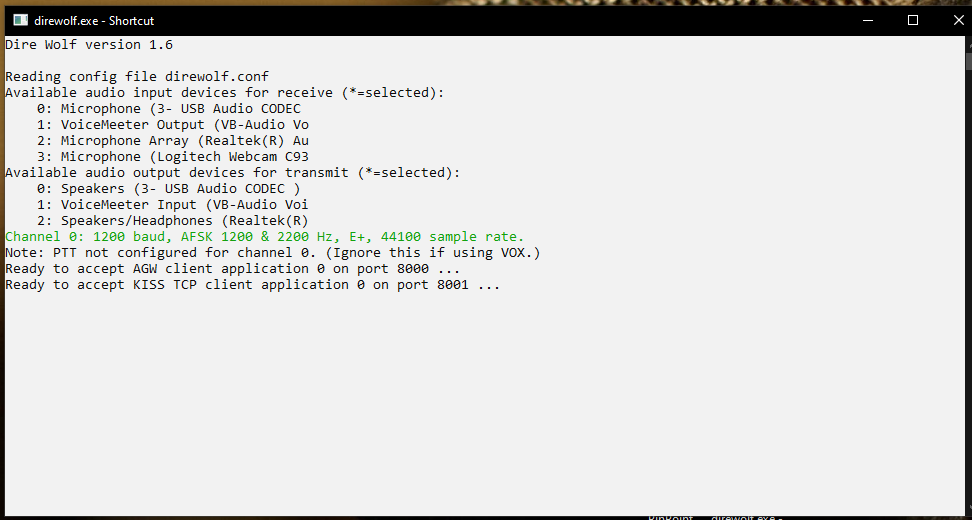 The program will pretty much start listening on whatever sound devices your computer has, and tell you what ‘ports’ you should you should have any client programs listen on. If you’re hardcord though, you don’t even need a client program - you can just read the raw text of the packets, as they will start scrolling by as soon Direwolf hears sounds its recognize as packets.
 -
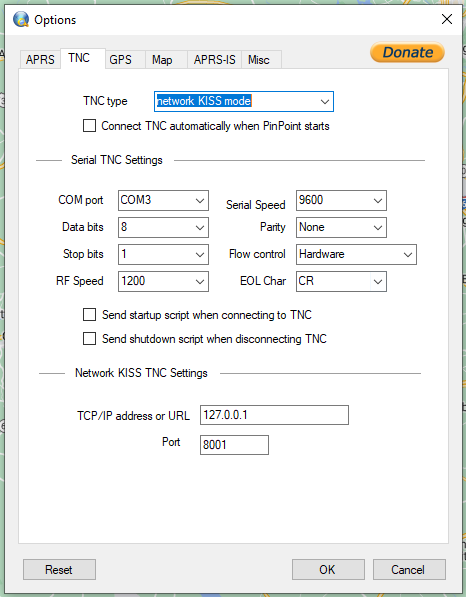
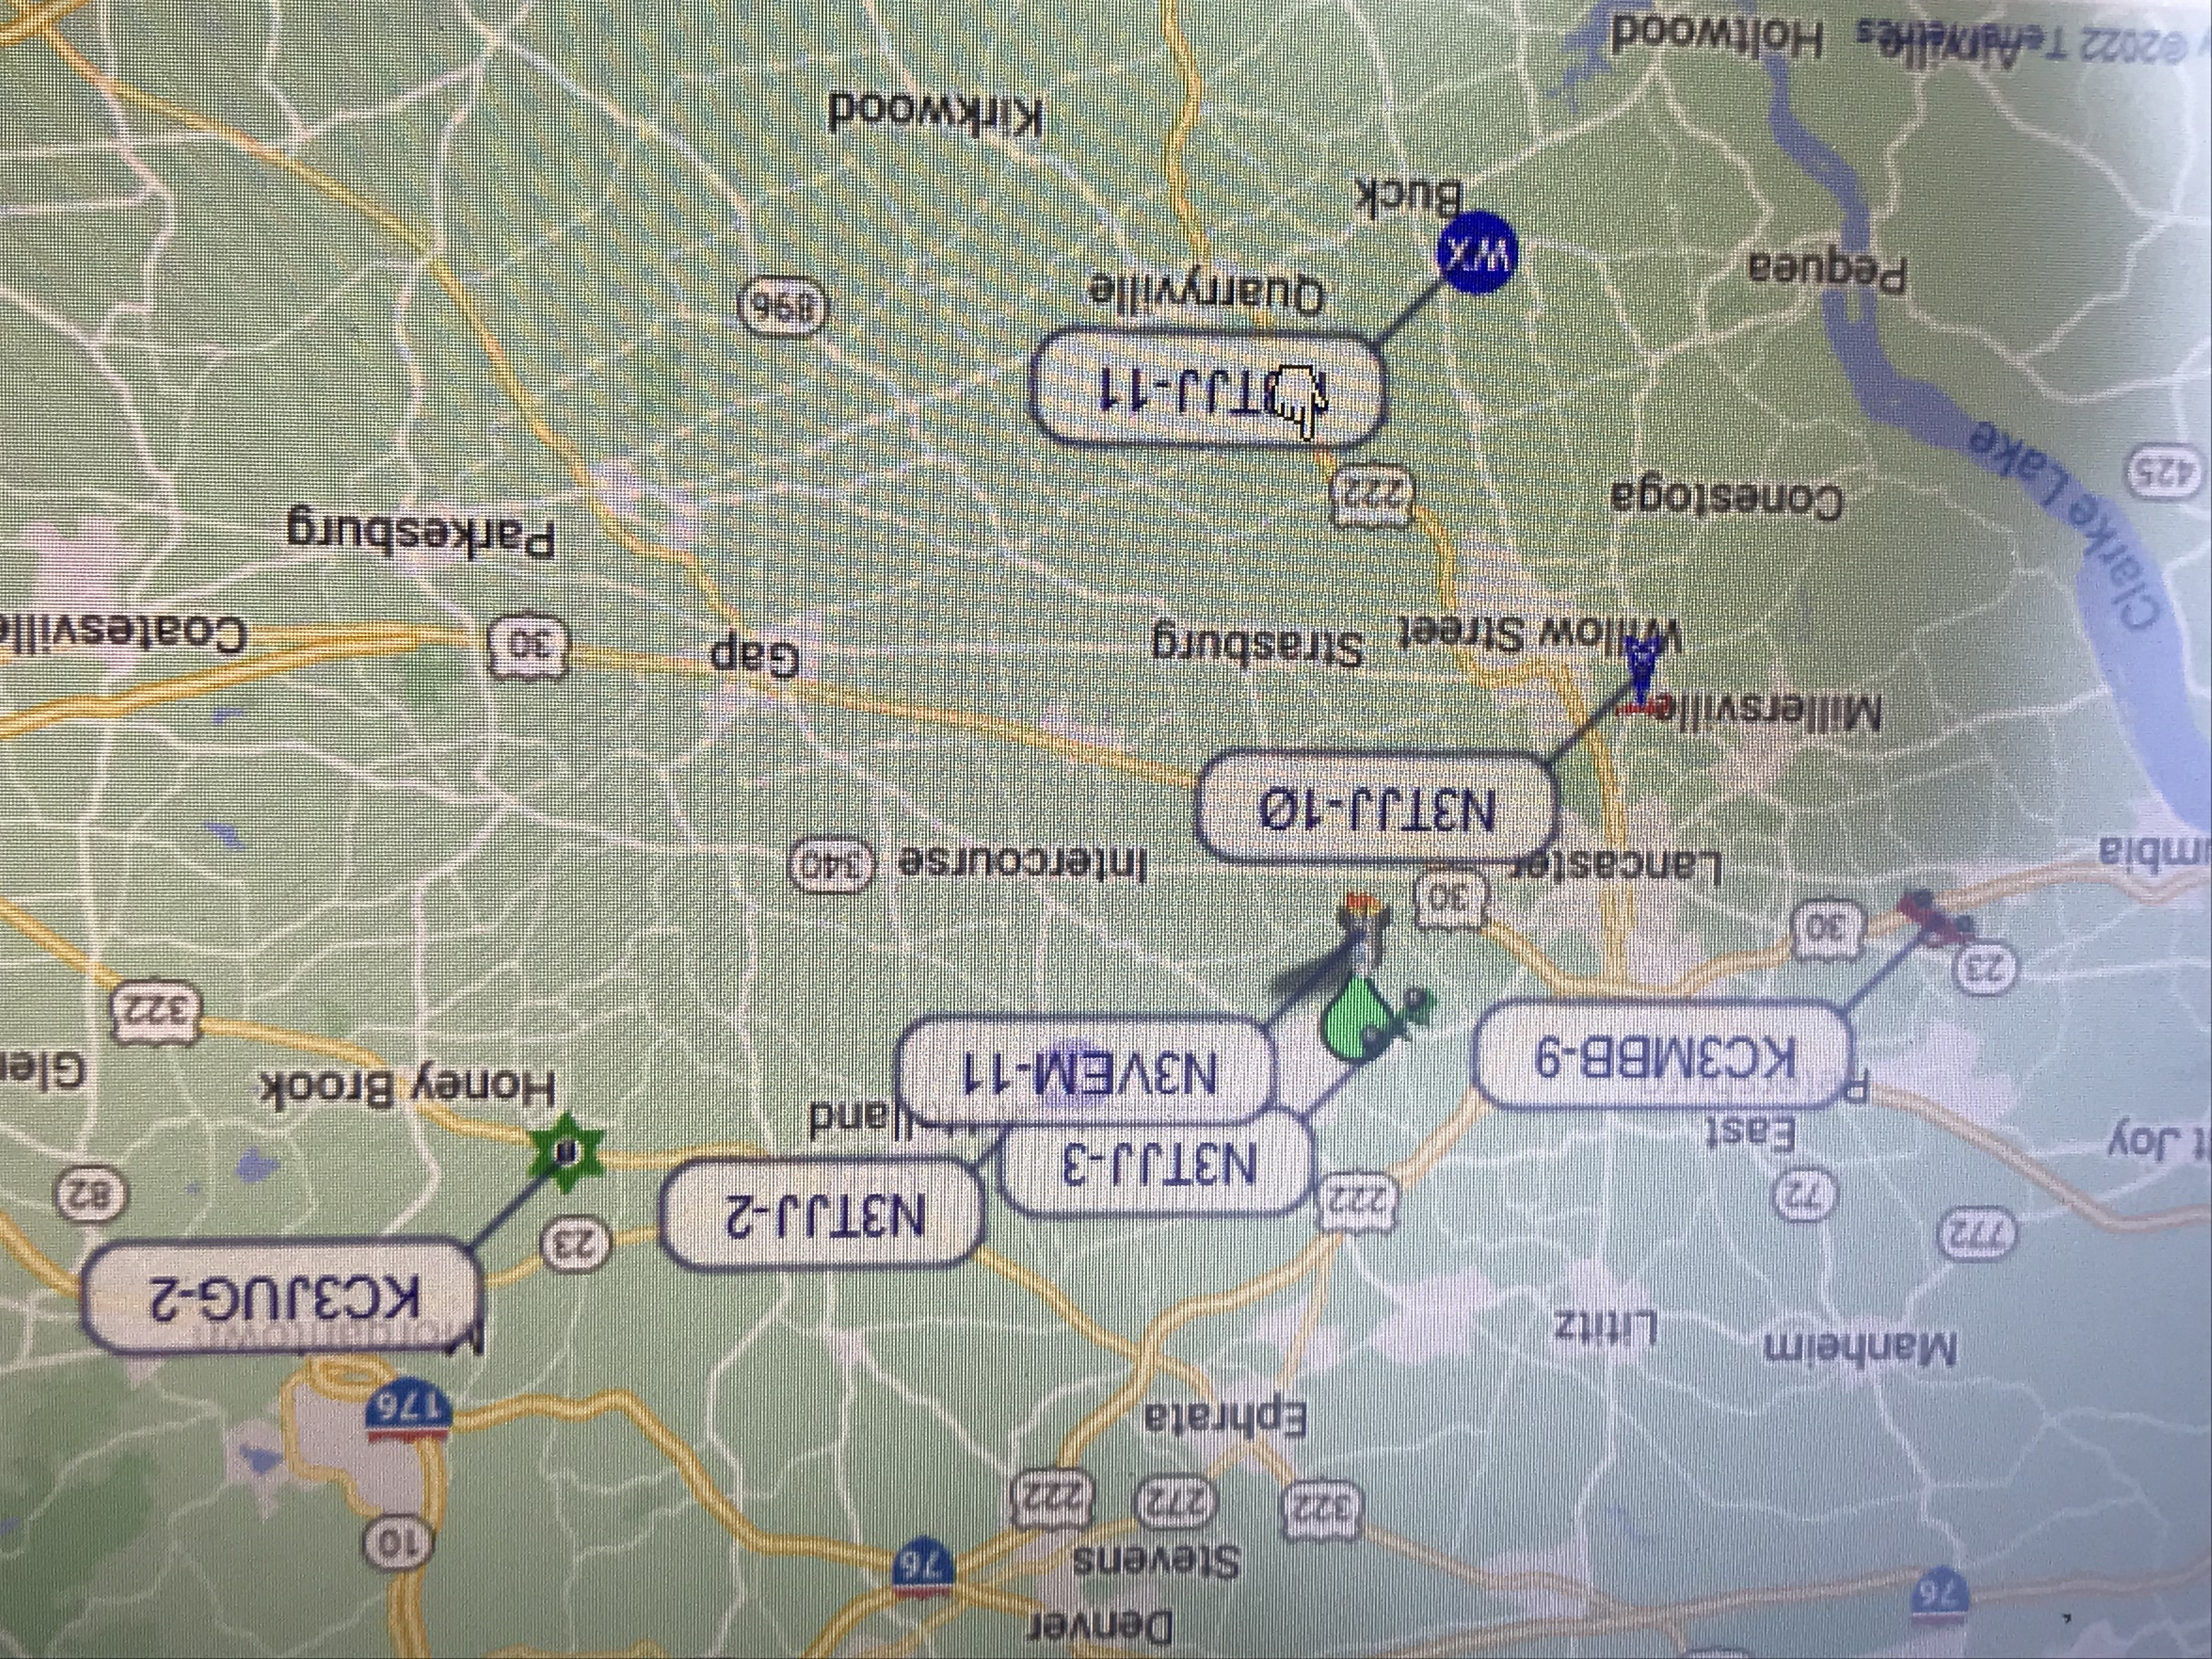
step 4 - Client program, because I am not hardcore. After a quick search, I decided to do my testing using Pinpoint APRS. After downloading and installing per the directions, I fired it up. From the tools and options menu you can set up pretty much everything you need. On the APRS tab I filled everything in, but unchecked the box for “Enable APRS Digipeater”, and unchecked the box for “Enable APRS beaconing” because I’m only interested in receving. On the TNC tab, I just picked “network KISS mode.” There are other settting on the other tabs to play with, but these covered it for me. From there, you can just head to the tools menu and choose “connect TNC”, and you’re off and running.

And that pretty much covers getting the APRS half of the ground station set up. Next time I’ll give details on the LoRa half, which is where the really fun stuff like telemetry, dashboarding, and keyboard to rocket to keyboard messaging happens.