- Get my little helper to Dance class and home again
- Fill up the gas can (for the generator)
- Fill up the propane bottle (for heat!)
|
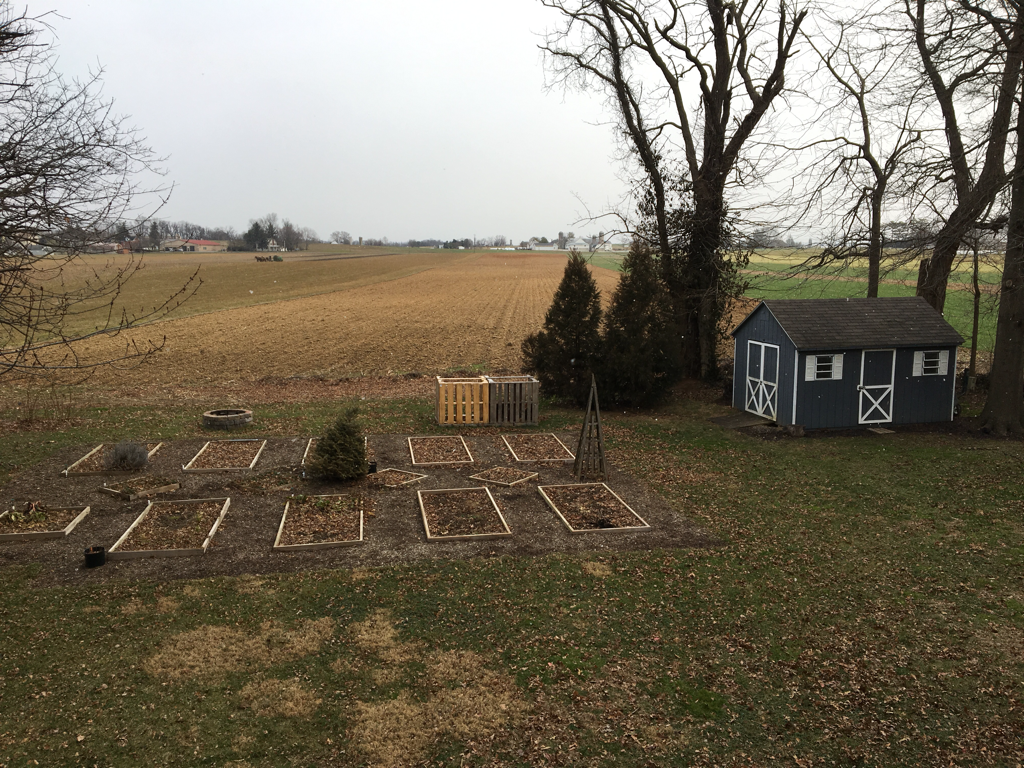
The big day is here! It even started snowing this morning, just to make it a proper winter field day. My backyard, with the snow falling (hard to see snow in pictures though...) is waiting patiently for a tent and antenna's to be erected. Setup can't start till later this morning, so until then here's my final checklist: Hope to hear you on the air!
0 Comments
Post Contains Affiliate Link
A wise person (my YL) once quoted another wise person (not sure whom) and told me "Don't let the perfect be the enemy of then good." Along those lines, I hadn't really gotten around to putting together a decent wire antenna that I could use independent of my Buddipole on my portable operations.
There are times where a wire would have been nice for the speed, or where I had tall trees available. My hang up (no pun intended...) was that I wanted the "right" balun to put at then feedpoint. Buying one just didn't feel right because I know I'm capable of making one, but I hadn't gotten around to making one either because I wanted the "right" parts. With that thought simmering away in my head, and Winter Field Day fast approaching, it dawned on me that I had stumbled on one of those small project boxes while cleaning some stuff up in the garage. I decided to get over my paralysis of wanting to make it perfect, and just put together something that was good. I had some hardware, and a quick trip to the hardware store got me some more. I didn't have anything to wind a balun but I figured what the heck, why not make a basic feedpoint now, and I can always wind up a ferrite core for a proper balun in the future. If you hung on through all that, congrats! Here's the nitty gritty of my feedpoint/future balun:
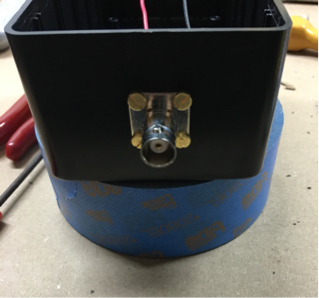
First, I drilled some holes in the bottom, and installed a panel mount BNC connector (why BNC? Because it's what I had!)
Next, I soldered a bit of wire to the center pin, and used a ring terminal to attach another bit to then shell of then connector. Also, because I like to at least try to make sure things are straight, I always put painters tape on things, and then measure and mark where to drill: So here's the shortcut, and why I call this quick and dirty. Ultimately, I'd like to actually make this into a proper balun, but since I don't have any ferrite beads/rings/rods available, for now it is just a generic feedpoint. The thought here though, is why let not having a ferrite hold up the whole works? This will work just as well as the typical coax spliced directly to dipole feedpoint that is so common, but gives me the ability to upgrade. I'll just make sure that I keep it in the back of my mind so that the next time I'm ordering stuff from a place that would have it, or the next time I'm wandering the rows at a hamfest, I can pick up what I need. All that was left for now however, was to put the lid on, add the wire connection hardware on the outside, and put a couple small holes in the bottom to allow any accumulated condensation to drain. So, looking at this final picture, it doesn't look so dirty after all...maybe I should have called this post "Quick, Upgradable Feedpoint" instead. Whats you're favorite feedpoint construction method? Leave a comment and let me know! Sometimes things just work out. In some cases it just seems like patience is the key, and in some cases it is just a combination of good timing and the camaraderie of ham radio. While this is by no means a technical post, good fortune struck twice in one day in my little corner of the world, so I figured I would share! First, in my post about my built-from-junk antenna mast that I am working on, I mentioned that where that project currently stands, I am looking for some HDPE plastic (the same stuff cutting boards are made from) in about 1/2" thickness. Since it is a goal to make that mast from mostly re-purposed, junk, or free stuff, I figured I would sit on it, put out a request to the universe at large, and at some point I figured I'd come across an old beat up cutting board or something similar. Well, my waiting paid off and I found 2 pieces of HDPE plastic that are just big enough to be able to use. Guess where I found them.......in my basement! I thought I had thrown out my scraps from the last project I used this material on, but apparently I had actually put them in the re-purpose pile, and had just forgotten about them! For you that means you'll soon get to read about my next steps in that project.  The second item of good fortune that happened today, actually worked the other way around. I had a few moments this evening, so I was working on programming the radio's that were part of my future operator #1's christmas gift (more on that to come in future posts, but for christmas I got a GMRS license and a couple rigs in need of some love for us to work on together.) Anyway, the programming was done, so I wanted to test the antenna she built, and put one of the radio's on the air to see how the audio sounded etc. While looking for the connectors and some other tidbits in the garage I came across one of the small metal pieces that connects the whip for a hamstick to the bottom fiberglass part. I remember where it came from....I had sacrificed a 10 meter hamstick to a low bridge early on in my HF mobile experiments, and this was one of the only surviving bits. Regardless, as I held it, I looked at it and asked myself "why am I keeping this?" After all, it's one of those things that can quickly make for a full junk drawer, and we've been going through an effort to de-clutter in our house. Not wanting to delay progress however, I tossed it back in the box, and moved on. Now, here is the interesting part of the story - I rarely turn on my VHF/UHF or HT radio's at night. Most of the time I don't want to wake a sleeping child, and when that's not a concern, I usually gravitate toward HF at this time of night. Since I was working on a little UHF radio though, I turned on my HT, figuring I'd use it to receive what I was transmitting, so that I could hear how my TX audio sounded on the rig for my little helper. When I turned the HT on, it was still on the local repeater frequency, and I just happened to hear one of the local hams - W3CWE, mention that he was working on piecing together something for 10 meters, and he had the base of a hamstick, and a whip, but he didn't have the piece to connect them together.....what are the odds of that?! I quickly jumped into the conversation and told him that I'd drop off just the part he was looking for. It seems like all I had to do was ask the universe "why am I keeping this?" out loud. The vibrations of stuff that holds the universe together must have propagated the question quite well this evening, because less than 5 minutes later the universe answered - or it was just lucky timing. Either way you choose to look at it, this boils down to hams helping hams, which I feel is one of the most important parts of our hobby. Hows that for good vibrations? First things first - I'd like to thank all of you (you know who you are!) for helping me accumulate 60 contacts over a couple of evenings while operating portable from Grand Haven State Park in Michigan! A few weeks back someone asked me what kinds of things I'd be up to when NPOTA ended (last I checked I ended up in a multi-way tie for 90th out of over 1,400 activators - I'll wear being in the top 100 with a badge of honor!) Well, even though NPOTA is over now that we're into 2017, I still have to travel for work, and I wanted to keep playing radio while I traveled. Enter "World Wide Flora and Fauna" or WWFF for short. For those of you not in the know, this is an international program that is very similar to NPOTA, but it is on-going, kind of like SOTA or IOTA. My work was taking me to Grand Rapids, MI so I did my standard "park hunt" to decide where to operate (I wrote about how I pick a place to activate a while back.) I ended up deciding on Grand Haven State Park (Unit KFF-1499) which sits right on Lake Michigan. I stayed in what they call the "Modern Lodge" which is really just a ranch style house that sits on the edge of their property: This was an awesome place to stay, because it was in the park, it was comfortable, and for goodness sake, you can rent an entire house for the same nightly cost as staying in a chain hotel! The only catch is that you have to clean up after yourself (vacuum, strip beds, etc.) when you leave. If I had gone in the summer, I would probably have camped in the park, but because the view of the park's lighthouse sometimes looks like this in the winter: I decided that staying inside a heated building was just fine by me! I did get lucky, and the weather was fairly nice. For antenna's, I used my Buddipole, in various configurations. On 20 meters I set it up as a V antenna (should I have called the opposite of an inverted V a verted V?) and I also set it up as an elevated vertical using some of my wire as 2 elevated, quarter wave radials. On 40 meters I used the Buddipole mast and it's feedpoint, but used my wire dipole (I gave some details on that in this post.) On 80 meters I did a hodgepodge arrangement - on each side I used an antenna arm, a coil, and my 40 meter wire, and I tuned it by adjusting taps on the coils. My biggest antenna takeaways from this trip:
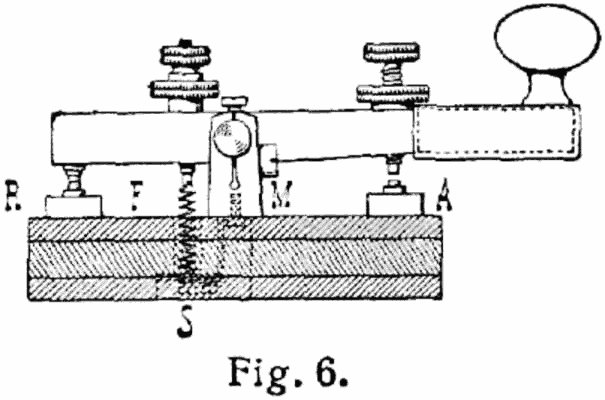
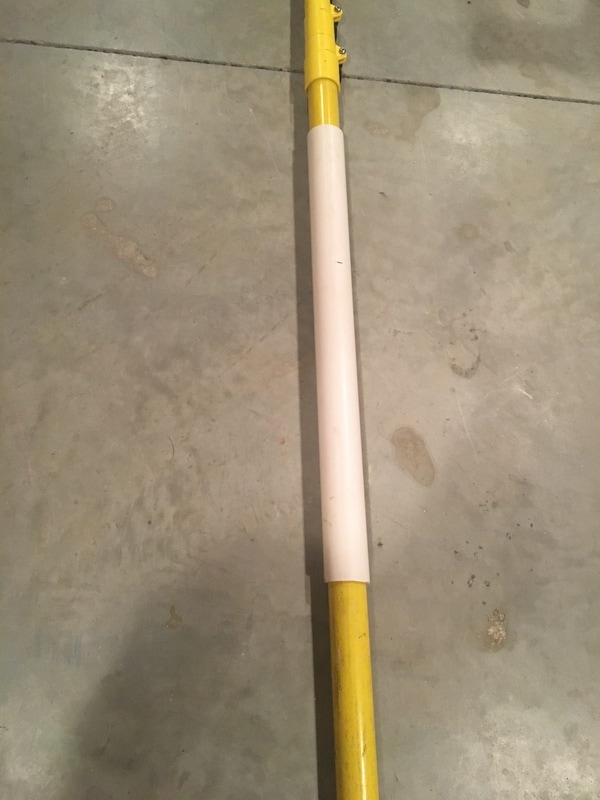
Even though the sand outside was a little messy to work in (did I mention that sand gets everywhere?) when I wasn't fiddling with the antenna, I had a very nice temporary "shack" set up in the back bedroom, complete with a cushioned adirondak chair to lounge in while I operated. I operated mostly voice (46 contacts over the 2 evenings when I got to operate) but also did some digital modes (14 contacts). I had 2 highlights here - My very first THOR contact was the first highlight. My second highlight was way cooler, even though it wasn't even something that most would consider a success: I "almost" had my first ever CW contact thanks to W6LEN! Whenever I have posted on the book of faces that I was going to be doing an activation, W6LEN always asks "are you doing any CW?" and I have always answered "Maybe, if I get up the nerve - I've been practicing but haven't made any contacts on the air." Well, this time peer pressure finally got me, and I attempted to make a CW contact on the air. Once I got past the technical hurdle of figuring out how to send CW with the microphone of my 857d (hint: e-mail me if you want to try this, it's not as intuitive as it seems it should be) I made the call, at a very shaky 5wpm: W6LEN de N3VEM ....and.....I heard code coming back, nice and slow!!! I copied W6 and then it got wiped out by someone sending right on top really loud, and much faster than I could copy. I hope it was a mistake, and not someone being a LID and purposefully interfering with a newbie attempt at CW..... Anyway, I made the call again, and this time I copied the W, then the loud interrupter broke in again (seeming less like a mistake now...), and I managed to copy an E and a W in between the interrupting dits and dahs. At one point I also hear my own call coming back to me, but couldn't copy who was sending it thanks to these kind interruptions (how grand...) - I'm sure it was W6LEN, but I didn't log it because it didn't "feel" right since I couldn't technically be sure, because I didn't copy the whole call sign at any point. So, with all that said, I now have a mission before my next trip: practice copying a bunch, grow some stones, get my hands on a key and officially include CW in my next activation! I have some bits of metal, and I'm sure some bits of spring in my garage somewhere. I also know for a fact I have some quarter inch plugs and wire....hmmm...maybe another project and related blog post is in order.... dah dah di di dit di di di dah dah Post Contains Affiliate Links So, my YL has this thing she says about "putting things out there in the universe" and then being patient. This week I got started on a project because of something I had left hanging out there in the universe, so maybe there is something to it after all.... Those of you who follow along with my posts know that I have a Buddipole Mast/Antenna system that I use fairly often during portable operations. It's great, especially when I'm flying somewhere for work, because it packs up pretty small. There are times though when I'm driving somewhere that I'd like a taller mast. I've spent a lot of time surfing around the web, and had kind of decided on a certain model of fiberglass mast that I liked because it seemed sturdy, had strong looking clamps to hold the sections, and depending on the model, had a top section that I could fit one of the pieces of my buddipole stuff onto, in order to use it with my buddipole parts if I wanted. The drawback was the price. It wasn't that expensive, but I just hadn't been able to get myself to pull the trigger. Cue the universe.... I was in the Hudson Valley for work, and while on one of our jobsites I saw a pole standing in the corner with our guys equipment that looked strikingly like the masts I had been eyeballing, so I asked what it was. They said they used to use it reach high stuff, but that the end was busted up, and they didn't use it anymore, and that they just hadn't gotten around to throwing it away. I quickly offered to take it off their hands. It wasn't as tall as the one I was looking at, and was a bit rough in a couple spots, but is was free! I figured I could try it out, and if I really liked it maybe I would buy the same thing, but taller. To start, they were right about the end being busted up. The fiberglass on the top was split, but only about 3 inches down. My miter saw made quick work of that, so even though it was now 3" shorter, I had a good solid top. I also noticed that the bottom section had a largish hole drilled in it for some reason (you can see that in the picture above). I figured I would think up something to do about that along the way. Since this was a free thing, I wasn't sure exactly how I was going to peice this together, but I decided to just let this one kind of "fall together" and see what happened. The top section was 1.25" in diamater, so I didn't really have anything that would fit around that to adapt to my buddipole stuff, so at first I was thinking I'd just put an eye bolt through the top and use it to support the center of dipole, or wire etc. Suddenly however, I remembered that in the scrap metal pile in the garage I had a broom handle from a no longer used broom, that had the same thread on the end as a painters pole: My Buddipole stuff does have an adapter to mount it's parts onto a painters pole, so I decided to try to re-purpose this, and make it so that this would be on the top of my mast, and then maybe I could give myself options - this to thread stuff onto, an eye bolt or 2 in order to hold it and also act as accessory places to hook wires or guys to, etc. With that thought in mind I quickly chopped the top 18" or so off this handle, so that I had the business end available. Unfortunately, this handle didn't really fit snug in any manner that was convenient right away: What I needed was some way to hold this pole centered inside the top of the mast, while I figured out some way to permanently attach it so that it wouldn't move. Step 1, center the handle in the mast, with just the thread sticking out the top. That problem was easily solved with several wraps of electrical tape - just enough to make the fit snug: With the pole then inside, and the threads sticking out, I could see that I was getting somewhere: To start filling the gap, I grabbed two tubes of this stuff (Loctite Epoxy), and figured I could use it to fill the void, which would help to lock the handle in place and make the top part stiffer, giving me the option to clamp things around the mast as well, without fear of crushing the fiberglass: The thought is that once the epoxy cures, I would drill through the fiberglass mast, epoxy, and handle in 2 spots, and put eye bolts through. I haven't gotten that done yet because it turns out that two tubes wasn't enough to completely fill the gap, so i'll need to grab more. The thought here is that this will give me 2 spots to hook things too, and will also prevent the handle inside the mast from rotating. My mind next turned to that hole in the bottom section. More than just the ugliness of it, I worried that it would make a weak spot where the mast would potentially break. The bottom section of the mast is 2" in diameter, so pretty quickly I thought that a sleeve of 2" PVC (PVC is sized by inside diameter) would be nice to slide over it and act like a splint. Queue the universe again. While I was debating purchasing a whole section of 2" PVC just to get a few inches of it, my work took me to the basements of some old buildings, that had piles of junk laying around in them. What do you suppose just happened to be lying in one of those junk piles? That right - a short section of 2" PVC! I haven't cut it to length or permanently attached it yet, but here you can see how nicely it slides over that bottom section: So what comes next? Well, I need to attach the PVC, and finish filling in the top at a minimum. Before I do that though, I'd like to make a couple guy rings to attach guy ropes to. The bottom one I want to slide on before I attach the PVC, as it will end up floating between the top of the PVC and the bottom of the first clamp. The second one I plan on putting on the top section, so that it floats between the top clamp, and the eye hooks. I had some HDPE flying around here from other projects, which would have been a perfect material to cut these out of, but apparently I used it all up, so here's my next request universe.....I could really use a couple old beat-up plastic cutting boards...... I'll update everyone once I finish this, but so far I'm only into it for about $11. since this is an 18' mast, that makes it about 61 cents per foot. Not bad considering the commerial option I was looking at, while much taller, worked out to be $4.27 per foot....
|
Categories
All
- N3VEM - Welcome to my Ham Radio Blog! This blog was started primarily to share my two concurrent shack builds - my mobile station and my home station. Over time, this has grown to include sharing about my operations, and general radio-related thoughts that I have as a newer operator. Proving that hams do indeed still build stuff!
100 Watts and Wire is an awesome community, based around an excellent podcast.
Archives
September 2020
|


 RSS Feed


