Post Contains Affiliate Links
No, I'm not referring to monitoring the bands (not at the moment anyway!) I'm referring to monitoring up my new ham shack! Since my new shack is also my new office, and I work from home, I needed to get my monitors mounted because I use them every day, and the mess of wires on the desk was making me bonkers! With that intro - here's my recent accomplishment:
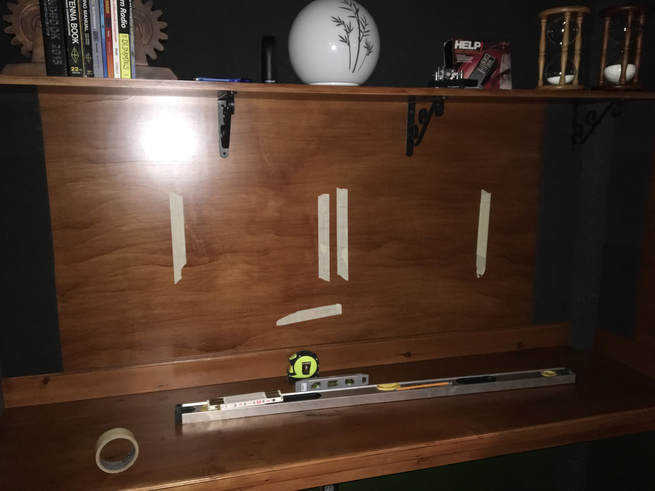
I had 3 monitors to mount, so I started by marking the center-line of the wall. After that I measured the offset to the mounting holes for the brackets I used. Then I marked the hole locations, and measured and leveled off the center bracket markings for the outer brackets. The bottom piece of tape is just where I measured that the bottom of the monitors would land, because I wanted to make sure there would be room below for the future HF rig to slide under them.
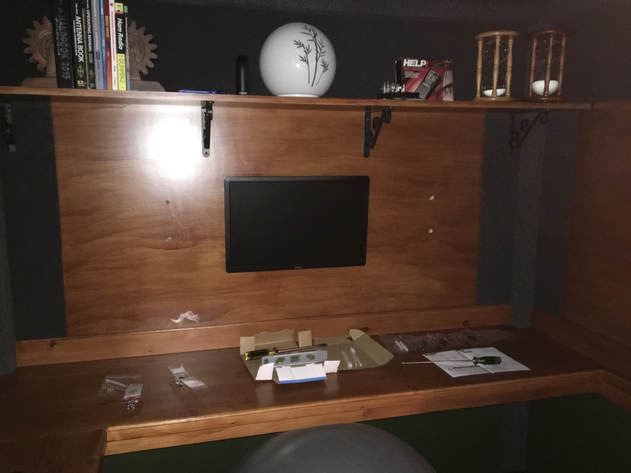
With the markings done, I drilled holes, and hung up the first monitor - looking good so far:
Below are the brackets I used, and they are a steal on Amazon! I got them for like 12 bucks each and they are just as heavy duty as anything I put my hands on at the local home centers and electronic stores. I also can't say enough for the anchors I used. They are way better than standard toggle bolts - they hold better, and because of the design their backs don't fall into the wall if you need to back the screws out. (word of caution - no matter how good the toggle, don't hang monitors just on drywall - you need to hit wood! In my case, the back of the desk area is 3/4" plywood, so no worries on holding power there.)
 |
 |
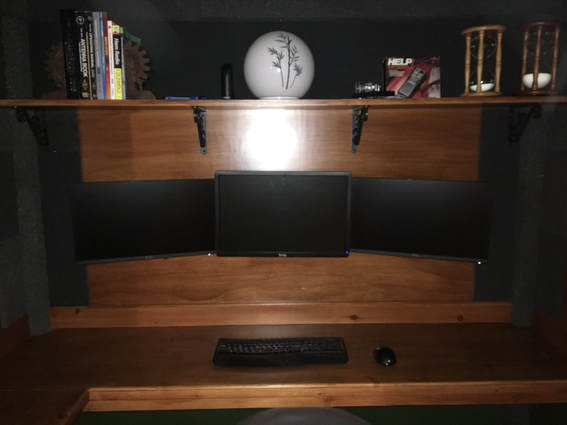
Anyway, since I was satisfied with the positioning of the first monitor, up went the next two. This looks much better than the mess with the wires everywhere:
But wait...where did those wires go? Well, once I was sure the monitors where just where I wanted them, I swung them out of the way, drilled holes, and passed all the cabling through, back into the service area behind the operating position:
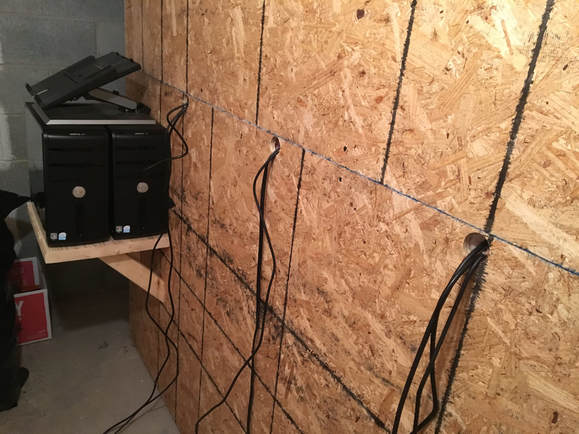
As you can see in the picture above, I made a fancy little shelf to hold my towers and laptop stand back here, so that this stuff could live out of the way, instead of under my desk at my feet, spewing hot air all over me:-) I just needed to get power to all this stuff, so I ran some conduit from the junction box where I left the ends of the circuits for this type of stuff, so that I would have easy access. Since I was doing it this way, I was also able to just pull the circuit and put plenty of outlets right at the equipment, rather than needing to rely on a dinky power-strip:

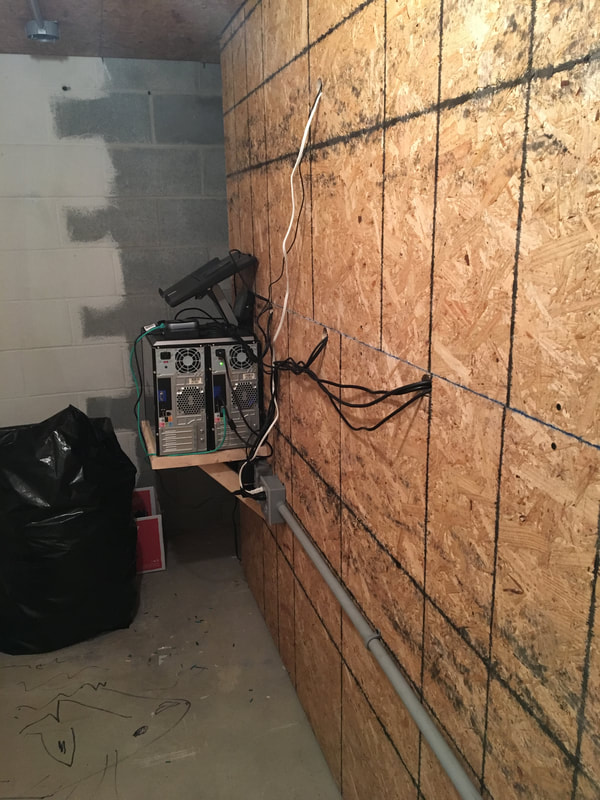
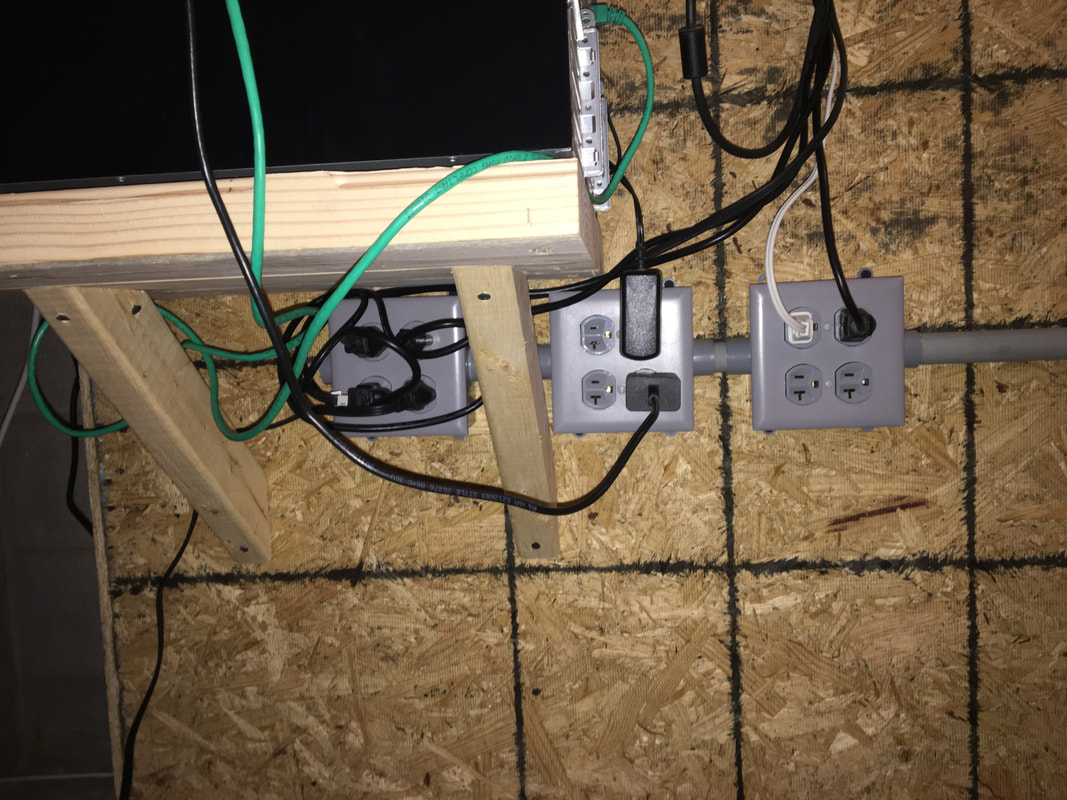
Just don't be too rough with your comments on my cord routing :-) They will be getting tacked and tidied up once the radio's are in, and I have the more final mess of wires to route and tack down.
P.S. I just got my statement from my work letting me know what my annual bonus is going to be, so I've started "the talks" with the finance manager in our house (my awesome YL!) about what may or may not be able to be diverted towards a new HF rig :-)
 RSS Feed


