NOVEMBER 3 VICTOR ECHO MIKE
  • Blog
  • Events and Activations
  • Diversions
  • About
  • Gallery
  • Contact
  • Links
  • Subscribe
  • Search
  • Blog
  • Events and Activations
  • Diversions
  • About
  • Gallery
  • Contact
  • Links
  • Subscribe
  • Search
NOVEMBER 3 VICTOR ECHO MIKE

ham radio Projects and musings from a (Relatively) new operator

another Quickie

2/28/2018

0 Comments

 
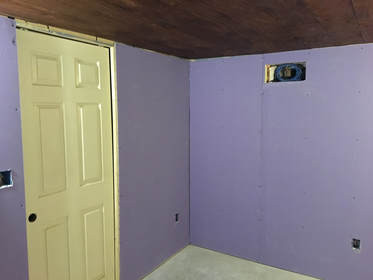
     Howdy all!  I just have another short update for everyone this week, related to the progress on my primary project - the home ham shack.  The shack and the main "rec room" part of the basement are part of the same project, so the last couple weeks have been tied up with drywall and related work in the main part of the basement, which is mostly not ham radio related (which is why I haven't bored all of you with those details...)  
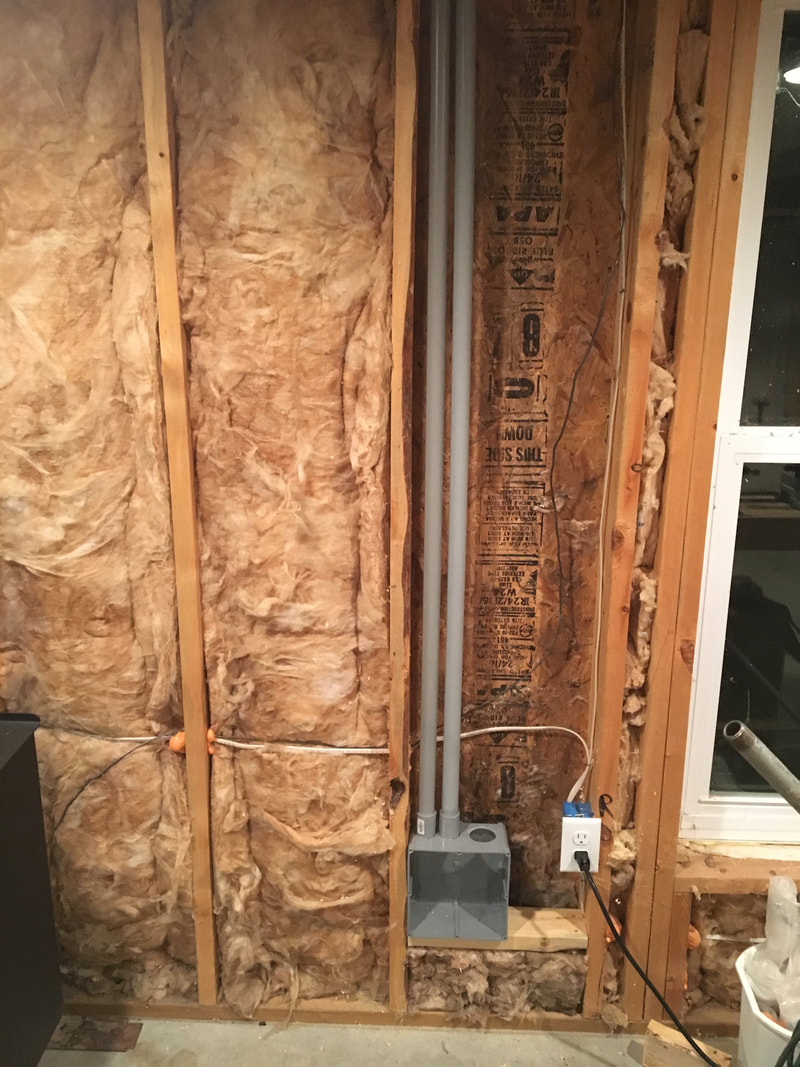
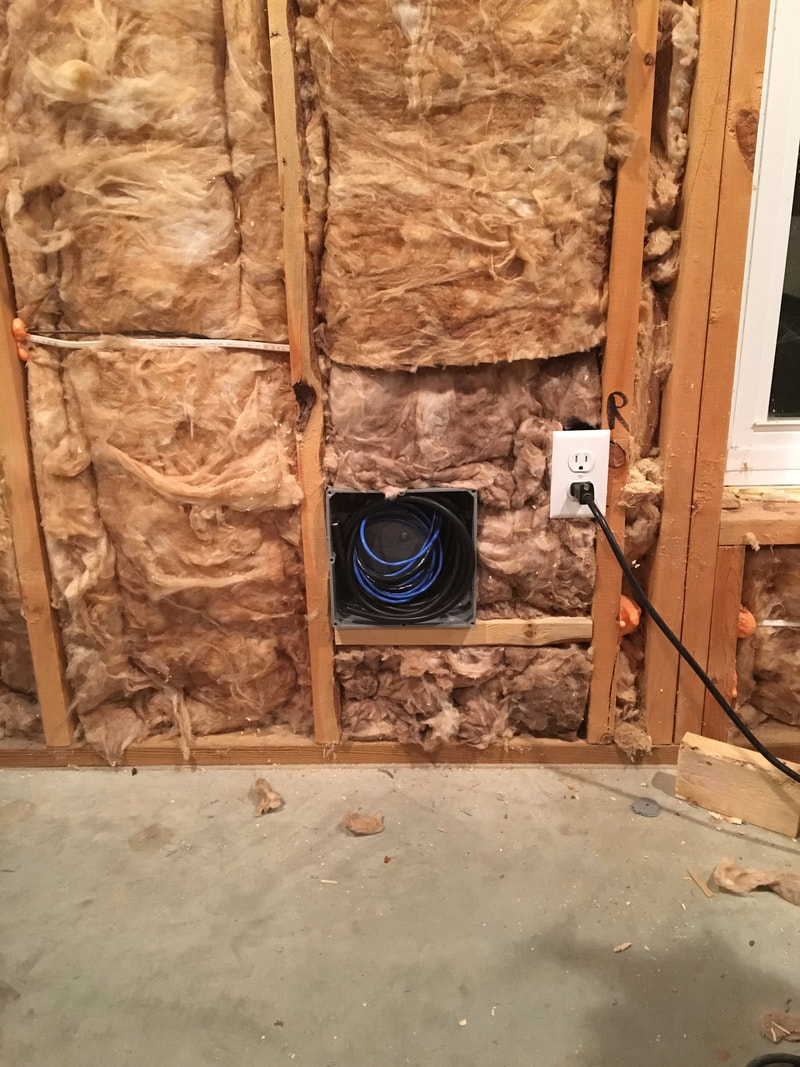
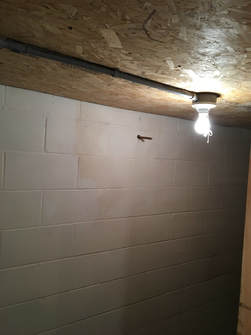
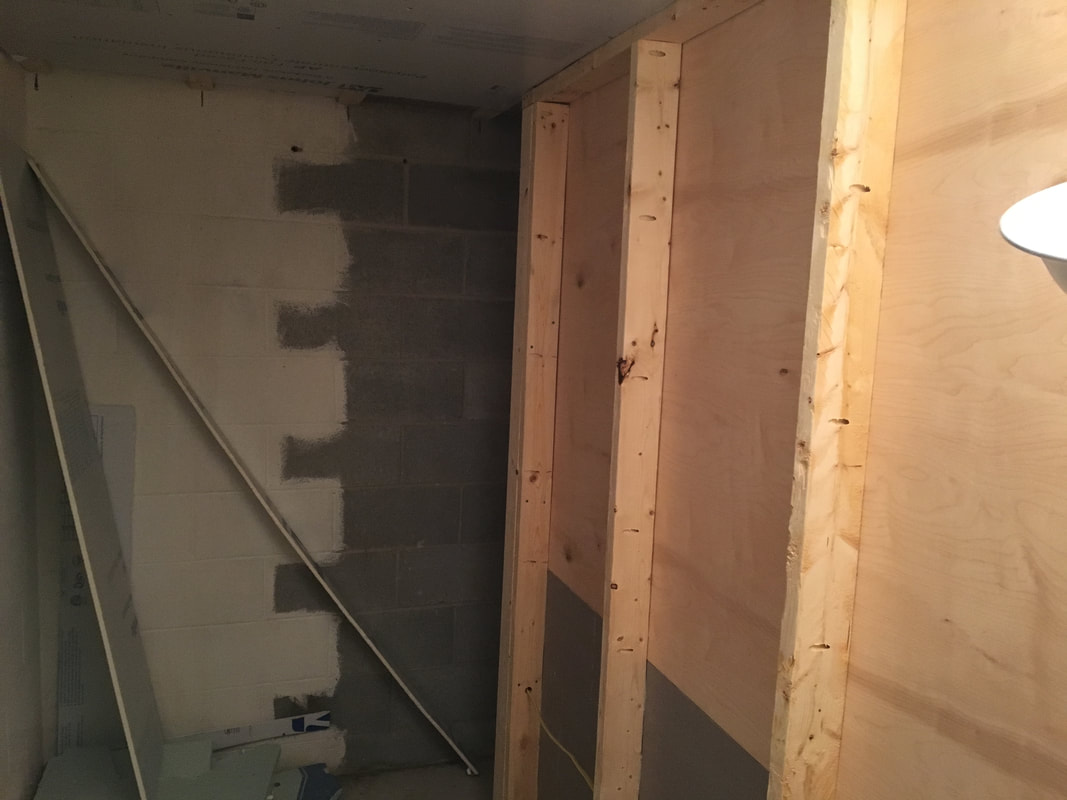
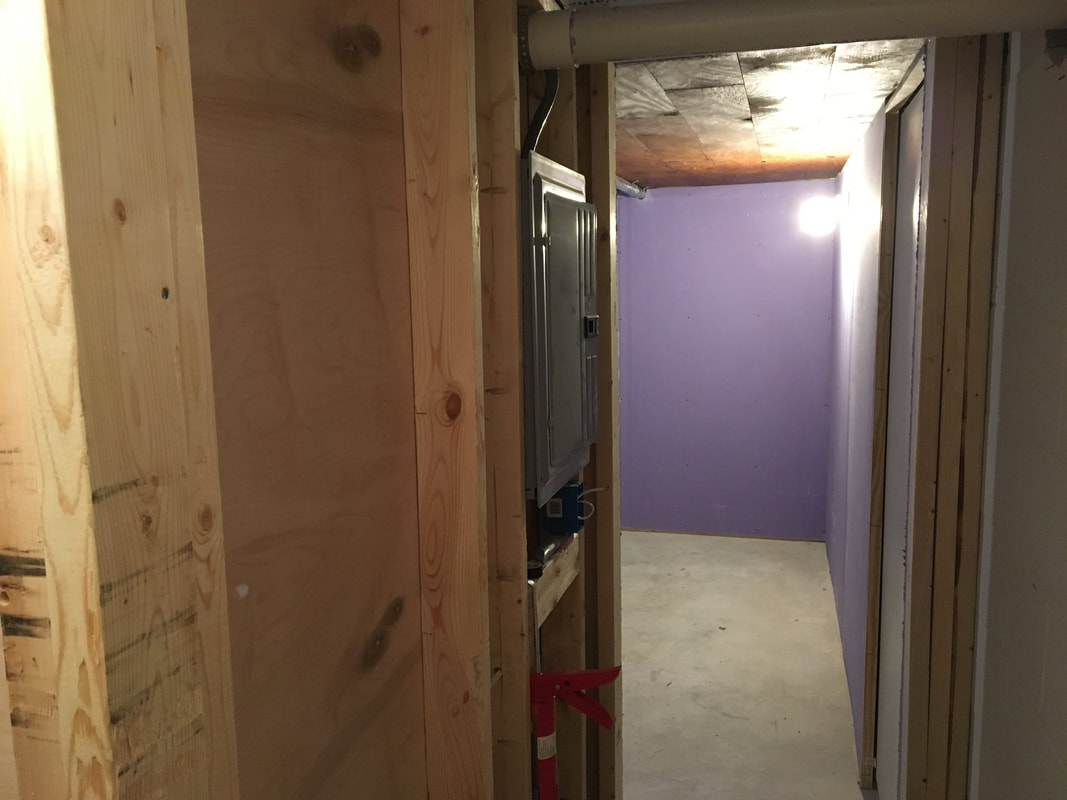
     Before I started hanging the drywall in that room, I did share some of the work I did to run coax, rotor cable, conduit, etc. across the rec room.  I discussed that way back here, but if you recall, I basically ran a bunch of wire, coax, and conduit, and left the ends in a box against the outside wall.  The idea was to make it easy to do the penetration to the exterior when the time came.  Here's a couple pics as a reminder of that:
Picture
Picture

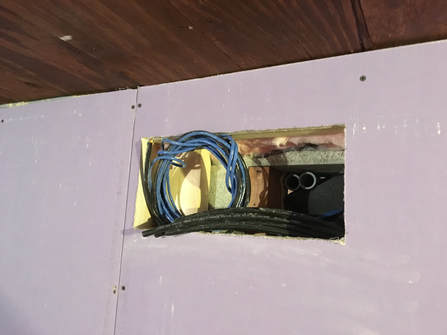
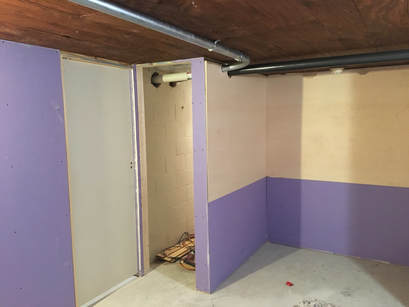
     Now, with drywall in place, the same spot looks like this:
Picture

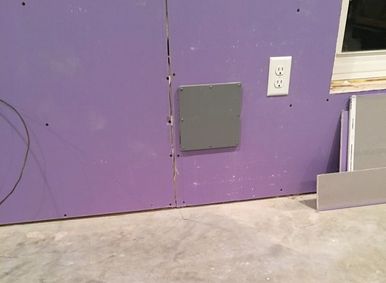
     This gives me an easy access panel in the basement, so that when I get to the tower part of the project, I'll be able to put a matching box outside the house, drill through the exterior wall into the back of this box, pull my cable and wires through, and make my connections in the outside box, where all the connections to tower, ground, etc. will be.

     Just trying to plan ahead as I keep plugging along with this project!
Previous Shack Build
Next Shack Build
Back to Part 1
0 Comments

Just a touch of progress

2/14/2018

0 Comments

 
     It was a busy week for me, but I still managed to make just a little bit of progress on the ham shack.  The larger portion of what I did was making more progress on the drywall in the area right outside of the ham shack.  I also put up some of the plywood ceiling in the service area, and added some bulb bases back there so that when I walk behind the equipment to work on things (and as I continue my current construction work!), I'll have plenty of light.
Picture
Picture

    For anyone who missed my previous updates, or anyone who is just inclined to like this type of thing, I also did a very short video tour of the space this week - enjoy!

Lastly, before I wrap up for this week, remember that the School Club Roundup is going on!  Just do me one favor - let's impress these kids and young adults with our very best operating skills - I heard a lot of people calling out of turn, individuals answering when schools called for other schools etc.  Many of these young people are getting their first introduction to ham radio, and if what they hear is adults that can't follow directions, we only have ourselves to blame if we can't get new recruits!

​Bye for now!
Previous Shack Build
Next Shack Build
Back to Part 1
0 Comments

Not that MMR

2/7/2018

2 Comments

 
     I suppose that quite a few people think of the shot for Measles-Mumps-Rubella when they hear the term MMR.  In my case though, I'm talking about the other MMR - Mold & Moisture Resistant drywall.  We've never had any moisture issues in our basement since it's a walk-out with big windows and plenty of airflow, but just to be on the safe side, I decided to use MMR drywall for the walls of the ham shack.
     With the goal of getting started on the hanging, I borrowed a truck this past Saturday morning, went to the home center down the road, and picked up a load of purple drywall.  I rather like the color - maybe I should just leave it this way :-)
Picture

     Anyway - now that there are some actual walls in place, it's a little easier to see and explain how all this is coming together.  The shack is in the "middle" of the basement, so the corner of the room in the picture above has the pocket door that leads to the current family room. The operating position is actually behind me as I stood to take this photo.  You can also see in the above photo, the access to the end of the conduit I ran across the rec room.  The hole will get a metal panel over it, with bulkhead connectors for coax.  I'm planning on mounting the panel with threaded inserts so that it can be easily removed to access the conduit behind it.  Here's a closer shot:
Picture

     The cables you see are the other things I ran while the ceilings were still open -  4 sections of LMR-400, 2 cat6 cables, and a rotor control cable.  
     The operating position is also starting to take some shape, now that walls are in place:
Picture

     The desktop will land right at the division between the plywood and the drywall, so from the desk up, will be a nice, stained-wood surface that will have the equipment recessed in it, and the drywall will only be under the desk.  
     If you look closely, in the lower right hand side of the picture you can see an opening in the wall - this opening will serve 2 purposes:
  • It gives me access to the bottom of the conduit that runs clean up to the attic of the house, to be used for coax, cables etc.
  • It is perfectly sized for the mini-fridge that is currently in the storage room, so most of the time the "hole" will just look like a built in fridge - an important feature in the ham shack!
     If you're wondering about outlets in this space, don't worry!  Some of them will be built into the desktop and back-splash as I finish things out, but most of them will actually be in the "service area" because all you'll see from here is the faces of the equipment - all the wires and such will be accessed by walking behind the wall, through the door to left, that you can just see in the above picture.  It's right next to the door that leads out of the other side of the shack (which will give me quick access to the bathroom that will be across the hall - another important shack feature!)
Picture

     I gave myself about 4 feet of space to the back wall of the room (where most of the equipment will stick through), and about 2.5 feet feet along the side, so it should be a very comfortable way to access the back of the equipment!  I also installed a sub-panel for the ham-shack, so future power needs are well covered!
Picture
Picture

     Anyway, that's where the shack stands for now! This coming weekend will be spent doing more drywall, but that will be out in the hallway and rec-room, so I won't bore you with those details :-)

Thanks for stopping by!
Previous Shack Build
Next Shack Build
Back to Part 1
2 Comments

    Categories

    All
    Antenna
    Cw
    Digital-modes
    Flying-with-gear
    Home QTH
    Miscellaneous
    Mobile
    Operating Events
    Portable
    POTA
    Shack Build
    Technical


    - N3VEM -

         Welcome to my Ham Radio Blog!  This blog was started primarily to share my two concurrent shack builds - my mobile station and my home station.  Over time, this has grown to include sharing about my operations, and general radio-related thoughts that I have as a newer operator.  
         
    ​Enjoy!

    RSS Feed


    Picture
    POTA!

    Picture
    Proving that hams do indeed still build stuff!

    Picture
    100 Watts and Wire is an awesome community, based around an excellent podcast. 

    Archives

    September 2020
    July 2020
    January 2020
    September 2019
    August 2019
    July 2019
    June 2019
    May 2019
    March 2019
    January 2019
    December 2018
    November 2018
    October 2018
    September 2018
    August 2018
    July 2018
    June 2018
    May 2018
    April 2018
    March 2018
    February 2018
    January 2018
    December 2017
    November 2017
    October 2017
    September 2017
    August 2017
    July 2017
    June 2017
    May 2017
    April 2017
    March 2017
    February 2017
    January 2017
    December 2016
    November 2016
    October 2016
    September 2016
    August 2016
    July 2016
    June 2016
    May 2016
    April 2016
    March 2016
    February 2016
    January 2016
    December 2015
    November 2015


Picture
Copyright © 2015
 Vance Martin is a participant in the Amazon Services LLC Associates Program, an affiliate advertising program designed to provide a means for sites to earn advertising fees by advertising and linking to amazon.com.