NOVEMBER 3 VICTOR ECHO MIKE
  • Blog
  • Events and Activations
  • Diversions
  • About
  • Gallery
  • Contact
  • Links
  • Subscribe
  • Search
  • Blog
  • Events and Activations
  • Diversions
  • About
  • Gallery
  • Contact
  • Links
  • Subscribe
  • Search
NOVEMBER 3 VICTOR ECHO MIKE

ham radio Projects and musings from a (Relatively) new operator

AnnaLink

2/26/2017

3 Comments

 
Post Contains Affiliate Links
      Welcome to my promised follow up about the sound card interface that I've been playing around with!  If you didn't read about my initial attempts at making a basic interface to connect my iPhone and  Tablet to my rig, check out Part 1 here!
Picture
     In case you're curious, this post is called AnnaLink because that is now the official name of this little project.  My daughter "helped" me put this together - which really consisted of me explaining a schematic, and her just nodding, and asking when she could poke parts into the breadboard....apparently that was the fun part :-)  Anyway, as she was having fun poking resistors and things into the little holes, she asked me "Daddy, what are we going to call it?"  I told her it should have "link" in the name because of what it does, and AnnaLink is what she decided, so AnnaLink it is....  If you read part 1 of this little project, you know that I actaully already had this mostly put together.  If you happen to follow me on Instagram or Twitter: 

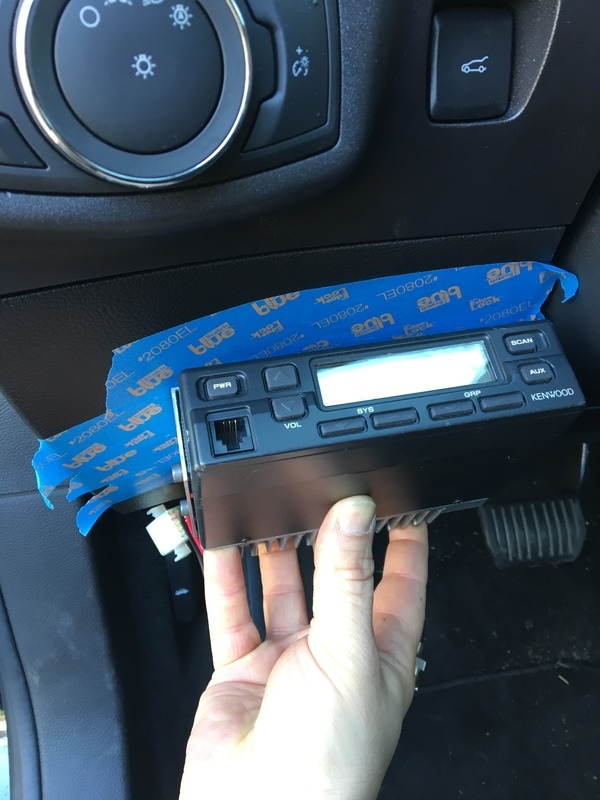
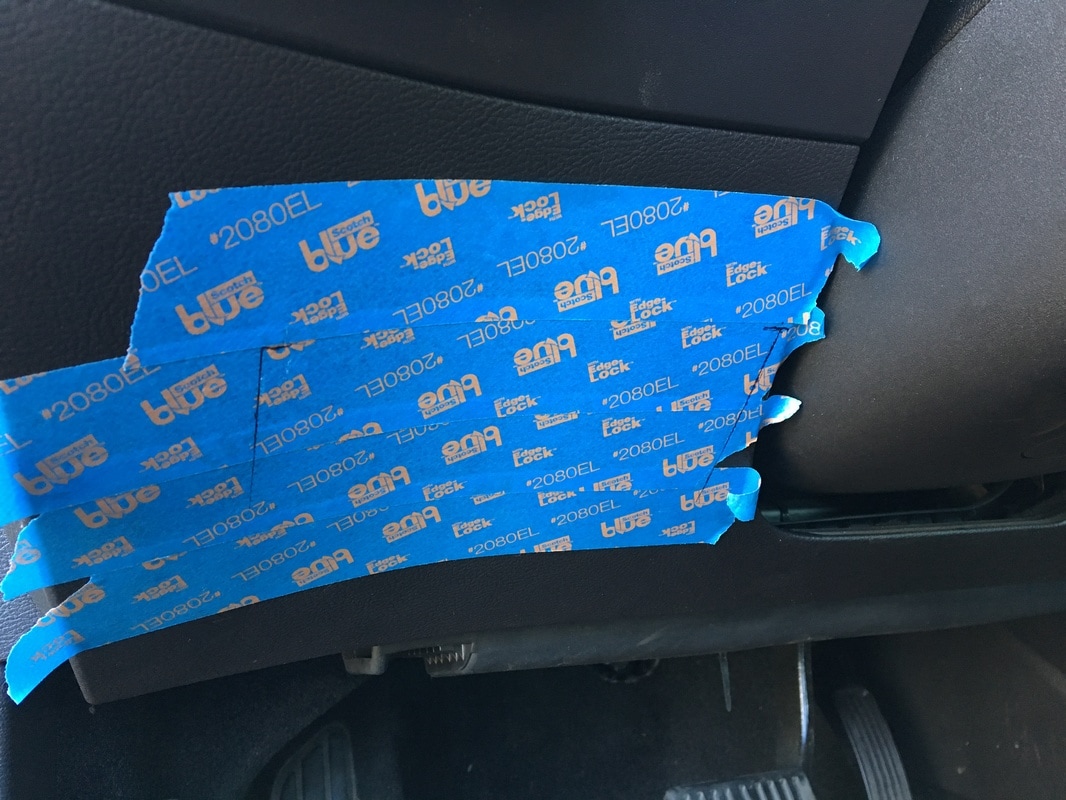
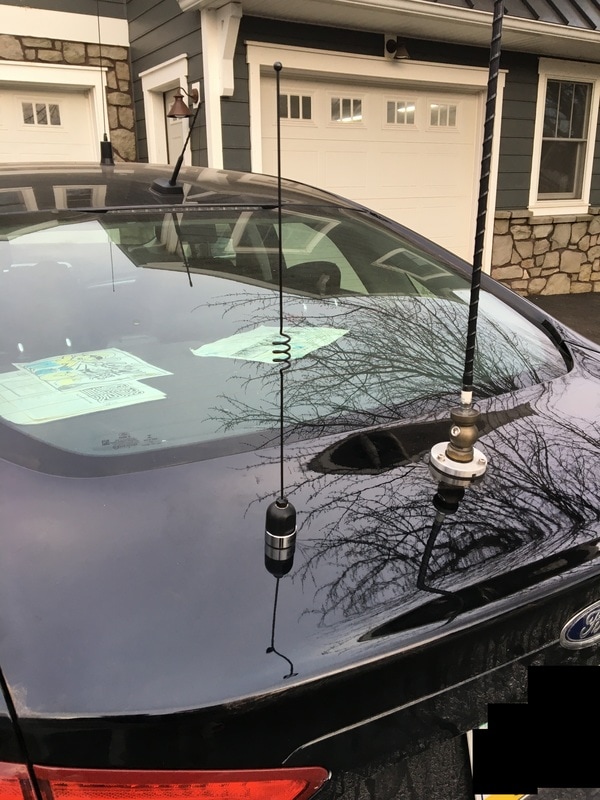
you also got a sneak peek at my test drive where I put the whole thing on the dashboard of my car, and drove down the road to fire off a few APRS packets using my iPhone and HT.  (Psst....I sometimes throw random pictures of stuff up on Twitter and Instagram before I write my posts, but don't tell - it's a secret...)
     So what was I working on?  Well, between my last post on this project and my test drive, I learned a couple things about the circuit I put together.  I had also promised a couple sketches of the circuit in case anyone wanted to play along.  With that in mind, I started this evening by sketching out the circuit, tearing the circuit apart, and then putting it all back together following the sketch.  I did all that so that I could double check my own work.  Here's how it went:
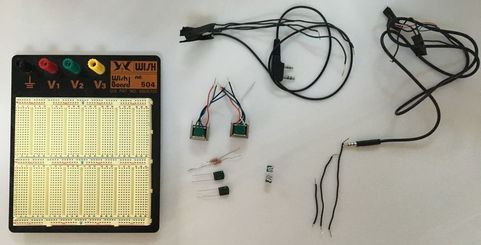
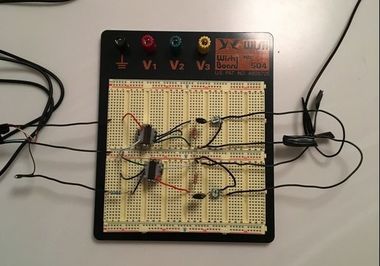
     The first thing I did, was to pull everything back off the bread-board and lay it out.  When you look at it this way, it's obvious that this is a very basic circuit, because there aren't really that many parts:
Picture
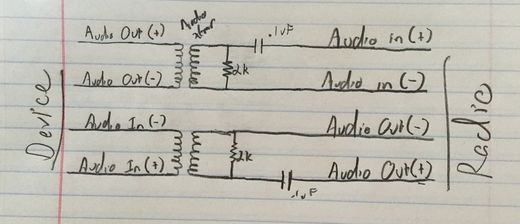
     And since we're starting from the beginning, I'll start by showing you the schematic that I first found online.  There are piles of this exact same diagram that pop up when you do a Google search for "Soundcard Interface", but they all follow this basic layout (P.S. I am not an Electronics Professional - just a hobbyist, so if my diagram doesn't show something "correct" and you are offended, feel free to comment and let me know, that's how we all learn!  If you're nasty about it though, I'll just ignore you...)
Picture
     If you'll recall from my prior post, I mentioned that I tested, and verified, that the audio from my iPhone traversed this circuit just fine.  The catch however, that I found prior to my test-drive, was that it didn't seem to be working the other way around - audio wouldn't get back into my iPhone through the mic connector.  After a lot of grumbling, poking at stuff with my multi-meter, and lots of Googling, I found out what I was missing, in the corner of some internet forum (can't remember which one - sorry!)  What I found was something that was new to me, and might be new to anyone that hasn't had much experience with modern smart-phones and tablets:
     Older devices and larger devices use a mic jack that has extra contacts in it, that act as a mechanical switch to sense when something is plugged in.  Newer devices, and devices that have a small footprint no longer do this mechanically - they do it electrically.  The mic connector actually provides a bias voltage that needs to pass through a resistor in the device being plugged in, before it will recognize that something is plugged into the mic port.  On the iPhone, if you have a direct short between the mic (sleeve on the TRRS connector) and ground (one of the Rings on the TRRS connector) it ignores the mic, because this is exactly what happens when you plug in normal headphones (that don't have a mic.)  By design, this is good for most users, because it lets them listen to the iPhone on traditional headphones, but use the microphone on the phone to talk, if needed.  
     For the circuit I made, this meant that my iPhone was ignoring the mic, and trying to use the built in speaker-mic because there is a direct DC path between Mic and Ground!
Picture
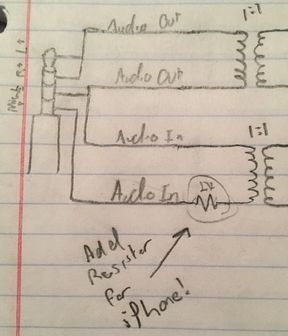
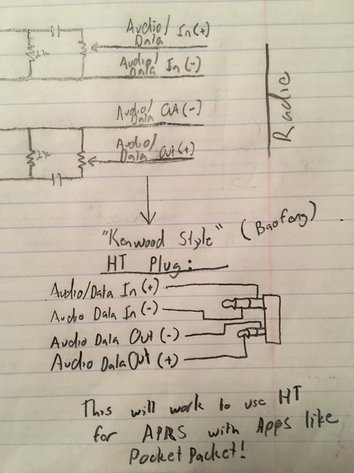
     Luckily, once I was finally enlightened to how the mic sensing worked, the fix was pretty simple - stick a 2k resistor in the path for the microphone!  As a note, in my drawing below, at this point I also sketched in the two potentiometers that I added so that levels passing through the device could be adjusted.  Putting them in the circuit this way just makes a voltage divider.  If you're very new to electronics the website All About Circuits has a lot of useful information, projects, and even a free textbook series, if you're not sure what I mean by voltage divider.
Picture
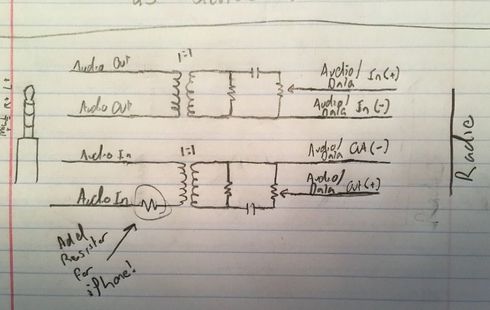
     Of course after I went through all this, I happened to stumble on an interface for sale on ebay, advertised to work with the iPhone.  Looking at the circuit on that device (a schematic was included with the pictures!) I could see that the needed resistor was included in their design.  Why couldn't that have been the schematic I found first?!  Oh well - this way I know why the resistor is there, and can share that info, rather than just saying that it's there because the picture told me to put it there :-)
     To connect this to my phone I grabbed a headset extension cable, and just cut off the end I needed, along with a a foot or so of cable.  If you happen to have an old headset lying around that doesn't work, repurpose that cord!  The connections to the plug can be sounded-out with your meter, but on mine the wires went like this:
  • Left Audio Out - White
  • Right Audio Out - Red
  • Ground - Green
  • Mic - Black
Here's a picture though of which pin should be which, in case you have different colors:
Picture
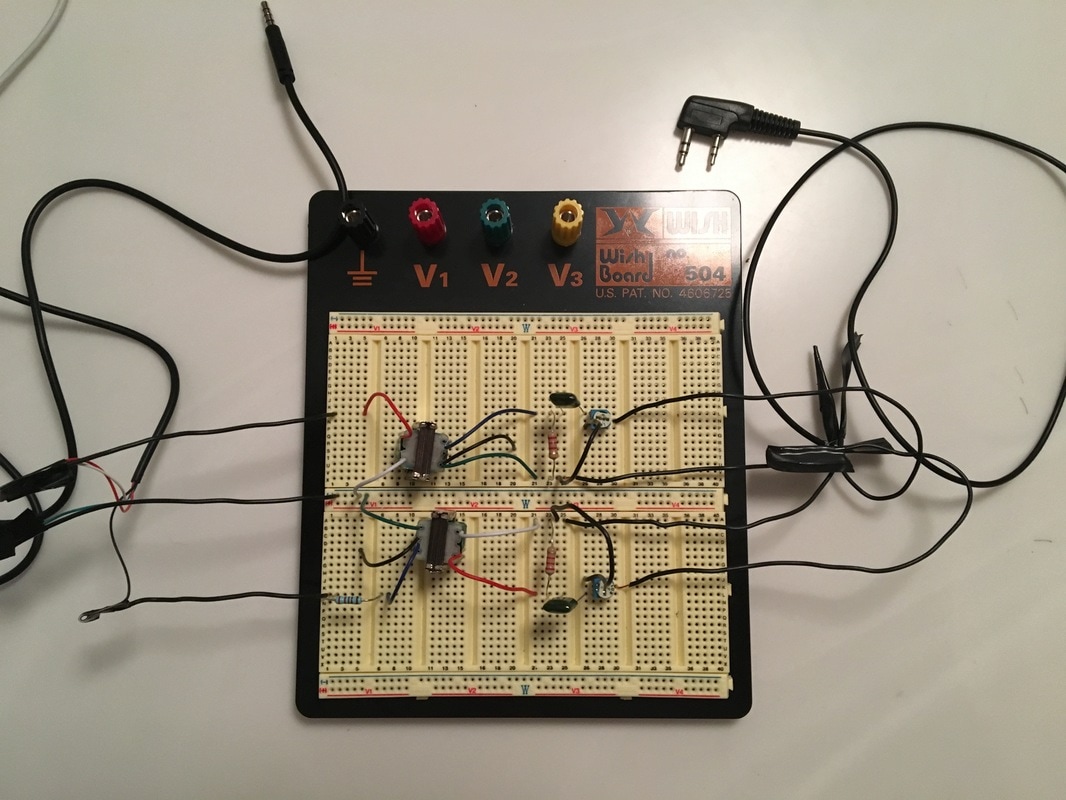
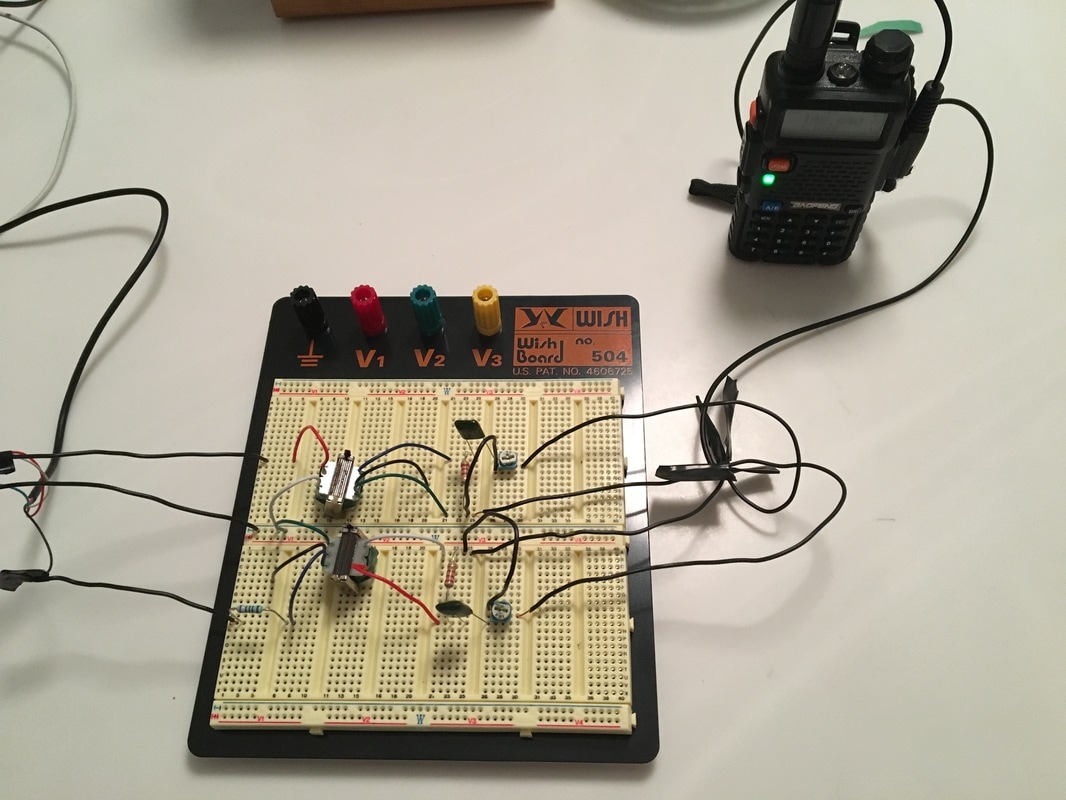
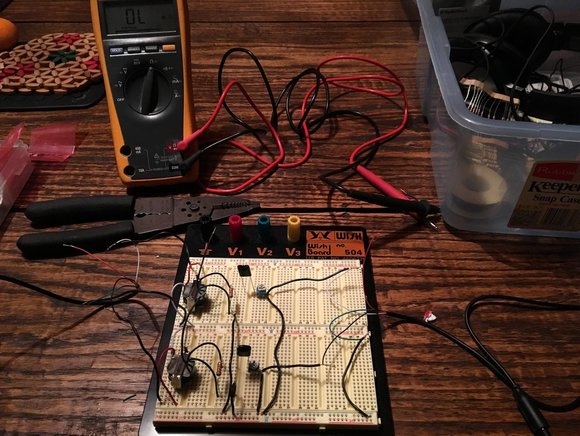
     So, enough of my bad scribbles, here's a picture of the real deal, on a breadboard, after my daughter did the fun part of poking the parts into the right holes:
Picture
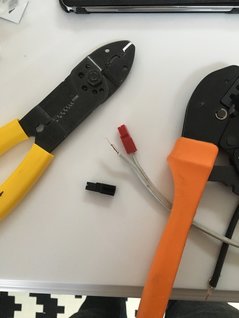
     I had an earpiece from a Baofeng radio that was junked but the plug and cable were still good, so I scavenged that to make up a connector.  Here's another tip - this is something I never knew because I never worked with wire this small before..when you strip the outer jacket, the individual conductors in these ear pieces are TINY.  They way they are made is that each individual "hair" in each bundle is coated in enamel, so you can't really strip the wires.  Essentially, you treat them like you would a bare wire - tin the ends, and then solder them - the heat in that process melts away the enamel and then the wires can make contact.  This might be old news to folks who have worked with small wire and magnet wire, but it was new to me!
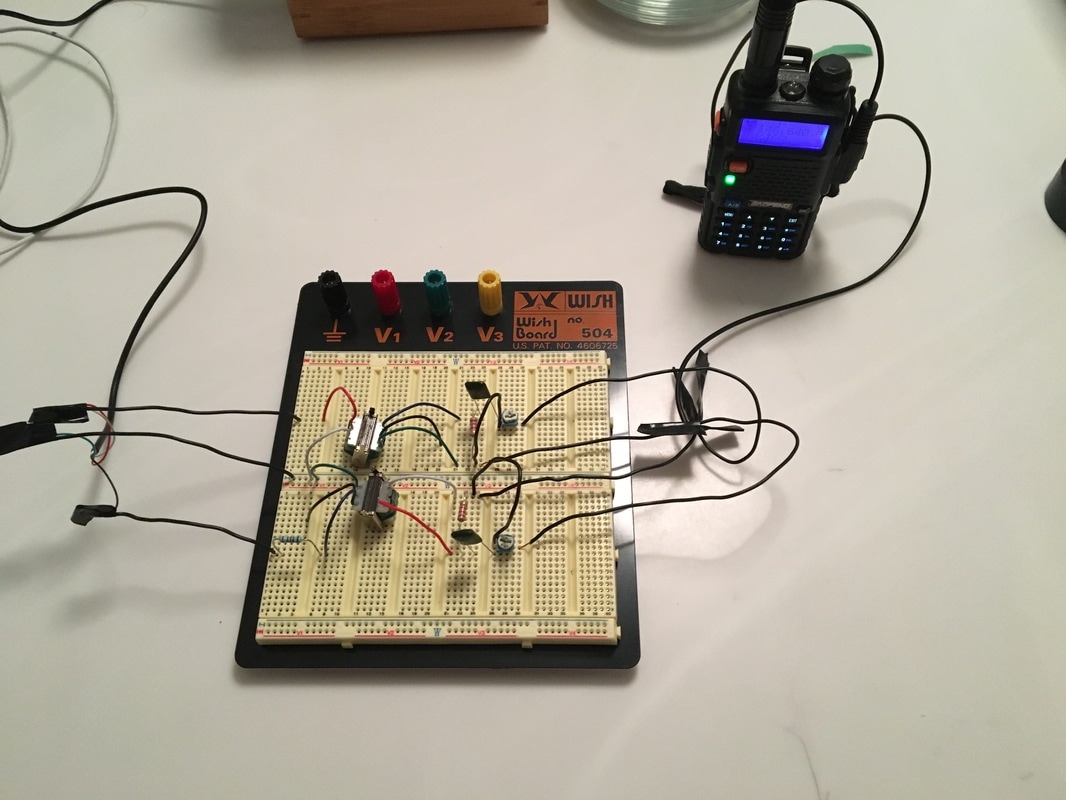
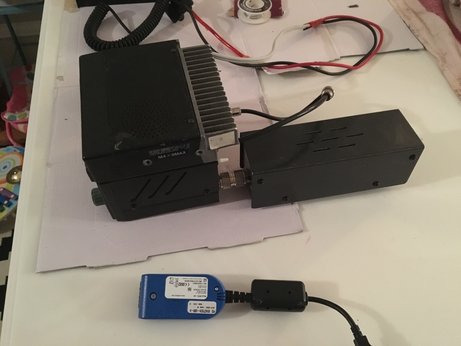
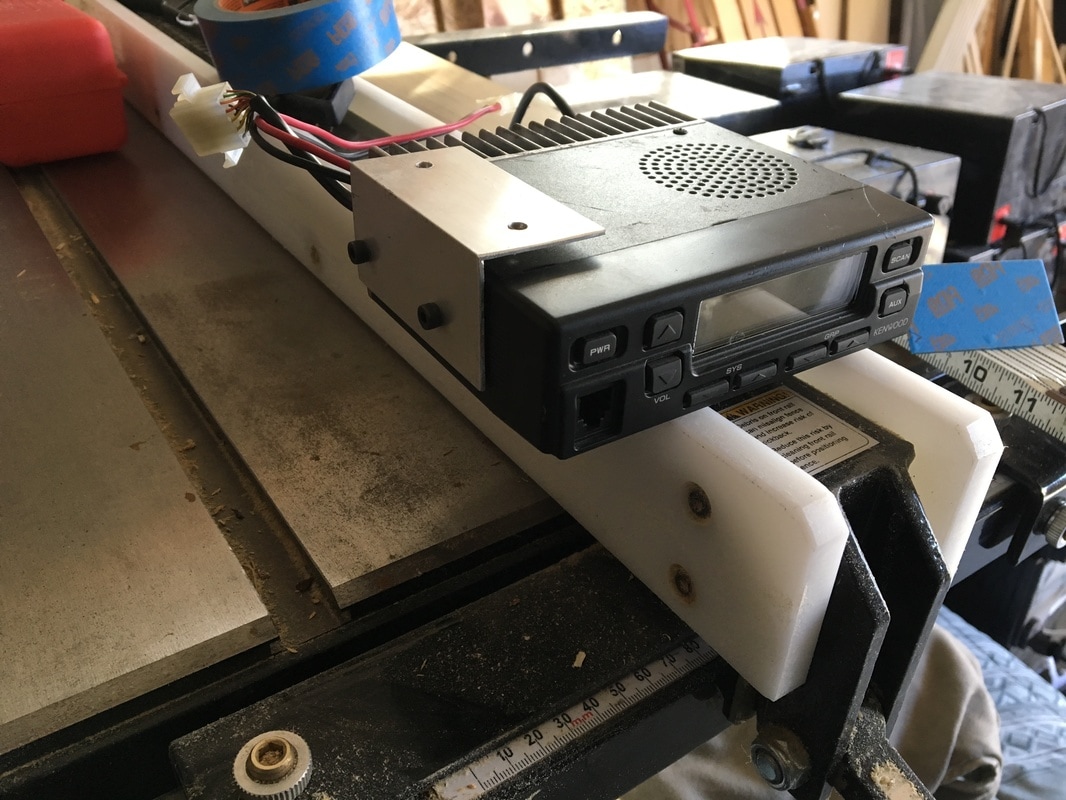
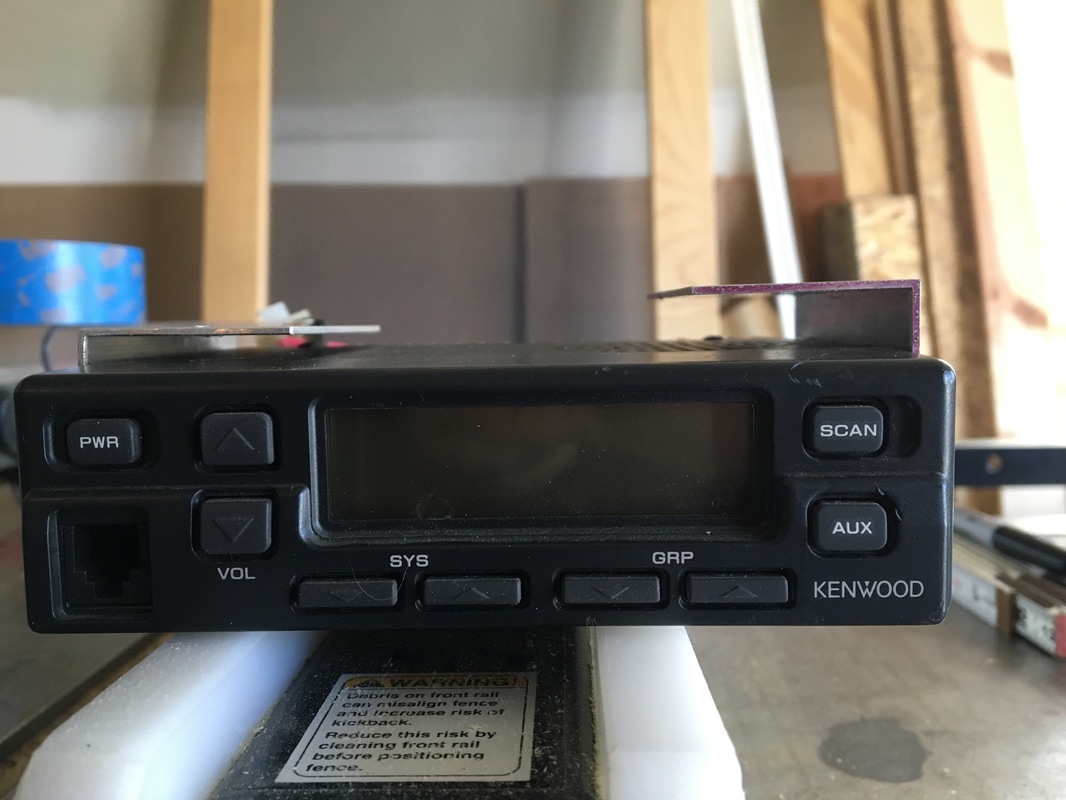
     Doing the above allowed me to verify that this would work for anything with the Kenwood "style" of plugs.  I verified the receive audio portion by tuning to a local repeater and recording the conversation that I heard using the "Voice Memo" app on my phone. I then verified that the transmit audio portion was working by taking the drive I mentioned at the beginning of this post - I used APRS.fi to make sure my packets got out - worked great!
     If you want to mimic the same thing, the connections on this style of plug are pretty straight-forward as well, and are also spelled out in many places online....here's my low-tech version of that diagram:
Picture
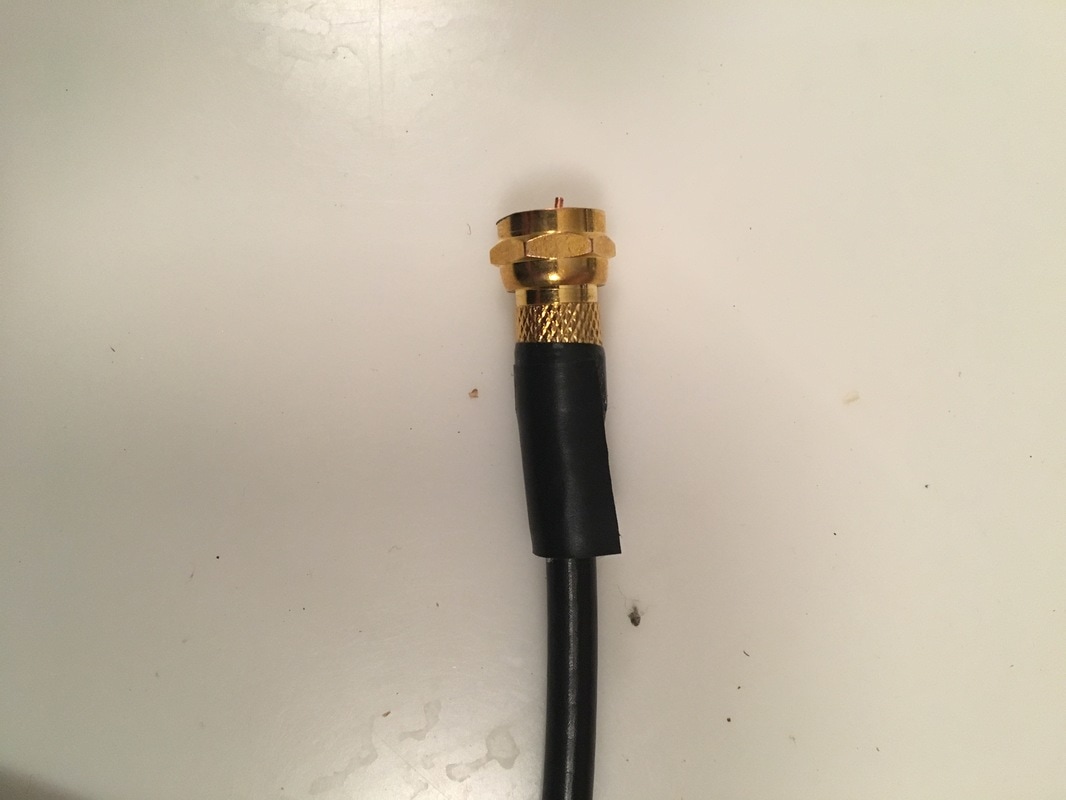
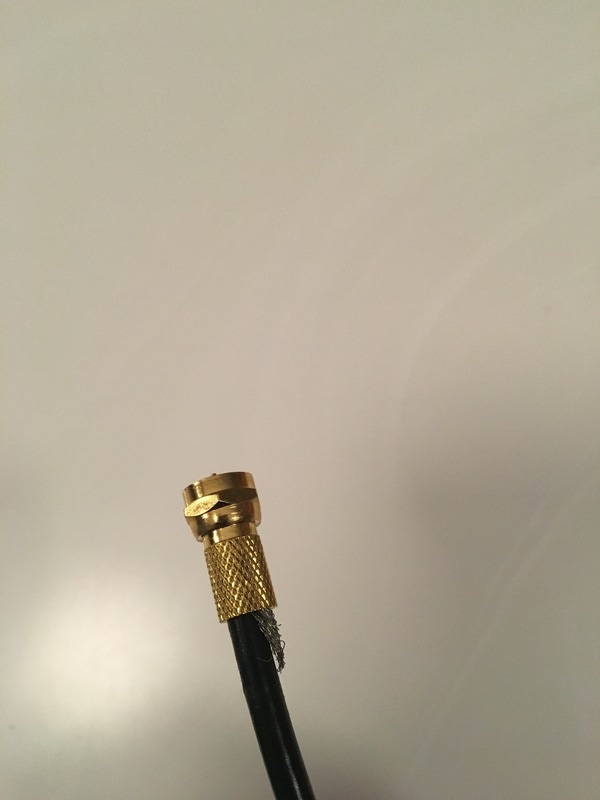
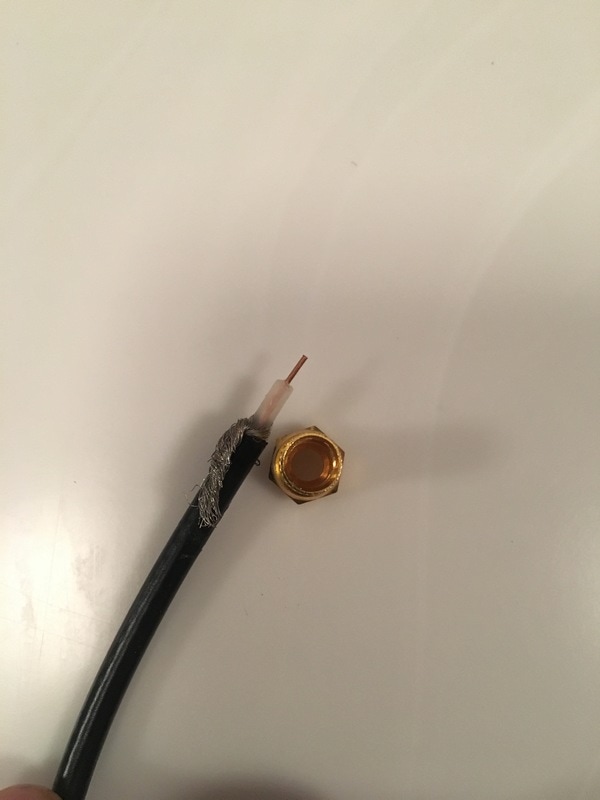
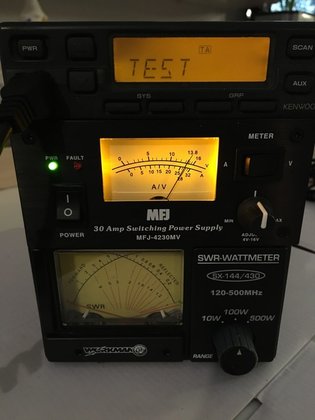
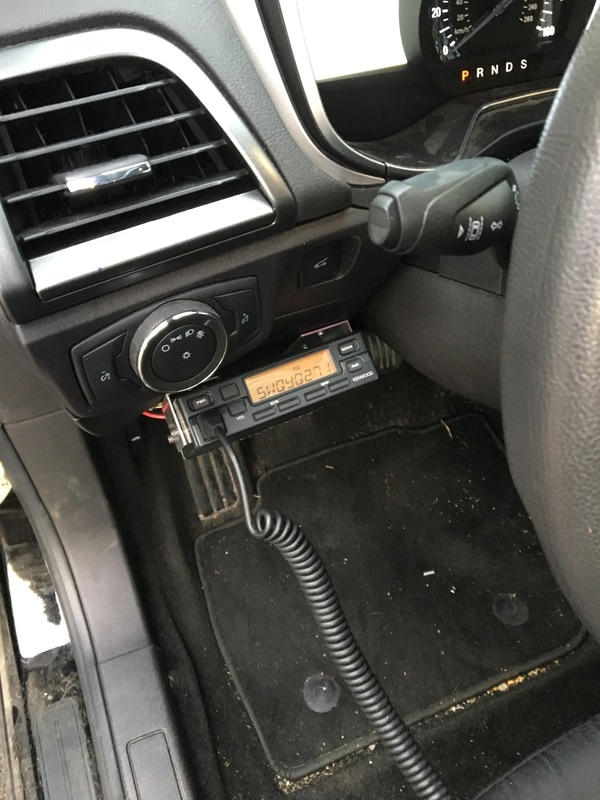
     Here's a couple of shots of the plug wired up, and the receive portion in action.  I couldn't get a shot of the transmit because APRS packets burst out so fast that the transmission ended by the time I could get my phone to take the picture - after a couple attempts to catch that in a photo I gave up :-)
     Whats next for this little mini-project?
  • Order a connector so I can wire something up to connect to my Yeasu 857d
    • I grabbed an old keyboard at a thrift shop for this because it had the right connector (PS/2 = Mini Din-6), and was cheaper then buying and shipping the actual connector, but it turned out the connector on the keyboard wasn't actaully using all the pins, and a couple of the missings pins were ones specifically needed to connect to the data jack on the 857d.
  • Test it out using my 857d and make some PSK and SSTV contacts
  • Build the circuit in a more permanent way
  • Call it done!
     Are you interested in playing along?  Below is the stuff you will need, with clickable Amazon links.  If you look around you can probably find these same items cheaper by getting exactly the quantity you need, but with these types of things it never hurts to have spares for your project stash. Many of these things are small, so for a small amount of money you can have everything you need to replicate what I did, AND have a bunch of stuff left over for your project box!
Breadboard and Jumpers together in one package!  This type of arrangement is the basis for a lot of my experimentation with small circuits.
Audio Transformers.  In ham radio these are great to have around because they can be used in quite a few sound applications where you need to isolate devices from each other!
2k Resistors.  You might already have a stash of these, but if not, start your stash now!
.1 uF Capacitors.  These are another item that might already be in your junk box, but if they aren't, you can get them here so that you can piece together your very own interface!
Potentiometers.  Some people refer to these as variable resistors.  They are pretty much the standard way to make an adjustable voltage divider so that you can control output / input levels of circuits like this one.
Baofeng Headset.  If you want to connect this to an HT that uses the Kenwood style plug, this is a pretty cheap way to buy the plug, with wire attached.  Just cut off the earpiece and use what's left!
TRRS Extension Cable.  For how cheaply you can get these cables pre-made, if you don't have anything to make up a cable, it's just as easy to get one of these and cut off the end you don't need.
     I'll be sure to post another update when I get my cable made up and test this with my Yeasu 857d.  If you happen to frequent the PSK or SSTV frequencies, you might even catch me on the air when I'm testing it out!

​Bye for now!
Next - Part 3
Back to Part 1
3 Comments

Can I buy You a License?

2/24/2017

0 Comments

 
Post contains affiliate links
     Believe it or not - it can be that simple.....What radio license can you just run out buy?  GMRS.  
     GMRS (FCC Part 95 Subpart A) is a radio service intended primarily for family communications (although there are some older businesses grandfathered in.)  In case you don't know about GMRS, it is basically a service where you are required to be licensed, but the only stipulations for getting the license are having about $60 available to mail to the FCC, being a person (not a business, government, or representative of one), and being 18.  Once you've done that, you, and anyone you're related too, can use your license.  
     GMRS is very similar to the little blister-pack radios you can buy at the chain stores.  Those radio's are normally part of the Family Radio Service, or FRS.  There are some shared frequencies between FRS and GMRS but power levels and allowable antenna types vary.  The biggest difference is, that you can use more power, larger antenna's, setup and use repeaters, etc. with GMRS.  There are a limited number of frequencies (specific channels) that you can use, but that shouldn't be a hurdle.  There are even commercial UHF mobile and HT radios out there that are type accepted for the GMRS service, so if you can get your hands on them, you can actaully put together a decent little station.
     So why am I writing about GMRS?  Because of my daughter!  She has been expressing a lot of interest in my ham radio activities, so I decided that setting up a couple GMRS radio's would be a good way for her to be able to "practice" for the big show!  The idea was to put 1 radio in the house, and 1 in my car, so that when I'm around town, we can chat, without the need for me to be standing over her shoulder.  With that thought in mind, this saga began around christmas time - and what a saga it turned out to be...

Who can use the GMRS license?  Pretty much anyone who would show up at your family reunion.....
(1) Licensee;
(2) Licensee's spouse;
(3) Licensee's children, grandchildren, stepchildren;
(4) Licensee's parents, grandparents, stepparents;
(5) Licensee's brothers, sisters;
(6) Licensee's aunts, uncles, nieces, nephews; and
(7) Licensee's in-laws.

     We ordered some Kenwood TK-840 commercial radio's online just before christmas.  Based on the searching I did, these radio's were type accepted for GMRS. Getting things off ebay, you never know what to expect - and this proved to be no different.  The radio's came, and the first thing I noticed was that there were F connectors, instead of anything normally used for radio, on the coax pigtails.  To make things even more interesting, they weren't even really attached.  It was almost like someone had gone to RadioShack, bought some connectors, and just kind of jammed them onto the end of the coax.  Whoever did it wasn't even good at applying electrical tape...
     Luckily, the coax itself seemed to be properly connected, so I figured we would just make putting connectors on part of the project as my daughter and I got these radio's ready to go (her first lesson in solder was about iron safety!)  Next came the power leads.  Again, it wasn't technically the proper cord, but I found out what it was that had been used, and looked up the current handling capacity, and it was rated for enough current to handle what these little radio's would do, so we added some powerpole connectors.
Picture
     With the powerpole connectors on (this goes WAAAAY easier with the proper crimper!!!), and proper RF connectors in place, I hooked the radio's up to a dummy load, through a meter, just to make sure they worked.  Everything seemed to be in order - so far so good!
Picture
     The next step was to get my hands on the programming software for these rigs.  That software, which was made by Kenwood, is called KPG25D.  It isn't officially available any longer, but through the magic of the internet most people can get ahold of it fairly simply.  Writing out all the details of how to use the software would take up a lot of space, so I'll just leave it at this - you'll need this stuff, which you can find online if you search around a bit:
  • The programming manual (or you can just sort of figure it out as you go)
  • The KPG25D programming software
  • This is DOS software, so another catch is that you either need to get your hands on an old computer, or use a DOS emulator - I used DosBox 
  • A USB to serial converter cable (if your computer doesn't have a serial port)
  • The Kenwood Programming cable that matches the radio

     All this does take some finagling, but Google helped me, so you can either search around like I did, or contact me and i'll help answer any questions you might have!
     Armed with all the stuff above, we programmed the GMRS frequencies into the radio's, and fired them up for a test:
Picture
     For the astute folks out there, you'll notice that the power meter isn't budging - for some reason these radio's, which worked fine before I reprogrammed them, now won't transmit!  I poured through lots of notes, and eventually realized that I had gotten version "2" of these radio's which only work on the commercial portions of UHF, and are now basically worthless because they are wideband, so they can't be used in commercial service any longer, and they won't transmit anywhere in the amature or GMRS bands.  Grrrrr.....no wonder they were so cheap.  (Anybody want to buy 3 worthless radios?  If not I'll hold on to them - maybe I can use them as exciters when I start building microwave transverters....)
So, with that lesson learned the hard way, we went back to ebay and paid just a bit more. This got us 2 additional radios that were the proper version. While we waited for them to arrive we (my daughter and I) spent a couple hours one evening passing the time by building her very first antenna, tuned specifically for the GMRS frequencies:
Picture
     As soon as the new radio's arrived, we opened them up, and thanked our lucky stars that these were in much better shape (a Ham must have had them!) - all we had to do was add powerpoles to the power leads, and we were ready to start programming radio's.  After we had them programmed, we connected the antenna to my daughter's radio, and a dummy load to mine (P.S, a dummy load will work as an antenna over short distances....sometimes even long distances as many will attest to!)  We then had a short test conversation from one end of the kitchen to the other - awesome!  Working Radio's!
     Next, we had to decide where to install my little helpers radio.  Putting radio's around the house can be an interesting exercise, because the install location needs to meet the criteria of everyone who might be involved - in this case, the criteria was:
  • Somewhere near power so I don't have to run a long cord
  • Somewhere easily accessible to my daughter
  • Somewhere that she will be within earshot of adult when she's using it
  • Somewhere that it isn't seen during day-to-day living
  • Somewhere that we can put her small antenna now, but eventually run a line to a rooftop antenna
     The spot that met all these requirements was the cabinet that I just recently built into the entryway from our garage - it has power in it, because we wanted to be able to charge phones and such, it has shelves and hooks for our little ones' things, it's pretty central in the house (so when little operator is using it she'll be heard), AND it is normally behind closed doors, so no one has to see it that doesn't want too.

     With the little one's radio installed, it was time to make some new holes in my car!  I started by making up some brackets to mount the radio.  Because the surface where I was going to put this wasn't level, I needed one side to stand out further than the other, so custom making a bracket from aluminum angle was the word of the day.  While making those brackets, and marking the mounting locations for everything, I did my normal marking method - I covered the area with blue painters tape, and made all my measurements and marks on it.  After drilling away, I peeled the tape back off.  I use this same tape method when I drill a hole for antenna's as well.  this does 2 things - it makes it easy to mark and measure where to drill without leaving any permanent markings, but it also servers to "catch" all the little metal shavings from the drilling, so they don't lie on the finish of the car and cause rust spots.  
     Finally, after a couple months, this project is complete, and my daughter can talk to me while I'm tooling around town.  If you happen to be on the GMRS bandwagon and you ever hear a little girl and her dad talking about random nonsense in the Lancaster, PA area, and using the callsign WQYQ271, that's us!
0 Comments

What's on my Workbench?

2/22/2017

0 Comments

 
post contains affiliate links
     Or rather.....what's on my kitchen table (to the annoyance of my YL...)
Picture
     This post was inspired by 2 things.  Firstly, I have a mini-project that I embarked on, but secondly, one of the podcasts that I listen to - Ham Radio 360 - challenged listeners to let them know what they have on their workbench.  [Ed.  I ended up getting to talk to KF7IJZ about this project on Episode 19!]  Maybe sometime I'll write a review of my thoughts on this podcast, but I'll sum it now by saying "It's Awesome!!"  (I really should ask them if they are cool with me putting a link to their site in my sidebar, but I haven't gotten around to it yet...[Ed. - it's there now!])  They do something that no other podcast does - they alternate styles every other week.  The main show is hosted by Cale - K4CDN and he covers all kinds of topics (like this week's episode on something else I love...WWFF!)  The alternate shows are hosted by Jeremy - KF7IJZ and George - KJ6VU.  These guys do a more technical, project driven show that they call "The Workbench."  Anyway, before I get too far off topic here - check them out!

      Moving on to what I'm up to - as many of you know I tend to do mostly portable and mobile operations because I travel a lot for work.  I also do a lot of digital modes, so part of my traveling gear is a Signalink USB interface and my Laptop (I love my laptop!  It's not new, but it's very "beefy" and awesome for traveling and banging around with my stuff.)
     This project started because I wanted an interface that I could use to connect my iPhone or Samsung Tablet to my Yeasu 857d.  There are commercial solutions out there if you want to buy something, like the WolphiLink and EasyDigi interface.  At the end of the day, I think most of these interfaces are basically Audio Isolation Transformers with a couple other tidbits.  Both of these options are well reviewed, and for a fully assembled unit in a box, run around $40.  I stumbled on a schematic for the EasyDigi (Do a Google search - you'll find it too!), and when I saw how simple it was I said - hey, I bet I can build that!  I don't have much of a stash of parts, so to avoid the $40 commercial, premade, option, I promptly ran out and spent $36 at RadioShack.....I know I know, I could have just bought one, but what's the fun in that?!  Plus, I got some other stuff, so the parts for this project were probably only about $20 of that bill.
     Armed with my bits and pieces from RadioShack, and the schematic from my Google search, I came up with this:
Picture
     I'm not a professional by any stretch, so when I play around with stuff I always like to bread-board it first, to make sure it works before I make anything permanent with solder :-)  In my initial test last night, the "Transmit Audio" portion was working just fine. I used an app on my iPhone to generate audio, and on the other end I just used headphones to listen to it coming through.  The only thing I added to the schematic you'll find on Google is potentiometers, so that I can adjust the input and output levels passing through.
     When I get to move forward on this project, I'll try to sketch out some schematics so that I have something that I can post here to share with you (you know - usage rights and all that business.)  With that being said, here's what's next for this project that you can watch for in the future:
  • Making up a 6 pin male connector so that I can connect this to my rig - I'll be keeping an eye on the thrift shops for a $0.50 PS/2 Mouse or Keyboard that I can cut the cable off of.  If I don't find one I suppose I'll actually buy a connector.
  • Potentially make up an adapter so that I can also use this with my HT and PocketPacket for APRS.
  • Test it with my radio's on the breadboard
  • Wire it up permanently in a box of some type
  • Pat myself on the back!
Jump to Part 2
0 Comments

Oleta River State Park KFF Activation

2/18/2017

1 Comment

 
Post Contains Affiliate Links
Picture
Picture
     This past Wednesday I woke up at 3:00am, with temperatures just under 30 degrees Fahrenheit (-1 C) and made my way to the Harrisburg Airport in my home state of Pennsylvania.  By the end of the day I was setting up my radio equipment in Oleta River State Park for another WWFF-KFF activation just outside Miami, Florida, where temperatures were 82 degrees Fahrenheit (28 C).  It's nice to experience some warm weather in February!
     For me, this was another one of my work trips that took me on the road.  Since I was visiting our Miami office, I looked around at the parks that were on the list at the KFF web site. The Oleta River State Park is a little gem, kind of hidden just at the edge of Miami - I'm sure that a lot of people pass right by it without ever realizing it is even there.  If you slow down to have a look, within just a few minutes of the hustle and bustle of both Miami and Ft. Lauderdale is this:
Picture
     Another neat thing about this park is that for less than the price of most chain hotels, you can have a very unique experience staying in one of their small cabins:
     While these are neat little cabins, I will warn you that it is much more fun if you are an "earthy" person.  Creature comforts are limited to mattresses that have seen better days, the furniture you see on the porch in the picture above, picnic tables, and a communal bathhouse (with only 1 working shower in the men's room!)  Notable things that are missing if you are accustomed to standard hotel chains are things like bed linens, pillows, towels, toiletries etc.  Any time you stay in a lodge/cottage/cabin inside a state park, think of it more like camping where you need all the stuff you would need if you were camping, except for your tent.
     For those of us that don't mind a little grit however, this was an awesome place to set up and play radio!  The bunk beds quickly became the place where I threw my luggage.  There was a small, wall mounted table which immediately became my operating desk, and (after emptying it) one of my Pelican Storm Cases become my chair.  Operating position - check.
     While the less hardy folks out there might be worried about the rodent sized crack under the door, for me this made a simple, and perfect place to run coax out to my antenna!  Once again, I was confronted with a situation where I didn't have any decent size trees within reach of the amount of feedline I have, so I used my buddipole mast to support my Quick and Dirty Feedpoint that I used to feed 2 inverted V dipoles - one for 20 meters and one for 40 meters.  Because the soil here is a weird mix of sand / rock / coral I couldn't really use my ground screw that I normally use to anchor the center of my mast, so I made use of what was available - the picnic table!
Picture
     So with that - antennas were up and ready to go, and I was able to start operating.  With conditions being what they are, and my antennas being so close to the ground, most of my contacts were domestic, but I did have 1 with Italy (on 40 meters, with an antenna only about 12 feet of the ground!), 1 with the Azores, and 1 with Puerto Rico.  The biggest highlight however, was my first ever CW contacts!  My first ever CW contact was with Richard - W0IS [ed.  Rick has his own blog! - www.onetuberadio.com check it out!] and my second came from Chuck - KO4SB.  Thanks guys!  Since I still didn't own a key (I just bought one today) I made those CW contacts using the Up and Down buttons on my mic via the "MicKey" option on my Yeasu 857d.  If anyone wants to know how to do that let me know, because it isn't intuitive, and you have to have the settings on the rig just right - I'm willing to share so you don't have to mess around trying to figure it out like I did!  

     Because I like to have some "lessons learned" every time I do something like this, here's a list of some of the things I took away from this activation, that might help you if you do something similar (of course, you might be a pro, and already knew these things...)
  • If you travel a lot make sure you buy non-aerosol bug spray (you can't take aerosol on the plane, even in checked bags.  I should have known this with all my traveling I do, but I guess never considered it before.)
  • Make a checklist of things you need, and keep it with your gear/traveling supplies so you don't forget anything.  I forgot a towel, so each day after my shower I had to dry myself with my shirt from the day before!  I also had to use a shoe to pound in my tent stakes that I use to tie off my dipole ends!
  • It's cheaper to fly with two 50lb pound bags (on AA $60), then it is to fly with a single overweight 70lb bag (on AA- $125.)  See my post about re-organizing my luggage.
  • If you think cats fighting make an awful sound, you've never heard a racoon fight.
  • There are some awesome little natural spaces hidden right in the middle of our populated areas - go look for them!  
1 Comment

Reorganization

2/15/2017

2 Comments

 
I'm actually sitting in the airport, just before 5:30am as I write this post. I'm traveling for work today, but like I always do, I'm taking Radio stuff with me!
I actually reorganized my packing for this trip. Firstly, my big stuff and work equipment I broke down into 2 cases, because I found out (after 2 years of doing this!) that it is cheaper to check 2 bags at 50lbs each, then to check 1 overweight bag. That means this trip is costing less for baggage, and I could bring a couple extra bits and pieces!
Picture
I also re-organized my "personal item" that I carry on the plane with me. It's a standard case, but slightly bigger than the laptop sized one I used to carry. This lets me be a little more organized with my stuff, and actually makes it easier to pop the body of my 867d in and out of the box quicker, since it has to go through the x-ray machine in it's own tray. The new layout is organized like this:
  • Top layer: 857d Radio body, hand mic, rig runner 4004u, and a box with all the interconnection wires for everything in this case.
  • Bottom layer: signalink USB interface, MFJ Power Supply, LDG YT-100 tuner, radio faceplate
It's all tucked in there with pick-n-pluck foam to keep things nice and cozy!
2 Comments
<<Previous

    Categories

    All
    Antenna
    Cw
    Digital-modes
    Flying-with-gear
    Home QTH
    Miscellaneous
    Mobile
    Operating Events
    Portable
    POTA
    Shack Build
    Technical


    - N3VEM -

         Welcome to my Ham Radio Blog!  This blog was started primarily to share my two concurrent shack builds - my mobile station and my home station.  Over time, this has grown to include sharing about my operations, and general radio-related thoughts that I have as a newer operator.  
         
    ​Enjoy!

    RSS Feed


    Picture
    POTA!

    Picture
    Proving that hams do indeed still build stuff!

    Picture
    100 Watts and Wire is an awesome community, based around an excellent podcast. 

    Archives

    September 2020
    July 2020
    January 2020
    September 2019
    August 2019
    July 2019
    June 2019
    May 2019
    March 2019
    January 2019
    December 2018
    November 2018
    October 2018
    September 2018
    August 2018
    July 2018
    June 2018
    May 2018
    April 2018
    March 2018
    February 2018
    January 2018
    December 2017
    November 2017
    October 2017
    September 2017
    August 2017
    July 2017
    June 2017
    May 2017
    April 2017
    March 2017
    February 2017
    January 2017
    December 2016
    November 2016
    October 2016
    September 2016
    August 2016
    July 2016
    June 2016
    May 2016
    April 2016
    March 2016
    February 2016
    January 2016
    December 2015
    November 2015


Picture
Copyright © 2015
 Vance Martin is a participant in the Amazon Services LLC Associates Program, an affiliate advertising program designed to provide a means for sites to earn advertising fees by advertising and linking to amazon.com.