|
Post Contains Affiliate Links It dawned on me that it has been quite a while since I've done any digital modes work from home. I think the last time I did, I was still using my GutterTenna as my primary home antenna. That simply had to change! Tonight I dug my SignaLink out of the pile, brought it up to my temporary shack in the master bedroom closet, hooked every thing up, set the levels, and made a contact. Awesome! This might seem like a small victory, but usually by the time I can get on the radio at night, there is a sleeping baby on the other side of the wall. This eliminates any mode that makes noise after about 23:00 UTC. I've been slowly working on my CW, but even that is challenging at night. The side tones and static are enough to stir him, but if I wear headphones so I don't disturb him, I also can't hear him if he needs me. Digital modes to the rescue! Using digital modes, I can make contacts without making any sound (other than they typing on my keyboard) AND I can keep my ears peeled for the sounds that mean daddy is needed. If you're on the air in the evenings, look for me hanging around the HF digital frequencies! Time for a new slogan - "Digital Modes: letting babies sleep and parents play radio all night long!"
3 Comments
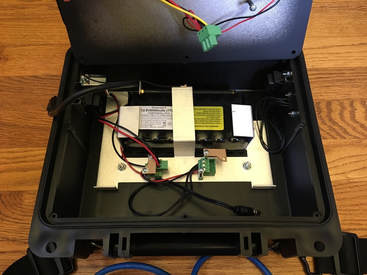
First, I'd like to thank everyone that has given their input so far on this project! For anyone who is just now joining the party, you can go back to part 1 if you want the full scoop on what has been going on here, OR you can just continue reading, because I'm doing 2 things in this post - sharing the results of the vote from the post just prior to this one, and then summarizing where we've been, and where we're going next. As a reminder, this project will always be Crowd-Sourced, but never Crowd-Funded. I don't want your money, just your ideas! Results of the Computer VoteLast time, all of you helped me choose which small form factor computer I should use for this project. The vote was between the Raspberry Pi, the BeagleBone, the Kangaroo+, or an Android Tablet. I asked everyone voting to pick their first and second choice, and I awarded 2 points for each 1st choice, and 1 point for each second choice. The winner ran away with the vote, and with the popularity of a certain fruit flavored computer (they wouldn't call it that if it tasted any different right?) I guess I shouldn't be surprised: Now What?Those of you who have been reading along are probably asking whats next, and those who just got here are asking, what happened before this? I think that the best way to answer both of these questions is to recap what we've done so far, so here's the Readers Digest version of things up to this point: One of the pieces of equipment that my work revolves around is built into a small black box. We had one that was being scrapped, so after the guts were removed, I was left with a nifty little box, complete with a LiFePO4 battery and charger. I decided to get input from everyone who reads or comes across my blog on what would make a good project. The basic guidelines where that the project needed to be radio related, it needed to all fit in the box, and it needed to use the battery that was already there as it's power source. The first step we took was to collect ideas for what to build. After collecting those ideas, it was put to a vote, and the decision was made to build an HF/QRP Go-Kit. With the decision made for the type of project, it was time to start nailing down some of the details. The first details we decided on were what type of radio should be used (SDR or Non-SDR), and whether it should be a kit radio, scratch built, or something off the shelf. Those decisions bubbled up a couple of interesting things but ultimately led us to choosing the Bitx40 as the radio to use in this project. Along the way we also came to the conclusion that if a small computer would fit in the box, we should build one in. Since the Bitx40 is sufficiently small, there was plenty of room, so I put the computer question up to a vote, which got us to where we are today. What's Next?The hardware is picked, and most of it is now in hand. At this point my plan is to lay out everything in the box to see how it all starts to fit together. I'll share some pictures of how things fit and how they might be arranged in the box. At that point I'll look for input and ideas on the layout before I start making holes and mounting things. Hope to hear from you when that time comes!
Post Contains Affiliate Links Thanks to everyone who voted on what to base this little station around! With all of your input, the overwhelming decision was that I should build around the BITX40. If that sentence leaves you completely baffled, you might want to go back to part 1 and come up to speed :-) After you do that, please head over to the subscribe page so that you can stay up date on all my projects! The final results of the voting put the rigs we identified in the following order, highest scoring to lowest:
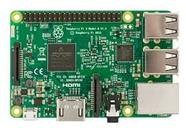
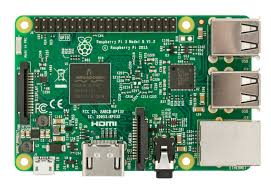
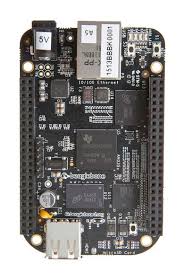
So with the decision on the rig made, I sent my payment off to HFSigs.com and now I just have to wait for the package to arrive! While I wait, I want you to once again help me decide on the next component of this project - the Computer! Okay, so maybe not THAT computer, but you get the idea! In some of our earlier voting the general opinion was, if there's room for a small computer, try to get one in there. With the radio that ended up being chosen, there will definitely be space to get something in there, so rather than drag things out, here are the options: Raspberry Pi If you don't know what this is, go ahead and climb out from under that log, dust yourself off, trim the beard you've been growing while sleeping for the last decade, and head over here to read about them. After that, go here to buy it before everyone finds out you didn't already have one (or 2, or 3) BeagleBone I won't be hard on you if you don't know about this one. These are another option in the single board computer market, but they haven't gotten the popularity craze that the Raspberry Pi has. They are a little more capable, but I guess people just like Pi more than they like Beagles... If you're interested in a good article comparing the Beaglebone to the Raspberry Pi you can check out this article over at techlila. Kangaroo + Say what now? Aren't kangaroos those things hopping our friends in VK land? Well, yes...but they are also a product that the company bills as being a "mobile desktop PC." Basically, its a tiny, out of the box computer. Just plug it into a monitor, add your favorite interface device (mouse, keyboard, etc.) and start computing. The slick thing here, is that it has a built in battery, which would take some load off the battery in the box, leaving more amp-hours for the rig, and it is much more powerful than either of the single board PC's above. You can check out the full scoop on these here. One of Those Cheap Android Tablets There are quite a few android tablets on the market, and some of them are pretty inexpensive. The downside of a tablet is that I would be more restricted in software options, since I would be tied to using mobile apps. The benefit though, is that a tablet would be an all in one solution and most tablets have fairly robust internal batteries. Just like the Kangroo+, having internal batteries gives the benefit of saving more battery power for the rig. All that would need to be done would be to figure out a mounting method in the box. Final Thought Before the Vote Just a quick thought before the official voting - you may have noticed that I didn't really touch on monitors or interface devices to go with these computers. I'm doing a "presumptive close" on that aspect. Due to our scope requirement for everything to fit in the box, there isn't really room for a mouse and keyboard, unless we went with a rather non-elegant, fold/up, roll/up type, which ultimately would just take room from something else. Since small touchscreen monitors are relatively inexpensive for all these options, that is the route I will pursue. If anyone feels strongly that I should do something other than this however, feel free to comment or reach out to me via any of the methods on my contacts page. Voting is now closed! Thanks for voting! It's time to get some more input! If you haven't been following along with my Crowd-Sourced Project series, you can either start from part 1, or stick around for the 60 second overview! Also, if you hate being left behind, don't forget to subscribe to stay up to date. As a reminder, this project is crowd-sourced, NOT crowd funded - I don't want your money, I'm just looking for ideas as I work on this project! Quick Review This project started because I ended up with a neat little box, that was begging to become a ham radio project. Rather than just start building something, I decided to do an experiment and at each step along the way, ask all of you "what would you do here?" It's been interesting to see where that takes us. With the quick overview out of the way, it's finally time to vote for the radio that will be the core of this project. If you don't feel like reading through the old posts to see what types of things were factored into the scope, these are the things that are driving the list you are now voting on:
The Contenders If you are familiar with all of these radio's, feel free to skip straight to the voting if you'd like. If not, here is a quick overview of each one, and a couple comments from me on my thoughts (but remember - in this case my opinion matters less than all of yours collectively!) 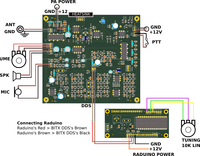 photo courtesy of hfsigs.com photo courtesy of hfsigs.com BITX40 If you don't already know about this little radio, you've got some catching up to do, and a good place to start is here. This little radio fits all of the criteria for this project, and has the benefit of being very "hack-able" to changes in the future. Another benefit of this one, is that the HamRadio360 Workbench crew is currently talking through builds of these little radio's, so this would fit that theme for anyone like me who is a fan of their podcast. This is a very simple kit, and it would be a pretty quick build. Bands: 40, others with simple modifications Mode: SSB, others with simple modifications TX power: 7 watts Rough Price: $60 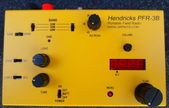 Photo courtesy of qrpkits.com Photo courtesy of qrpkits.com Hendricks PFR-3B This kit comes from Pacific Antenna. It should work well, but may require a different battery mounting method then what is already in the box (simple enough to change!) Bands: 40, 30, 20 Mode: CW TX power: 5 watts Rough Price: $275  Photo courtesy of lnrprecision.com Photo courtesy of lnrprecision.com Mountain Topper 3B This is a small radio from LNR Precision that comes as either a kit or prebuilt. With it's small size, fit would be no concern! Bands: 40, 30, 20 Mode: CW TX power: 2.5 watts Rough Price: $260 / 270 (Kit / Prebuilt) 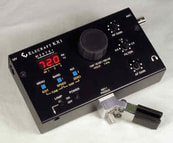 Photo courtesy of elecraft.com Photo courtesy of elecraft.com Elecraft KX1 This radio meets all the criteria, and was suggested by a couple of different folks. The only catch is that it is discontinued, and finding a used one may be a bit hit or miss. Luckily, the details about this radio are still available on Elecraft's site. Bands: 40, 20 Mode: CW TX power: 4 watts Rough Price: $300 W7EL Optimized qrp transceiver This is actually not so much a radio, as it is plans and a parts list to source and build it on your own. The ARRL has a copy of the build information available here for reference. Bands: 40 Mode: CW TX power: 1.5 watts Rough Price: depends on sourcing, but probably very inexpensive. 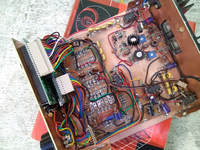 Photo courtesy of phonestack.com/farhan Photo courtesy of phonestack.com/farhan uBITX Does this sound familiar? It should! Ashhar Farhan designed this, the multi-band successor to the BITX40. It isn't available yet as a kit, but plans and parts lists are available on Ashhar's site. This would take longer to build, but would probably be a rewarding project! Bands: 160, 80, 60, 40, 30, 20, 17, 15, 12, 10 Mode: SSB, CW TX power: 5 - 10 watts depending on band Rough Price: $50 and a well stocked junk box  Photo courtesy of 4sqrp.com Photo courtesy of 4sqrp.com 4sqrqrp Bayou Jumper This is an interesting little crystal controlled qrp rig. The receiver is a regenerative design, making this radio more "old school" which can have a certain charm to it. The only bad part of this is that being crystal controlled means you're restricted to whatever frequencies you have crystals for. Bands: 40 Mode: CW TX power: 5watts Rough Price: $80  Photo courtesy of connectsystems.com Photo courtesy of connectsystems.com ConnectSystems CS108G (Xiegu X108G) This a rig from a new company, that is trying to break into the portable rig market. They are surprisingly full featured for the price, and they seem to be starting to get a loyal following. It's at the top end of what I had in mind for this project cost-wise, but if this is what everyone votes for, I'll set aside some pennies for a little bit! Bands: 160, 80, 60, 40, 30, 20, 17, 15, 12, 10 Mode: SSB, AM, CW TX power: 20 watts Rough Price: $400 Lets Vote! We'll pause here for the official vote, but if you happen to be curious about a rig you suggested and why it isn't on the list, I'll give some "bonus material" after the vote for those who want to stick around. Voting is Now Closed - Stay Tuned for Results! The Rejects As promised, here's the short list of some of the commonly suggested radios that didn't make the cut for the vote, and the reasons why:
Yeasu FT-891: Fit, Cost, and if it is similar to my 857d, even on low power the surge during startup will trip the safety circuit in the battery, rendering it out of scope Yeasu FT-817(ND): Borderline Fit, Cost (for new, might find used within range), out of scope bands (project was voted to be HF focused) Elecraft KX2: Scope (this is an SDR), Cost There are quite a few other radios that might have made the list, but these were the options that were suggested most often, that I felt warranted an explanation as to why they weren't being considered. Thanks for your input! |
Categories
All
- N3VEM - Welcome to my Ham Radio Blog! This blog was started primarily to share my two concurrent shack builds - my mobile station and my home station. Over time, this has grown to include sharing about my operations, and general radio-related thoughts that I have as a newer operator. Proving that hams do indeed still build stuff!
100 Watts and Wire is an awesome community, based around an excellent podcast.
Archives
September 2020
|


 RSS Feed


