NOVEMBER 3 VICTOR ECHO MIKE
  • Blog
  • Events and Activations
  • Diversions
  • About
  • Gallery
  • Contact
  • Links
  • Subscribe
  • Search
  • Blog
  • Events and Activations
  • Diversions
  • About
  • Gallery
  • Contact
  • Links
  • Subscribe
  • Search
NOVEMBER 3 VICTOR ECHO MIKE

ham radio Projects and musings from a (Relatively) new operator

End of an Era (Kinda...)

3/27/2019

2 Comments

 
     Don't worry, I'm not ending my ham-radio career!  I'm still plenty busy and enjoying radio, and I've actually had my rig turned on more in the last few days than I have in the last 2 months.  The era that is coming to an end however, is my "mobile HF" career.

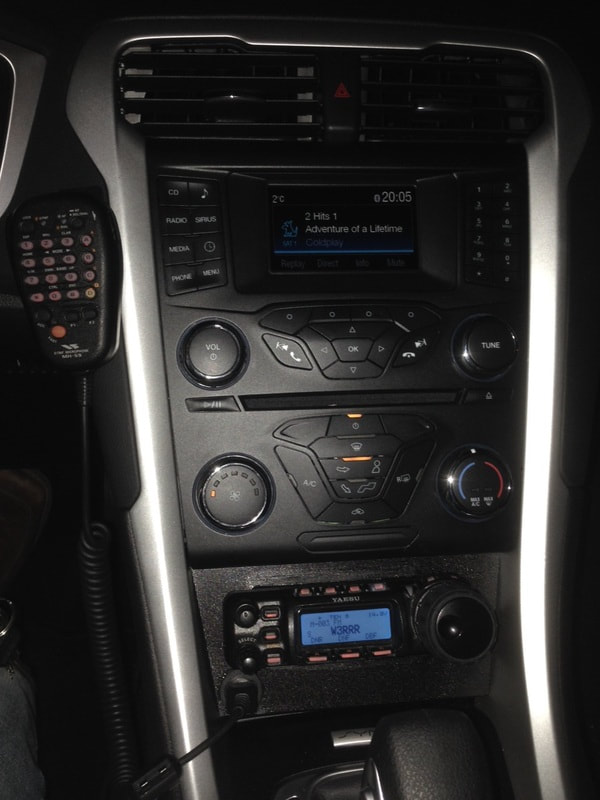
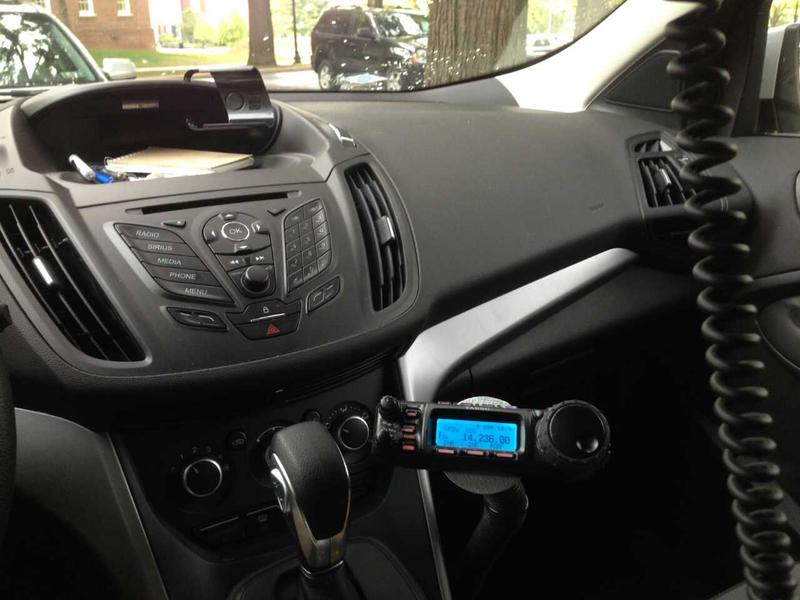
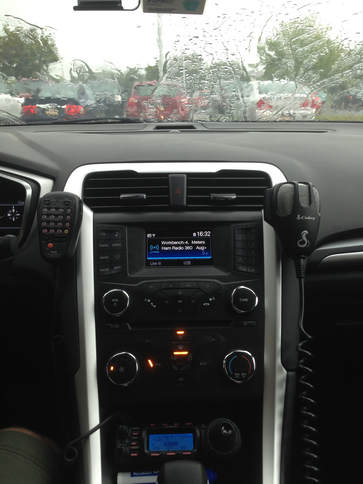
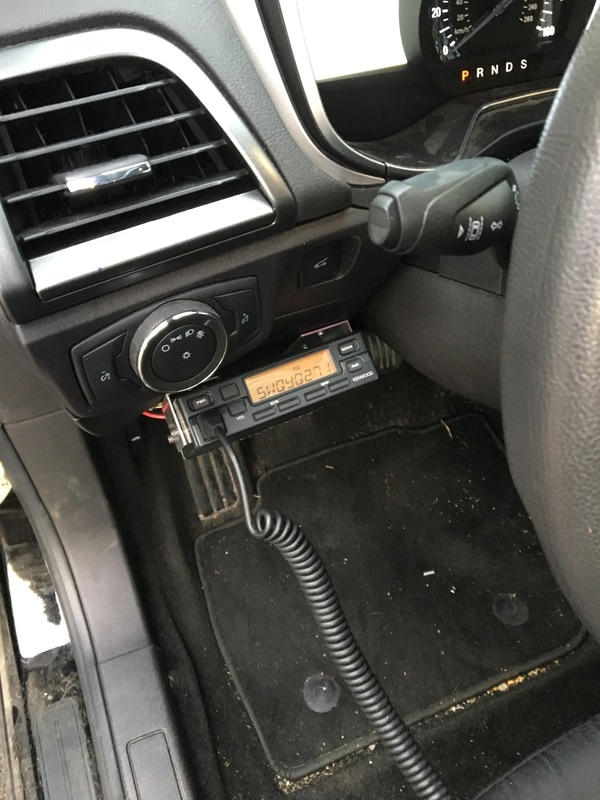
​     When I first got into ham radio, I was doing a TON of traveling in my car - often 6+ hours in a single day, and numerous multi-state trips.  With all that road time, it made sense to invest the time and effort to install HF gear in the car.  Anyone who has done a proper HF mobile install however, can tell you just how time consuming that can be, when you start getting into bonding, the heavy cabling needed for powering an HF rig, etc.  
     Well, as the last couple years have gone by, I have actually been spending less and less time traveling, and more time working from home, and doing meetings via skype, conference call etc.  this is awesome for me and my family, but it also means that the gear just wasn't seeing much use in the car.  It was nice to have it there when I did travel, so I just left well enough alone.
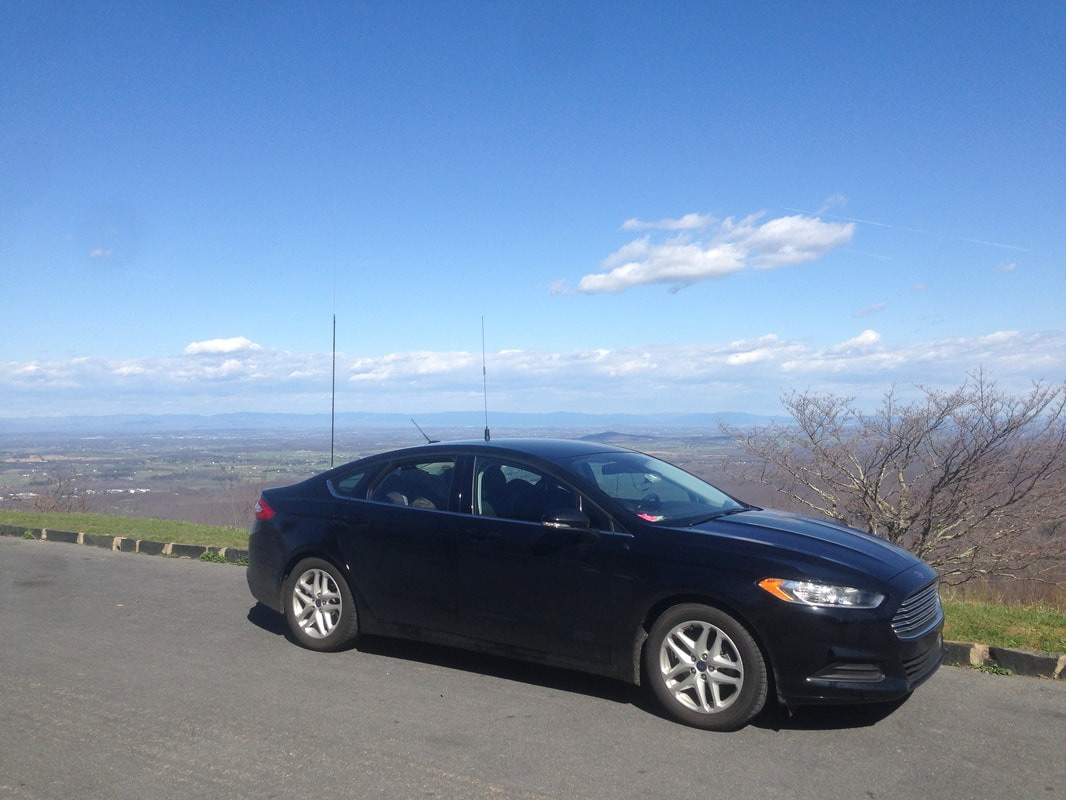
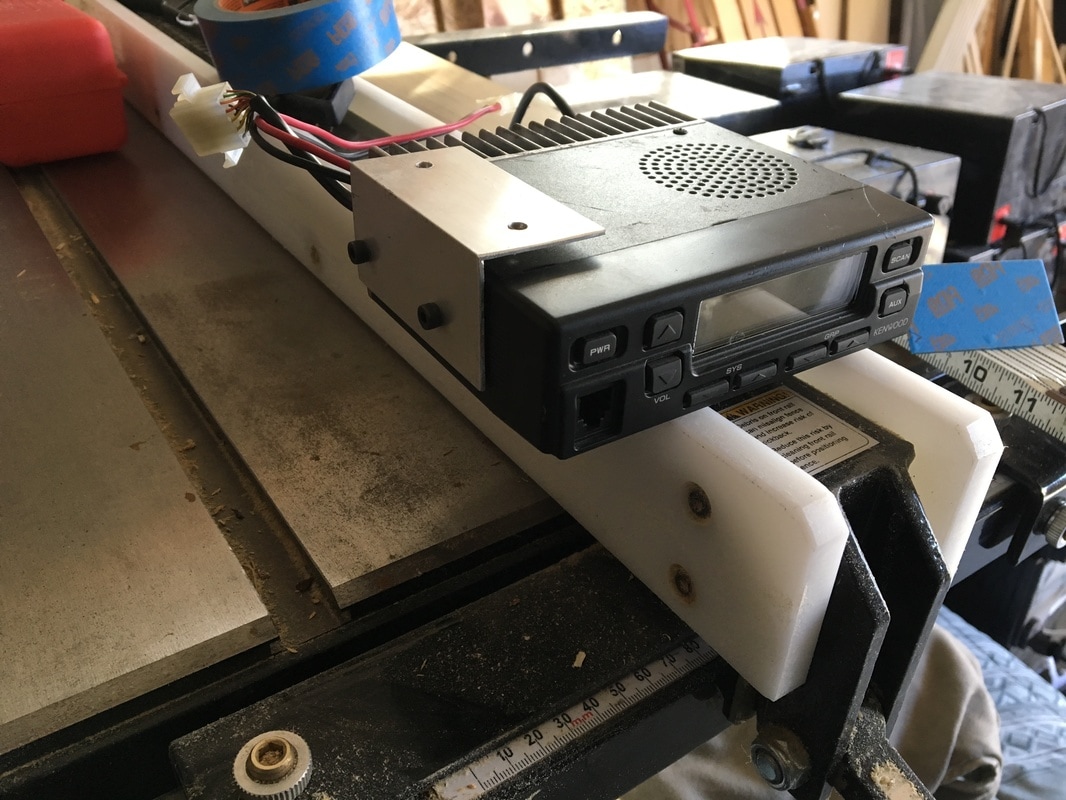
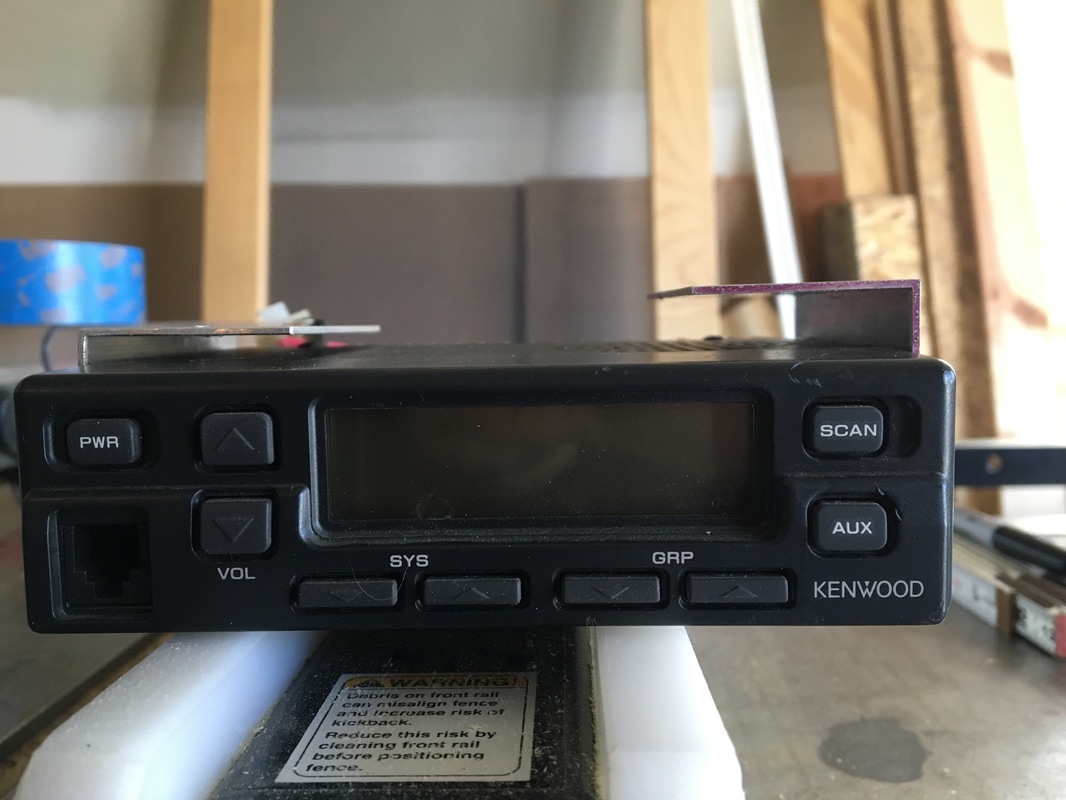
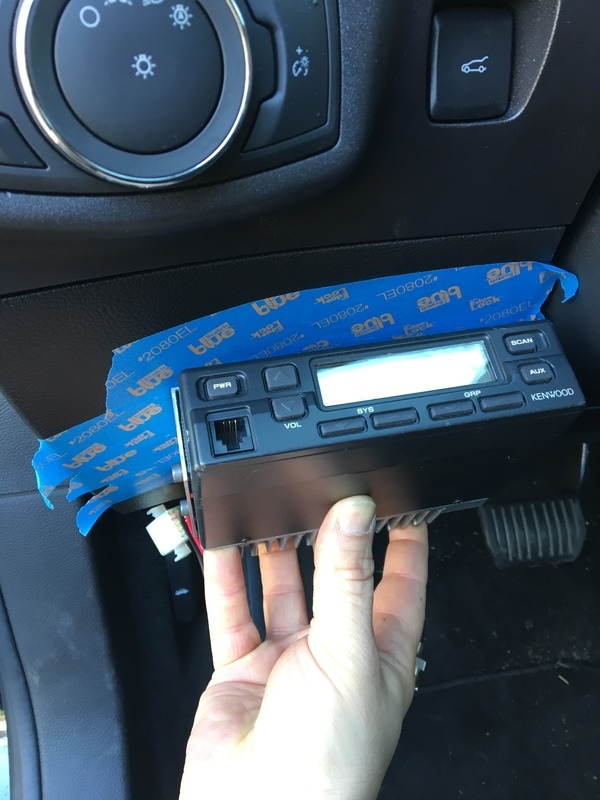
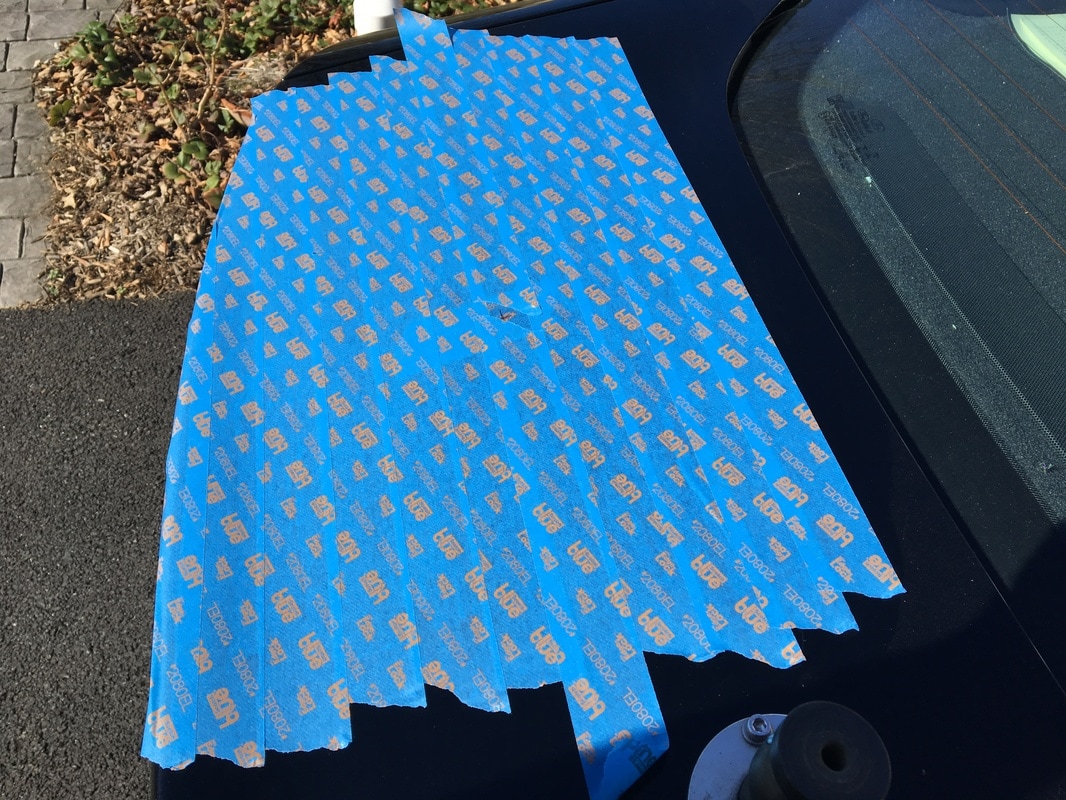
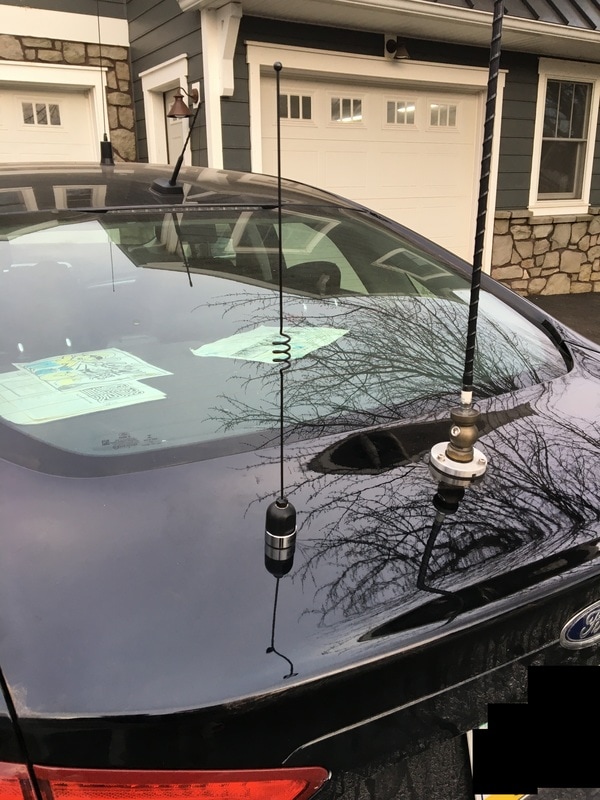
     The time came however, for a new car, and I just got notice that my new one has been delivered to the dealership.  I spent this past weekend pulling all the radio gear out of my old car, and considering that the vast majority of my driving now will be shorter trips, I just don't see the point in going through the effort to put all the gear in the new one.  I'll probably throw in a 2m/70cm dual bander at some point, but I suspect I won't install much more than that in this new vehicle (unless I suddenly go road-warrior again.)
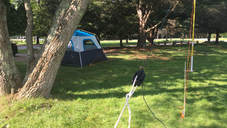
     So with that, N3VEM/M is signing off, but you'll still hear me from the parks operating portable with my go-kit, and you'll probably hear me from the home shack a lot more often!

bye for now!
2 Comments

CodeLink

8/21/2017

0 Comments

 
Post contains affiliate links
I made something that I want to share with you!

If you've stumbled on my blog, or ever talked to me on the air, you probably know that I do quite a bit of portable and mobile operating (actually, because of the current state of my shack project, ALL of my operating is portable and mobile at the moment.) 
Picture
I enjoy operating in this way quite a bit, because I travel regularly for work. Recently, I learned enough Morse Code to start making contacts on the air with CW in addition to SSB.  This works great when I'm portable in my tent, but I recently had a couple activations that I had to do from the car.  I didn't know CW when I first did my mobile install, and I didn't think I'd ever have a reason to do CW from the drivers seat, so I didn't plan for it.  Now that I'd like to be able to, I started making plans.  At first I thought I would just run a cable from the radio body in the trunk, to the panel that I have my remote head and mic jack mounted in.

Picture

As I thought about it however, I really didn't feel like removing body panels, rolling back carpet, and all that business, so I didn't get around to it.  While I was stewing on this, I got to thinking about the times I did do CW from the front seat.  The Yeasu 857d (and probably the other Yeasu rigs as well) has a feature called "MICKEY."  This feature lets you do Morse Code by using the mic as a weird sort of paddle.  With this feature turned on, the down button acts like the dah, and the up button acts like the dit.  It works, but to be honest it is a pain, so I started avoiding it.  

The realization I had was this - those are just buttons.  I can probably make an interface that plugs into the mic jack, and just uses the lines for those buttons, so that I can plug a key into the mic jack.  The wheels started spinning.
So, first I needed a pinout of the mic jack. Luckily a google image search for "Yeasu 857d mic pinout" brought up just what I needed.  If you look at the jack, flat side up, the connections are, from left to right:
  • Down
  • Up
  • +5 v
  • Mic Ground
  • Mic
  • PTT
  • Ground
  • Fast
With this information it seemed obvious to me that all I needed to do was make something that went to the appropriate pins.  I also wanted something that I could keep in my glove box, so that I could work CW on a moments notice.  With that goal, here's what I came up with:
Picture
I started with a standard 4x2x1 project enclosure. The parts that will go in here would fit in something smaller, but I needed something that fit the hand nicely - you'll see why in a moment.
Picture
Because modern radios use an RJ45 style plug, I decided to put an RJ45 jack in the end of the interface, so that I could connect with a standard network cable, or with the mic cord that comes with the radio. I put a piece of painters tape on the end so I could measure and mark for my cut.
Picture
After a few zips with the Dremel tool and a couple different bits, the jack fit nicely into the end of the box. They make jacks with the wires already attached on the back, but I had a pass-through jack, so that's what I used.
Picture
I used my tap set to drill holes, and then carefully cut 4-40 threads right into the plastic, so that I could use screws to hold the jack in place. Don't over-tighten when screwing into plastic!
Picture
I put more tape around the box, and marked for a hole in the end for a 1/8" stereo jack, and holes on either side for buttons. You'll find out shortly what the buttons are for...
Picture
Next, I completely stripped a section of network cable. Referencing back to the mic pinout, I only needed 3 of the wires, so I picked 3 colors I liked - I put the green wire at the first pin, which would go to the "down/dah" button, I put the blue wire to the second pin, which would go to the "up / dit" button, and I put the brown wire to the 7th pin, which would be the ground. The rest of the wires I just jammed in as spacers to make it easier to slide everything into place in the plug, and then I cut them off after crimping the pins down.
Picture
Next, it was time to start stripping and tinning some wires. Secret admission here - don't tell! - Sometimes if I'm in the garage and not near water, I spit on my sponge to moisten it. Who does that?!
Picture
Next it was time to put in the jack and switches, and solder them up! The buttons are offset so that when holding the box, one lands nicely under my thumb, and one lands nicely under my pointer. To pick the spots I actually just held the box they way I would, and marked where my fingers hit. The pointer button got the green wire and the brown wire, the thumb button got the blue wire and a jumper from the brown wire on the other button. The jack got a jumper from the brown wire to the sleeve connection, from the blue wire to the tip connection, and from the green wire to the ring connection.
Picture
This is just a quick sketch of how I wired the plug that would be on the inside of the box.
Picture
This is a quick sketch of how I wired the switches and the stereo jack.
Picture
Ready for it's lid!
Picture
And there it is - my "CodeLink" ready for action!

Now, to make this work, the settings on the radio are important, because I am relying on the "Mickey" feature.  This means that I need to have these setting correct:
  • Multifunction Row J - "BK" needs to be on (this basically tells the radio to actually transmit on CW), and "KYR" needs to be on (this tells the radio to use the built in keyer)
  • Menu Item 26 - needs to be set to "Mickey"
  • Menu Item 30 - sets the keyer speed (keep this to the speed you can copy)
  • Menu Item 59 - needs to be set to "normal" (this selects the type of mic connected)
So, with the interface made, and the settings chosen, it's time to show you how it works!  Check out this short video I made to see it in action:
 
To wrap up, here's the parts list with links if you want to make your own.  Several of these things come in quantities greater than you'll need, but it never hurts to have spares, or build up your supply!
Project Box 4x2x1
RJ45 Feed-through
2 Buttons
Stereo Jack
RJ45 plug
network cable
​
And, if you don't have these tools already, you might want to check them out as well.  I used mine in this project, and in A LOT of other projects as well:
RJ45/RJ11 crimp tool
​Dremel Tool

Bye for now!
0 Comments

Pota/WWFF Logging & More with HamLog

7/28/2017

11 Comments

 
Post contains affiliate links
[ed. I updated this post, to reflect the fact that these setting and options will work for both the POTA and WWFF park activation programs]
​
Before I get started - have you voted yet? - I'm currently at part 5 of my "Crowdsourced" project, where I have been soliciting for your input into an ongoing project I've been slowly kicking down the road. 

​With that out of the way, on with the show!
Picture
There are quite a few ham radio apps out there, but if you are an iOS user, you can probably download this one app and be done.  This is because there is not much you could ever want a ham radio app to do, that isn't included in this one.  Look at the insanely low price along with everything this app does, and you'd have to be a crazy person to not download it.  I'm going to be up front with you and let you know that this app does SO MUCH that this is a loooong post.  


You can skip to the end of this article for a list of all of the amazing things that this app will do, and I won't be offended, because most of this post will focus on the feature that I just "found" in the app that has helped me immensely with one of the things I love doing in ham radio - portable operating for the Parks on the Air and World Wide Flora and Fauna programs.

Logging

A topic that comes up regularly for these types of programs is logging while operating portable.  When portable, one of the biggest concerns is power, so while logging on a laptop might be nice, it is often times power prohibitive.  Many people choose to log on paper and then transcribe their contacts into a program when they return home.  If you're like me, free time is at a premium, so an option that lets you get the contacts logged in the proper format as you make them is always preferable.  Since many of us now carry around a portable device that operates for a number of hours on relatively low power, using it for ham radio logging is an obvious choice.
What makes Hamlog so great for logging?  It has a "hidden" feature called "Create A Log" that lets you build a log sheet with exactly the fields you need, no more, no less.  For POTA and WWFF this is awesome, because there are a couple of fields in the ADIF format that the (currently being built) POTA database, and logsearch (the WWFF database) uses, that are not included in the "standard" layout of most (any?) iOS based logging apps.  Hamlog lets you create logs with exactly the data you need.  This makes it easy for you, but also for the program administrators when they upload your logs (they'll thank you for it!)  
What ADIF data fields do POTA and WWFF need, and how are they used?  Here they are, with a brief description of each - but don't be intimidated!  I'll explain how hamlog makes this very easy later in this article.
  • STATION_CALLSIGN
    • ​This field is used for the call sign that is getting "credit" for the activation.  Usually, we are activating by ourselves, so it is just our own call-sign.  There might be times however, where you are activating with a club or something similar.  In this case the club callsign would be the one you enter here.
  • OPERATOR
    • ​This is the filed where the person making the contacts puts their callsign.  When we are operating by ourselves, it is usually just our own callsign a second time.  It may be different then the "station_callsign" however, if you are activating with a club or with someone else.  This is also a place to put the callsign of a guest operator if another ham happens to stumble by, and you put them on the air.
  • MY_SIG
    • ​This is one of the fields that databases use, that might not seem to make sense based on the name of the field, until you relaize that SIG is not signal - it's short for "Special Interest Group."  You can think of it like being a field to put the name of the program into (i.e. POTA, WWFF, SOTA, IOTA, etc.)  Every contact in your log should have the same value here.
  • MY_SIG_INFO
    • ​Once you understand MY_SIG, it's easy to think of MY-SIG_INFO as being the details - i.e the park number.  Programs maintain a list of their park numbers and designations, so just be certain to use the right park number!  (Luckily, most programs are flexible, so if you activate a location that qualifies under multiple things - i.e. you activate a SOTA peak, that is on an IOTA Island, that is in a park, that is part of both POTA and WWFF, you can usually indicate when submitting logs where you were, making you able to submit the same logs to multiple groups (an example of the above is Cadillac Mountain on Mount Desert Island in the Acadia National Park.)
  • CALL
    • ​This is the field where you type the callsign of the person that contacted you.  That's pretty straightforward!
  • QSO_DATE
    • ​This is the field that contains the date the contact was made (if you're logging as you go, its just today's date, in UTC)
  • TIME_ON
    • ​This is the field that contains the time the contact started, in UTC.
  • BAND
    • ​This field contains the band of operation.  Different log uploading tools seem to handle this differently, but for award purposes, pretty much universally, you don't need the exact frequency, just the band.  What we need here is simply the band, followed by the letter "m".  As an example, if I made the contact on 20 meters, I would be entering "20m" in this field.  The "m" is important (learned the hard way with the help of Jeff Dahn!) because this is what lets logging databases. know that you have entered a band and not a specific frequency.  Don't forget the "m"!
  • MODE
    • ​This is where you enter the mode of the contact.  Pretty much all of the standard abbreviations (SSB, CW, DIG, RTTY, etc.) are accepted.
  • SIG
    • ​Special Interest Group of the person you are contacting. for POTA and WWFF, we use this field to indicate the "program" that the person chasing you is participating in.  Normally it will be blank, but if they also happen to be in a park doing an activation (known as a park-to-park contact) this is where you put the letters "POTA" or "WWFF" to indicate that this chaser is also doing a park activation.
  • SIG_INFO
    • ​The final Special Interest Group field.  This field is complimentary to the one above.  If this is a Park-to-Park contact as indicated above, this is where you put the designation of the park that the other person is in. 
  • ​NOTES
    • ​No logging databases that I know of actually need anything in this field, but since we often like to type little tidbits about our contacts, it gets included in nearly every logging package as a "catch-all" field.
You may notice that their are some fields not included, that we commonly exchange, like signal reports.  Here's a little secret - very few logging databases care whether or not you use signal reports.  When portable, the name of the game is to do only what you need to do, no more.  So yes, while I may give signal reports as a courtesy while I am activating, I don't actually put them in my log.

Hamlog Makes Recording Exactly the Data We Need Easy!

Through the "Create-a-log" feature, hamlog lets you build templates, so I made a template for WWFF, which will also work for the newer POTA program, that gives me exactly what I need using the fields above.  The template also lets you give custom names to the fields we discussed, so we can call them something that makes more sense, to help us remember what each field is for. After I set up the template the first time (I'll help you with that in just a little bit) doing my logging is now super easy!  Just follow along in the gallery below for the step by step of what this is like in practice.

Did I convince you to use Hamlog?

    If so, I'll even help you out by making it easy to set up your custom template!  Right in the app, on the "Create A Log" main screen, you can click help for detailed directions on how to create and set up your template.  The first step is creating the template, which is done using a CSV file, but I'll make that easy for you - here it is!  Feel free to download it and use it so you don't have to create it from scratch. Both of these are the same internally, but if you're picky about names and organization, choose whichever you like:
To use the template, you first add it to your iPhone using iTunes File Sharing.  To quote the help file in the app:
cal_pota.csv
File Size: 0 kb
File Type: csv
Download File

cal_wwff.csv
File Size: 0 kb
File Type: csv
Download File

  • Connect your iPhone (or iPad) to your computer
  • Open iTunes
  • Navigate in iTunes to your devices
  • Select the "Apps" tab
  • Scroll down to the bottom of the view to find "iTunes File Sharing"
  • Select HamLog
  • Drag and Drop your template into the file area
  • To verify the upload, open the App on your phone, go to Tools, and Create A Log as described above, and you should see the template, just like you saw in my pictures.
I highly recommend this app for anyone doing activations that has an iPhone.  It couldn't be any easier once you are all set up!

And finally, all the other stuff it does too!

I apologize for the length of this post already, but this app has so much awesomeness in it, that it takes a long post just to skim the surface!  I'll finish up with a quick (kind of...) list of everything else that is built into the app:
  • ​Audio Recording - Allows you to record audio clips, but at the time of this writing, this feature didn't seem to be working on my phone (I don't use this one anyway...)
  • Azimuth Calculation - Automatically gets your grid square info from your location, and allows you to enter any other grid square, to determine the bearing between you and the other station.
  • Azimuthal Equidistant Maps - Lets you create slick world maps centered on your location, via AZProj that was authored by WM7D.  You can generate these on the fly, from wherever you happen to be, using the location data from your phone - very handy for portable operations!
  • Band Plans - This gives you the international band plans, as created by the various organizations like IARU, DARC, ARRL, etc.
  • CW Generator - Generates CW!  Depending on your rig, you might be able to make an interface of some sort to use this as an auto-keyer.  I havn't played around with it much, other than having it sound out my callsign to me via the phone's speaker.
  • CW Helper - A basic chart of the CW characters, that will also play the sounds of them when you click on each letter.
  • Callsign Lookup - Does what it says :-)
  • CloudSync V2 - This is an extra feature that allows cloud backup of your Hamlog data. (requires a subscription)
  • Contact Charts - This gives you some analytics about your contacts in your main log, complete with graphs by count, mode, states, countries, etc.  Pretty slick!
  • Contest Calendar - Gives you a view of the contest calendar data from WA7BNM
  • Create A Log - lets you create custom logs for things like WWFF, SOTA, IOTA, etc.
  • DTMF Memories - This lets you save and store DTMF commands.  Do you operate a repeater or regularly use echolink / allstar?  You can save the commands you use most often as Macro's and play them through your mic to send commands.  Pretty slick to have if you find yourself trying to send commands to a repeater from a radio that doesn't have a DTMF keypad!
  • DTMF Tone Generator - this is a basic keypad that lets you generate DTMF tones.  this is very useful if you need to send repeater commands but don't have a DTMF keypad on your mic - just hold your phone up to the mic, press your PTT, and type the command!
  • DX Cluster - Enter the server and port info for your favorite DX cluster server and viola - you're connected!
  • DX Spots - Gives you DX clustuer spots from DX Summit
  • DXCC Entities - gives you a lis of the entities including ITU and CQ zones, continent, etc.
  • DXpedition Calender - at the time of the writing this feature was not active.
  • Delete All Log Entries - I'm scared to click this - I will just assume it does what it says (it does give you an "are you sure" pop up, so don't worry about accidentally bumping it)
  • Dupe Finder - Searches your main log for potential duplicate entries.
  • EtherPig - This function is not currently active
  • Export Log Entries - Lets you export entries from your main log for uploading to your favorite site - LOTW, eQSL, etc.
  • Field Day - This gives you a log specifically formatted for the field day exchange.  It also has the option of connecting to a "field day server" that you can set up, so that multiple operators can use their own devices to log, and automatically consolidate the logs in a single location.
  • Grid Calculator - lets you find the Grid Square of a manually entered latitude and longitude.
  • Grid Square GPS - gives you your FULL grid square, latitude, longitude, and altitude using the GPS built into your device.
  • Grid from Map - gives you a clickable map that you can use to find grid square designations.
  • Grid to Map - lets you type in a grid square, and then shows you on a map where that grid is located.
  • HF Net List -Displays the very comprehensive net list and schedule from N1YZ
  • HamQTH lookup - allows you to do lookups in the HamQTH database, if you provide your HamQTH user name and password
  • HamStack Lite - Remote station control and monitoring via Sierra Radio (I'm pretty sure this is the  company that the George half of George and Jeremy from Hamradio 360 Workbench Podcast is involved with!)
  • IARU Prefixes - A quick way to look up where someone is from when you hear that strange call sign prefix - very hand to know if it is worth pausing in the middle of an activation to try and catch a "rare" one!
  • IRLP Node Status - gives the status of IRLP notes, including the RF frequency that the node is associated with, and it's location.
  • ITU Phonetic Alphabet - handy for those times when you can't remember if R is supposed to be Romeo or Radio...
  • Import ADIF - allows you to import ADIF files into your log.
  • LAT/Long to Deg/Min - calculates degrees and minutes for you from a manually entered latitude and longitude
  • Length Converter - are you talking to one of those weird Americans that doesn't use the metric system like the rest of the world?  Enter the distance he/she says and convert it to cm/m/km.  (oh, it works the other way around too.  Just had to remind my fellow 'muricans' that we're the odd ducks here, not everyone else.)
  • Net notifications - lets you save net info so that your phone will remind you when it's net time!  I personally use my phone's built in alarms for this, but you could do it this way as well.
  • Notes from the Author - Read what Nick has to say!
  • PSKReporter.info - lets you view the data from pskreporter within the app.
  • Part 97 - yes, its simply part 97.  But this is great, because technically we're supposed to have a copy of this in our "station."  You're covered, just in case the FCC shows up at your campsite while you are operating portable! (I know, this would probably never happen, but who knows - maybe you just want to review it before climbing into your sleeping bag at night...)
  • PigMac - lets you send customer command macros to your Piglet and connected radio.  Info on the piglet interface which gives you wireless rig control from the app is here
  • Pigtail - connections to a hardware device you can connect to your rig to get wireless rig control from the app.
  • Pigtail Tracker - combines features of the Pigtail with TNC and a map to show APRS data.
  • Podcasts - gives a list of some of the more popular ham radio podcasts - as a note, this list is currently out of date.
  • Q Signals - A handy reference when you are trying to remember the difference between QRN, QRM, and QSB OR if the other person says/sends "QSZ" and you're trying to decide if that's actually a thing (hint...it is...but saying it on phone would be goofy...)
  • QRP Spots - Handy link to QRPSPOTS.com for those of you that might like chasing QRPers.  (See the tool above if you don't know what QRP means!)
  • QRZ xml lookup - looks up callsigns and retrieves the operators information (in text format) from QRZ.com using XML.
  • QRZ.com lookup - displays the QRZ web page for the callsign you enter.
  • RST Explained - a quick reference chart explaining how RST is supposed to work.  It's a handy refresher in today's wam-bam-thank-you-ham 5-9 world. It's nice to be reminded of what real signal reports are:-)
  • Reverse Beacon Network - takes you to the reverse beacon network.  If you're not familiar, this is a slick interface that skims the airwaves listening for CQ calls in CW, and "spots" them automatically.  It's a slick way to see if your signal is getting out, or just to see who is calling CQ via Morse Code at any given time.
  • Ring the Phone - This just makes the sound of a ringing phone.  If you're talking to "that guy" you can hit this, and he'll hear a phone ringing in the background, to which you can say "gotta go!  phone's ringing!"
  • SOTA Watch - Takes you to the SOTA Watch web site.  Handy if you like chasing summits!
  • SWR calculator - Enter forward and reflected power to determine SWR, just in case you failed division in high school...
  • Six Addict - takes you to the Six Meter spotting network. If you like VHF dx this is handy.  It's also useful if you're operating portable because it can help you decide if its worth throwing up that 6 meter antenna, or if you should just stick to HF.
  • Solar Data - this gives you a text summary of the solar conditions from HamQSL.com
  • Temp Converter - Talking to that US ham who say's it's 90 degrees, and you instantly conjure up images of fire and brimstone before realizing that American's use that funny Fahrenheit stuff?  You can use this to convert it to the "real" temperature.  (Just another reminder to my fellow US operators that we're the weird ones here, not the other way around...) Oh, and yes, like the distance tool, this one works the other way around too.  And also shows you temperature in Kelvin - you know, just because.
  •  US Band Plan - This gives the band plan commonly used in the US, complete with the "gentlmen's agreements" about which sections of the band are commonly used for which modes, and calling.
  • US Third Party Op Agreements - This is a quick reference for which countries we have third party agreements with.  If you plan on ever having guest operators while portable this is a great reference to have, in case a dx station answers your guest operator's CQ - you can do a quick look to see if the guest operator can take the call, or if you need to grab the mic and take over. (I'm always intrigued about why we do and don't have agreements with certain countries...)
  • UTC Clock - What you see is what you get here.
  • Voice Macros - This would in theory let you use the app like a voice keyer, but at the time of this writing, this feature wasn't working on my phone.
  • WWV Prop Report - This gives you a text display of the most recent WWV propogation report and basic solar conditions.
  • Wavelength Calc - Entering the frequency gives you wavelengths.  This could be handy for cutting wire in the field, or just to use for any reason you see fit.
  • Weather - Gives basic weather forcast data for any entered zip code
  • Where Am I - uses the phone's GPS to determine Lat, Lon, state, city, and street address, of your current location. 
Wow.  Can't believe I'm finally done.  Sorry for how crazy long that was!  (I won't be offended if you didn't read the whole thing!)  

Summary

The hamlog app does a TON of stuff.  Before you spend a bunch of money on different apps, check this one out, because odds are, it's cheaper, and does whatever the "other" app does plus some!  Pretty much the only things this app doesn't do are give you a repeater directory, or give you an audio modem that you can use for digital modes.  With all of the stuff it does, and especially because of the "Create-A-Log" feature it is perfect for your POTA, WWFF, SOTA, IOTA, etc. operations!
Picture
11 Comments

Baitless Fishing

4/18/2017

2 Comments

 
post contains affiliate links
Picture
     I think nearly every ham has, at some point, compared calling CQ to fishing.  After a recent experiment, I'm going to extend that analogy and make the claim that sometimes calling is like fishing without any bait on the hook.  So where was I calling that felt like fishing with no bait?

National FM Simplex Calling Frequencies

     Yup - that's where.  Many of you probably aren't surprised by this.  146.52 and 446.000 both see varying levels of use around different areas of the country.  I personally have made some contacts during my travels after making calls on 146.52, but it was always very hit-or-miss.  I've never made a contact on 446.  Because of this, I wanted to do a small experiment to see what kind of luck I would have if I did some dedicated fishing. 
     A recent work trip took me to Columbus Ohio.  From my home, with stops for meals and bathroom breaks, this ends up being about an 8 hour drive.

     Knowing that I had this drive to make, I quickly came up with a plan.  Spend the entire drive monitoring both 146.52 and 446.000, AND calling every 10 minutes, to see how many answers I get.  I debated whether or not I wanted to make my plans known ahead of time on social media.  I ultimately decided that I wanted any responses I got to be "organic" and not because someone was specifically watching for me, so I just kept my lips sealed tight - until now!
     Bright and early on April 4th I pulled out of my driveway.  My first stop was close to my home where I filled up on gas, and turned on APRS (I was sharing my location and the frequencies I was monitoring every 5 minutes using the PocketPacket app).  I also asked Siri to set an alarm to go off every 10 minutes, and shared a post to Instagram showing my (rather large) coffee mug.  It was 3:30am after all.....
     With these house-keeping items taken care of, I turned on the two radios that would be serving me for the day.  To monitor 446.000 I used my older Kenwood TK-840 commercial rig, which runs about 20 watts into an antenna mounted on the trunk (NMO mount - with an actual hole drilled!).  For 146.52 I used my Yeasu 857d, running 50 watts into the vertical that is mounted top dead center on my car (also an NMO mount, with an actual hole!)
     I put out my first call on both frequencies (one right after the other) as soon as I turned the radios on.  It went something like this:
This is N3VEM. November Three Victor Echo Mike listening on (insert frequency).  N3VEM mobile and listening.
      Any responses to my first call?  Nope!  It was 3:30 am after all - so I wasn't really expecting to drum up any business just yet.  I started driving, and repeated my call every 10 minutes.  After a couple hours of this, I still hadn't gotten any answers.  Twice - once at around 4:30 am and again at around 6:40 am, I thought I heard "something" break squelch on 446 after my call, but that could have just as easily been random interference.
     At 7:00 am I started to perk up a little bit.  I was getting into the "morning drive" time of day, and figured that I might have a better chance of getting an answer to one of my calls, so I kept at it.
     So, enough beating around the bush...how many answers do you think I got during my drive?  If you're keeping track, with traffic, and a couple stops here and there, I actually took over 8 hours to make the drive.  I also made some "extra" calls when I saw cars that looked "hammy" - at one point, I even ended up behind a car that had as many antenna's on it as mine does (4, unless you count the factory radio, then its 5.)  All in all, I called over 100 times between the two frequencies.  Total Answers....... 

​0

     You read that correctly.  I spent over 8 hours, calling every 10 minutes, on two different frequencies, for a total of over 100 calls, and didn't get a single answer.  So what does that say about the state of ham radio?  Here's where a lot of naysayers would proclaim the ultimate doom of ham radio.  For me, here's what I think it says about the state of ham radio:  Absolutely Nothing!
     It's easy for us to get down on ourselves when we don't get answers to calls, but if we stop to consider it, there are so many factors that go into "getting an answer" that we should never make these wild speculations.  If it was a scientific experiment we would just say there are too many variables.  There could be lots of other reasons I didn't get an answer:
  • At least half of my drive was at a time when most people are still asleep!
  • Large portions of my drive were in very rural area's.  It was more like fishing without bait - in puddles.
  • There's always that whole propagation thing - it's hit or miss depending on the day, time, weather, etc.
     So when it seems like "the bands area dead" - don't go all doom and gloom!  Keeping calling, keep having fun, and learn from what you're doing, no matter what the outcome actually is!
     As a final parting thought, yesterday I was traveling for work, and put out a single call, when I was passing a major city in the Northeast.  I got an answer, and had a nice chat - it just goes to show that if you want to catch fish, at least go where the fish are!

In Other Business

     When life gets busy, my tendency is to use my small amounts of free time to do stuff, instead of writing about the stuff.  I have some time in the next couple weeks to write updates again, so I'll be updating you on my recent "doings" soon:
  • I've collected about a dozen ideas for my "crowd-sourced project" that I'll have everyone vote on soon!
  • I've made some progress on the shack project in my basement - if you follow me on Instagram you've seen a couple pictures!
  • I've made progress on my "secret project" that everyone will get to see when it is complete!
  • I've done 2 WWFF activations that I'll update everyone one - Buck Creek State Park and Morristown National Historical Park.
Bye for now!
2 Comments

Can I buy You a License?

2/24/2017

0 Comments

 
Post contains affiliate links
     Believe it or not - it can be that simple.....What radio license can you just run out buy?  GMRS.  
     GMRS (FCC Part 95 Subpart A) is a radio service intended primarily for family communications (although there are some older businesses grandfathered in.)  In case you don't know about GMRS, it is basically a service where you are required to be licensed, but the only stipulations for getting the license are having about $60 available to mail to the FCC, being a person (not a business, government, or representative of one), and being 18.  Once you've done that, you, and anyone you're related too, can use your license.  
     GMRS is very similar to the little blister-pack radios you can buy at the chain stores.  Those radio's are normally part of the Family Radio Service, or FRS.  There are some shared frequencies between FRS and GMRS but power levels and allowable antenna types vary.  The biggest difference is, that you can use more power, larger antenna's, setup and use repeaters, etc. with GMRS.  There are a limited number of frequencies (specific channels) that you can use, but that shouldn't be a hurdle.  There are even commercial UHF mobile and HT radios out there that are type accepted for the GMRS service, so if you can get your hands on them, you can actaully put together a decent little station.
     So why am I writing about GMRS?  Because of my daughter!  She has been expressing a lot of interest in my ham radio activities, so I decided that setting up a couple GMRS radio's would be a good way for her to be able to "practice" for the big show!  The idea was to put 1 radio in the house, and 1 in my car, so that when I'm around town, we can chat, without the need for me to be standing over her shoulder.  With that thought in mind, this saga began around christmas time - and what a saga it turned out to be...

Who can use the GMRS license?  Pretty much anyone who would show up at your family reunion.....
(1) Licensee;
(2) Licensee's spouse;
(3) Licensee's children, grandchildren, stepchildren;
(4) Licensee's parents, grandparents, stepparents;
(5) Licensee's brothers, sisters;
(6) Licensee's aunts, uncles, nieces, nephews; and
(7) Licensee's in-laws.

     We ordered some Kenwood TK-840 commercial radio's online just before christmas.  Based on the searching I did, these radio's were type accepted for GMRS. Getting things off ebay, you never know what to expect - and this proved to be no different.  The radio's came, and the first thing I noticed was that there were F connectors, instead of anything normally used for radio, on the coax pigtails.  To make things even more interesting, they weren't even really attached.  It was almost like someone had gone to RadioShack, bought some connectors, and just kind of jammed them onto the end of the coax.  Whoever did it wasn't even good at applying electrical tape...
     Luckily, the coax itself seemed to be properly connected, so I figured we would just make putting connectors on part of the project as my daughter and I got these radio's ready to go (her first lesson in solder was about iron safety!)  Next came the power leads.  Again, it wasn't technically the proper cord, but I found out what it was that had been used, and looked up the current handling capacity, and it was rated for enough current to handle what these little radio's would do, so we added some powerpole connectors.
Picture
     With the powerpole connectors on (this goes WAAAAY easier with the proper crimper!!!), and proper RF connectors in place, I hooked the radio's up to a dummy load, through a meter, just to make sure they worked.  Everything seemed to be in order - so far so good!
Picture
     The next step was to get my hands on the programming software for these rigs.  That software, which was made by Kenwood, is called KPG25D.  It isn't officially available any longer, but through the magic of the internet most people can get ahold of it fairly simply.  Writing out all the details of how to use the software would take up a lot of space, so I'll just leave it at this - you'll need this stuff, which you can find online if you search around a bit:
  • The programming manual (or you can just sort of figure it out as you go)
  • The KPG25D programming software
  • This is DOS software, so another catch is that you either need to get your hands on an old computer, or use a DOS emulator - I used DosBox 
  • A USB to serial converter cable (if your computer doesn't have a serial port)
  • The Kenwood Programming cable that matches the radio

     All this does take some finagling, but Google helped me, so you can either search around like I did, or contact me and i'll help answer any questions you might have!
     Armed with all the stuff above, we programmed the GMRS frequencies into the radio's, and fired them up for a test:
Picture
     For the astute folks out there, you'll notice that the power meter isn't budging - for some reason these radio's, which worked fine before I reprogrammed them, now won't transmit!  I poured through lots of notes, and eventually realized that I had gotten version "2" of these radio's which only work on the commercial portions of UHF, and are now basically worthless because they are wideband, so they can't be used in commercial service any longer, and they won't transmit anywhere in the amature or GMRS bands.  Grrrrr.....no wonder they were so cheap.  (Anybody want to buy 3 worthless radios?  If not I'll hold on to them - maybe I can use them as exciters when I start building microwave transverters....)
So, with that lesson learned the hard way, we went back to ebay and paid just a bit more. This got us 2 additional radios that were the proper version. While we waited for them to arrive we (my daughter and I) spent a couple hours one evening passing the time by building her very first antenna, tuned specifically for the GMRS frequencies:
Picture
     As soon as the new radio's arrived, we opened them up, and thanked our lucky stars that these were in much better shape (a Ham must have had them!) - all we had to do was add powerpoles to the power leads, and we were ready to start programming radio's.  After we had them programmed, we connected the antenna to my daughter's radio, and a dummy load to mine (P.S, a dummy load will work as an antenna over short distances....sometimes even long distances as many will attest to!)  We then had a short test conversation from one end of the kitchen to the other - awesome!  Working Radio's!
     Next, we had to decide where to install my little helpers radio.  Putting radio's around the house can be an interesting exercise, because the install location needs to meet the criteria of everyone who might be involved - in this case, the criteria was:
  • Somewhere near power so I don't have to run a long cord
  • Somewhere easily accessible to my daughter
  • Somewhere that she will be within earshot of adult when she's using it
  • Somewhere that it isn't seen during day-to-day living
  • Somewhere that we can put her small antenna now, but eventually run a line to a rooftop antenna
     The spot that met all these requirements was the cabinet that I just recently built into the entryway from our garage - it has power in it, because we wanted to be able to charge phones and such, it has shelves and hooks for our little ones' things, it's pretty central in the house (so when little operator is using it she'll be heard), AND it is normally behind closed doors, so no one has to see it that doesn't want too.

     With the little one's radio installed, it was time to make some new holes in my car!  I started by making up some brackets to mount the radio.  Because the surface where I was going to put this wasn't level, I needed one side to stand out further than the other, so custom making a bracket from aluminum angle was the word of the day.  While making those brackets, and marking the mounting locations for everything, I did my normal marking method - I covered the area with blue painters tape, and made all my measurements and marks on it.  After drilling away, I peeled the tape back off.  I use this same tape method when I drill a hole for antenna's as well.  this does 2 things - it makes it easy to mark and measure where to drill without leaving any permanent markings, but it also servers to "catch" all the little metal shavings from the drilling, so they don't lie on the finish of the car and cause rust spots.  
     Finally, after a couple months, this project is complete, and my daughter can talk to me while I'm tooling around town.  If you happen to be on the GMRS bandwagon and you ever hear a little girl and her dad talking about random nonsense in the Lancaster, PA area, and using the callsign WQYQ271, that's us!
0 Comments
<<Previous

    Categories

    All
    Antenna
    Cw
    Digital-modes
    Flying-with-gear
    Home QTH
    Miscellaneous
    Mobile
    Operating Events
    Portable
    POTA
    Shack Build
    Technical


    - N3VEM -

         Welcome to my Ham Radio Blog!  This blog was started primarily to share my two concurrent shack builds - my mobile station and my home station.  Over time, this has grown to include sharing about my operations, and general radio-related thoughts that I have as a newer operator.  
         
    ​Enjoy!

    RSS Feed


    Picture
    POTA!

    Picture
    Proving that hams do indeed still build stuff!

    Picture
    100 Watts and Wire is an awesome community, based around an excellent podcast. 

    Archives

    September 2020
    July 2020
    January 2020
    September 2019
    August 2019
    July 2019
    June 2019
    May 2019
    March 2019
    January 2019
    December 2018
    November 2018
    October 2018
    September 2018
    August 2018
    July 2018
    June 2018
    May 2018
    April 2018
    March 2018
    February 2018
    January 2018
    December 2017
    November 2017
    October 2017
    September 2017
    August 2017
    July 2017
    June 2017
    May 2017
    April 2017
    March 2017
    February 2017
    January 2017
    December 2016
    November 2016
    October 2016
    September 2016
    August 2016
    July 2016
    June 2016
    May 2016
    April 2016
    March 2016
    February 2016
    January 2016
    December 2015
    November 2015


Picture
Copyright © 2015
 Vance Martin is a participant in the Amazon Services LLC Associates Program, an affiliate advertising program designed to provide a means for sites to earn advertising fees by advertising and linking to amazon.com.