NOVEMBER 3 VICTOR ECHO MIKE
  • Blog
  • Events and Activations
  • Diversions
  • About
  • Gallery
  • Contact
  • Links
  • Subscribe
  • Search
  • Blog
  • Events and Activations
  • Diversions
  • About
  • Gallery
  • Contact
  • Links
  • Subscribe
  • Search
NOVEMBER 3 VICTOR ECHO MIKE

ham radio Projects and musings from a (Relatively) new operator

Curiouser and Curiouser

8/31/2017

0 Comments

 
Post Contains Affiliate Links
...she was so much suprised, that for the moment she quite forgot how to speak good English...
-Alice in Wonderland

I can't really say I was surprised this week, but I have found myself being "curiouser and curiouser" about ham radio satellites!

It seems like everyone is talking sats and amsat at the moment. I follow several folks on Twitter who are into satellites, the crew at ICQ Podcast keeps mentioning them, and I just read through the Winter Field Day rules again, and was looking at those satellite bonus points...
Picture
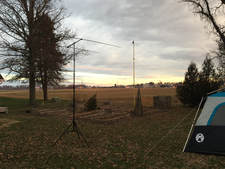
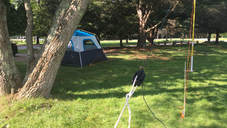
To see if this was an itch I wanted to scratch I downloaded GoSatWatch at the recommendation of NJ4Y and KX9X. They were right- this is a great app! Using it I went and stood in the field behind my house (in the mud...) And listened for the first time to a satellite pass as SO-50 went overhead. Think about it - signals from space! How is that not freekin' awesome! I know, most people aren't impressed because they think of satellites as a way to get their TV, but none of them can talk back to the satellite, so I still think it's awesome!

Picture
GoSatWatch has a slick night time mode so you don't kill your night vision if you're chasing sats in the dark!
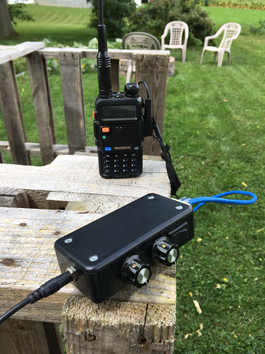
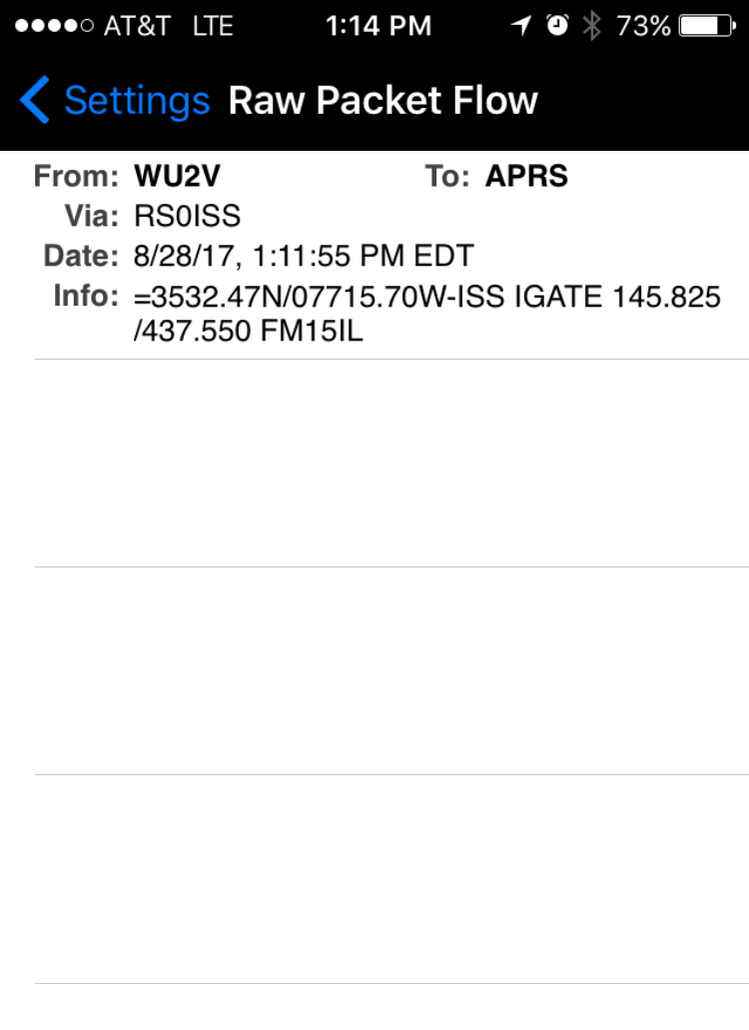
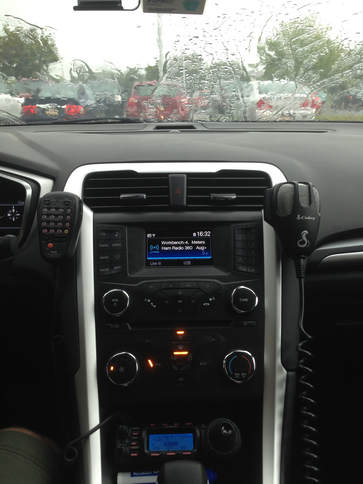
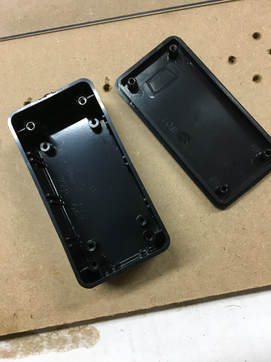
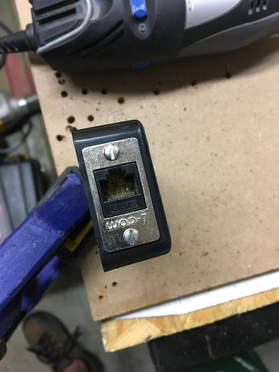
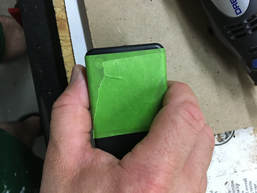
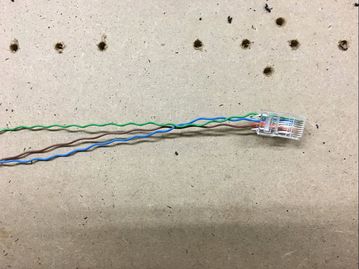
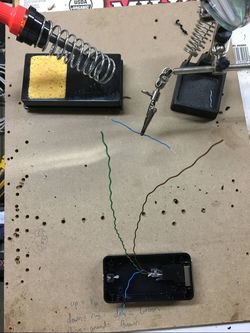
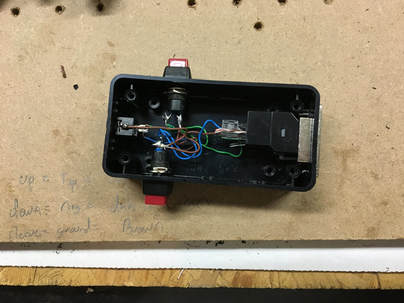
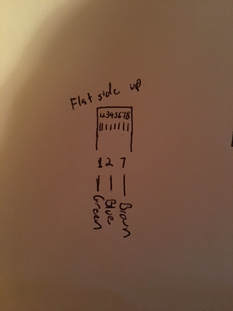
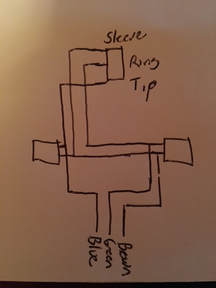
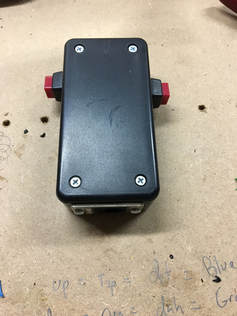
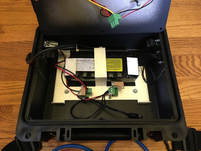
In addition to listening to SO-50 passes, I also listened to the ISS pass a couple times during last several days. For one of those passes I actually hooked my HT up to my AnnaLink Interface (Remember when I made that? Whodathunk it would be useful for satellite stuff too!) I then used the audio modem in the PocketPacket app to snag a packet sent through the digipeater on the ISS. Fun stuff!
Picture
Picture
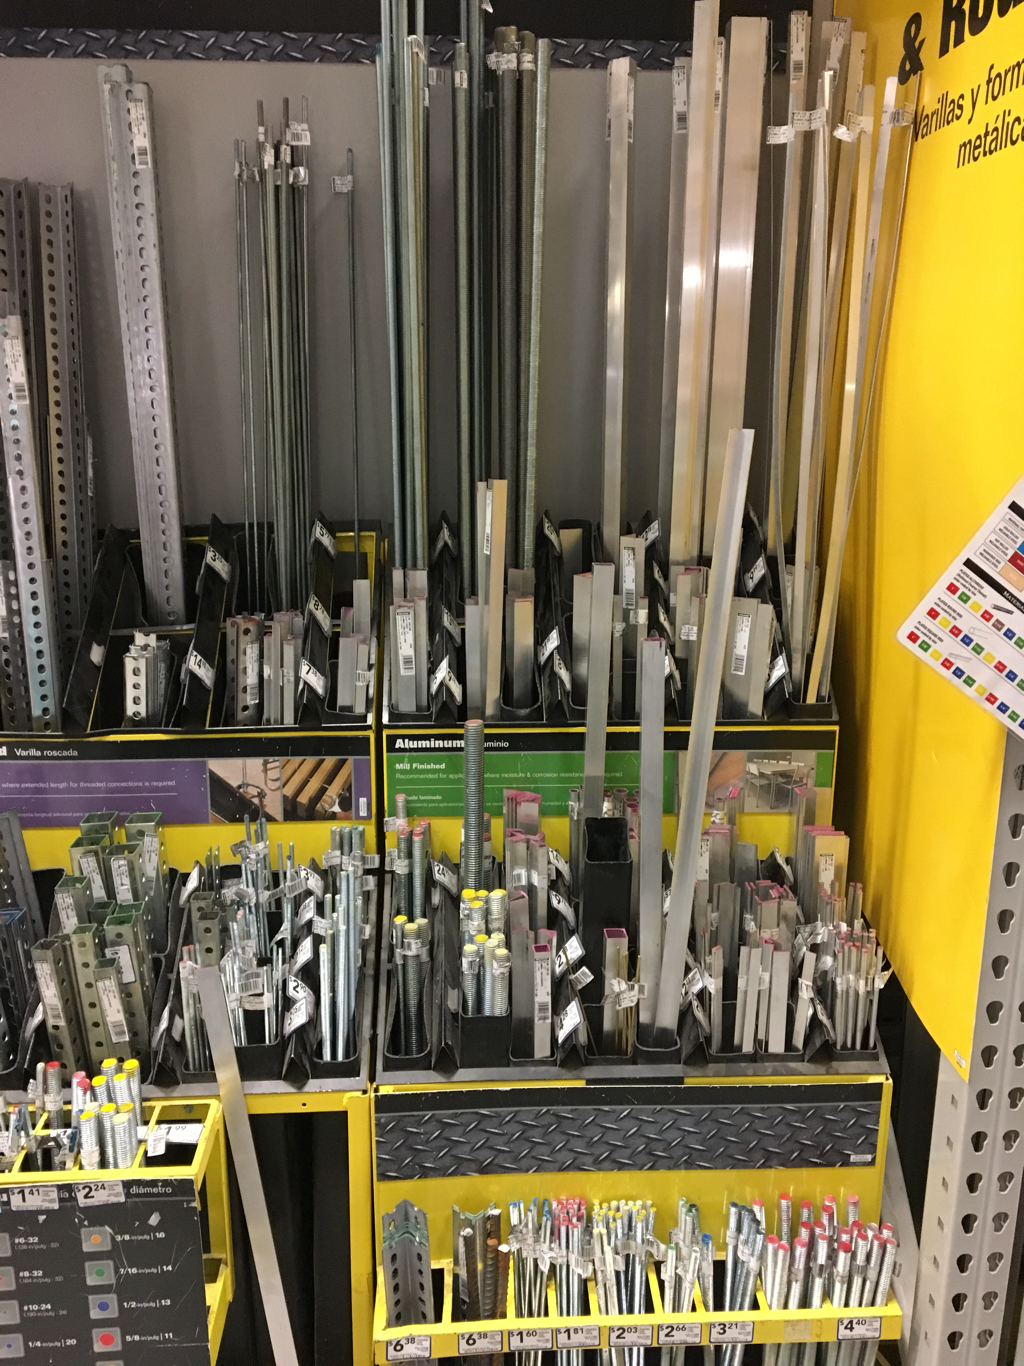
Anyway, I think I have a new project in the queue, to add to all the other ones - building an antenna for satellite work (you should know me by now - I wouldn't be happy just buying one!) So, once I have the time to tackle it, I'll share here. I suspect however, that I'll end up using scraps from my garage, and maybe some of the stuff from this section of Lowe's:
Picture

Bye for now!
0 Comments

WFD2017 Detailed Results

8/25/2017

2 Comments

 
Picture
If you're anything like me you may have missed the fact that the Winter Field Day 2017 results were posted a while back.  The website breaks down the entrants into the 3 main categories for posting results:  Indoor, Home, and Outdoors.  To see those results check out the Winter Field Day 2017 Results Page.

Based on those categories,  I was in the "Outdoor" group, and I ended up in spot 77 out of 182.  Last year the categories were done slightly differently, and in the group I was in, I was about 33 out of 40.  I'd say I improved, considering that in the new groupings my score was up against all the multi-ops etc!   I was curious though, how I fared compared to the same group I was in last year (Single Operator, Outdoor) so I grabbed the data and worked some pivot magic with Excel.  In just the 1O group I was 41 out of 118 - a great improvement if you ask me!
 Anyway, enough about me - it dawned on me that others might be interested in some more detailed groupings, results, and data evaluation.  With that in mind, here are the results in some of the breakdowns that people might be interested in.  At the end of this post you can also find the Excel file that I used to generate these results, in case you are data nerd too and want to play around with it.  Lastly, I do have a typo on some of these, but it is just that - a typo, it doesn't actually change the scores or rankings, so I'm not going to bother fixing it, since it would take forever (I'm not even going to tell you what it is - we'll see if you catch it ;-) Enjoy!

Outdoor Categories

1O


2O


3O


4O


6O


Indoor Categories

1I


2I


3I


4I


5I


6I


7I


8I


Home Categories

1H


2H


3H


4H


6H


Results by Power Category

QRP Outdoor


QRP Indoor


QRP Home


100 Watts Outdoor


100 Watts Indoor


100 Watts Home


High Power Outdoor


High Power Indoor


High Power Home


Other Categories - just for fun!

All Participants by # of Contacts


All Participants by CW contacts


All Participants by Digital Contacts


Thats all folks!

Or, at least that's all the categories that I broke down - if you're a data nerd, you can probably think of even more ways to slice and dice this, but I figured this would cover the majority of what most people would want to see!  If you want to do some of your own slicing and dicing, the files below are free for the taking:  The first is a zip file of the PDF's of all of the tables above, and the second is the Microsoft Excel file that has the data and pivot table in it that you can feel free to play around with..enjoy!
wfd2017_results_charts.zip
File Size: 6693 kb
File Type: zip
Download File

wfd2017_results_table.xlsx
File Size: 92 kb
File Type: xlsx
Download File

2 Comments

CodeLink

8/21/2017

0 Comments

 
Post contains affiliate links
I made something that I want to share with you!

If you've stumbled on my blog, or ever talked to me on the air, you probably know that I do quite a bit of portable and mobile operating (actually, because of the current state of my shack project, ALL of my operating is portable and mobile at the moment.) 
Picture
I enjoy operating in this way quite a bit, because I travel regularly for work. Recently, I learned enough Morse Code to start making contacts on the air with CW in addition to SSB.  This works great when I'm portable in my tent, but I recently had a couple activations that I had to do from the car.  I didn't know CW when I first did my mobile install, and I didn't think I'd ever have a reason to do CW from the drivers seat, so I didn't plan for it.  Now that I'd like to be able to, I started making plans.  At first I thought I would just run a cable from the radio body in the trunk, to the panel that I have my remote head and mic jack mounted in.

Picture

As I thought about it however, I really didn't feel like removing body panels, rolling back carpet, and all that business, so I didn't get around to it.  While I was stewing on this, I got to thinking about the times I did do CW from the front seat.  The Yeasu 857d (and probably the other Yeasu rigs as well) has a feature called "MICKEY."  This feature lets you do Morse Code by using the mic as a weird sort of paddle.  With this feature turned on, the down button acts like the dah, and the up button acts like the dit.  It works, but to be honest it is a pain, so I started avoiding it.  

The realization I had was this - those are just buttons.  I can probably make an interface that plugs into the mic jack, and just uses the lines for those buttons, so that I can plug a key into the mic jack.  The wheels started spinning.
So, first I needed a pinout of the mic jack. Luckily a google image search for "Yeasu 857d mic pinout" brought up just what I needed.  If you look at the jack, flat side up, the connections are, from left to right:
  • Down
  • Up
  • +5 v
  • Mic Ground
  • Mic
  • PTT
  • Ground
  • Fast
With this information it seemed obvious to me that all I needed to do was make something that went to the appropriate pins.  I also wanted something that I could keep in my glove box, so that I could work CW on a moments notice.  With that goal, here's what I came up with:
Picture
I started with a standard 4x2x1 project enclosure. The parts that will go in here would fit in something smaller, but I needed something that fit the hand nicely - you'll see why in a moment.
Picture
Because modern radios use an RJ45 style plug, I decided to put an RJ45 jack in the end of the interface, so that I could connect with a standard network cable, or with the mic cord that comes with the radio. I put a piece of painters tape on the end so I could measure and mark for my cut.
Picture
After a few zips with the Dremel tool and a couple different bits, the jack fit nicely into the end of the box. They make jacks with the wires already attached on the back, but I had a pass-through jack, so that's what I used.
Picture
I used my tap set to drill holes, and then carefully cut 4-40 threads right into the plastic, so that I could use screws to hold the jack in place. Don't over-tighten when screwing into plastic!
Picture
I put more tape around the box, and marked for a hole in the end for a 1/8" stereo jack, and holes on either side for buttons. You'll find out shortly what the buttons are for...
Picture
Next, I completely stripped a section of network cable. Referencing back to the mic pinout, I only needed 3 of the wires, so I picked 3 colors I liked - I put the green wire at the first pin, which would go to the "down/dah" button, I put the blue wire to the second pin, which would go to the "up / dit" button, and I put the brown wire to the 7th pin, which would be the ground. The rest of the wires I just jammed in as spacers to make it easier to slide everything into place in the plug, and then I cut them off after crimping the pins down.
Picture
Next, it was time to start stripping and tinning some wires. Secret admission here - don't tell! - Sometimes if I'm in the garage and not near water, I spit on my sponge to moisten it. Who does that?!
Picture
Next it was time to put in the jack and switches, and solder them up! The buttons are offset so that when holding the box, one lands nicely under my thumb, and one lands nicely under my pointer. To pick the spots I actually just held the box they way I would, and marked where my fingers hit. The pointer button got the green wire and the brown wire, the thumb button got the blue wire and a jumper from the brown wire on the other button. The jack got a jumper from the brown wire to the sleeve connection, from the blue wire to the tip connection, and from the green wire to the ring connection.
Picture
This is just a quick sketch of how I wired the plug that would be on the inside of the box.
Picture
This is a quick sketch of how I wired the switches and the stereo jack.
Picture
Ready for it's lid!
Picture
And there it is - my "CodeLink" ready for action!

Now, to make this work, the settings on the radio are important, because I am relying on the "Mickey" feature.  This means that I need to have these setting correct:
  • Multifunction Row J - "BK" needs to be on (this basically tells the radio to actually transmit on CW), and "KYR" needs to be on (this tells the radio to use the built in keyer)
  • Menu Item 26 - needs to be set to "Mickey"
  • Menu Item 30 - sets the keyer speed (keep this to the speed you can copy)
  • Menu Item 59 - needs to be set to "normal" (this selects the type of mic connected)
So, with the interface made, and the settings chosen, it's time to show you how it works!  Check out this short video I made to see it in action:
 
To wrap up, here's the parts list with links if you want to make your own.  Several of these things come in quantities greater than you'll need, but it never hurts to have spares, or build up your supply!
Project Box 4x2x1
RJ45 Feed-through
2 Buttons
Stereo Jack
RJ45 plug
network cable
​
And, if you don't have these tools already, you might want to check them out as well.  I used mine in this project, and in A LOT of other projects as well:
RJ45/RJ11 crimp tool
​Dremel Tool

Bye for now!
0 Comments

Actimation Report

8/20/2017

2 Comments

 
No, that's not a typo...I actimated a park!
​ My daughter is now 6, but it wasn't that long ago that she was still trying out new words. The first time I heard her try to say "activate" I had just picked up my phone, and had accidentally held the home button down long enough to turn on Siri. My daughter promptly said "uh oh! You actimated Siri!" To this day, in our house we still use the word "actimate" quite regularly.
Anyway, enough about the nonsense that goes on in my house - I'm actually writing to update you on my second trip to Mashamoquet Brook State Park (You can read about the first trip here.)
Picture
This time around, I reserved the one camp site they have that has a power hook-up. Most of the camp-grounds I've gone to that had RV hookups had either 50 or 30 amp connections, plus a standard 15 or 20 amp outlet. I realized the first night of this trip however, that this site only has a 30 amp connection, so I ended up running off battery power for the first night anyway.
In spite of the power mishap, I had a good first night - my very first contact was actually with Jeff, KB3ZUK. Jeff is the North American Continental Representative, in addition to being the log manager for the call district I live in, for the WWFF program. It was fun to actually get a contact on the air with Jeff, after all these months of e-mails and such as I sent in my "actimation" logs!

After my contact with Jeff, I found a frequency of my own, and quickly racked up enough contacts to bring my total for this park past the 44 mark (the US awards only require 10 per park, but I like to shoot for 44 because that's where most of.the international awards kick in.)
Before evening number 2, I stopped at an RV center and picked up a couple adapters so that I could use the AC power at the campground:
in addition to this adapter, I also got one to go from 50 amp to 30 amp connections. This way I'm now covered for using AC power no matter what type of connection a place has. Of course, there is always the option to use batteries in places with no AC, but if it's available, why not make life easy?

With an easy power solution for the second evening, I was able to dive right in to making more contacts.  With the pressure off, I started out in CW.  This was a particularly exciting one for me, not because I made a lot of contacts, but because I upped my speed a little bit.  I leaned CW using the PC program Just Learn Morse Code, which uses the Koch/Farnsworth method.  As I practice I've been using faster character speeds, and faster word speeds, but on the air I've been hesitant, so prior to now I was keeping my keyer set at 5 wpm.  This time I decided to bump it up to 7 wpm, and I found it was actually easier for me to copy stations at this faster speed, because it's closer to what I've been practicing.  After  a few more like this I just might have to bump the speed up to 10 wpm and have a go!

Anyway, with plenty of SSB contacts, and a few more CW contacts under my belt, I was in good spirits as I packed up and headed out.  I don't know what park I'll end up at next, but I hope I have just as much fun as I did at Mashamoquet!

As a final note, if any of you are CW newbies like me (or seasoned pros for that matter) check out the ditdit.fm podcast - it's a new one, all about CW.  For me it has been a good resource for tips and hints from the CW pros.  It's also nice to hear the top notch operators talk about their experiences when they were in my shoes - great stuff!
Picture
2 Comments

Crowd-Sourced Project: Brainstorming Results

8/10/2017

0 Comments

 
If this is the first you are stumbling upon my "Crowd-Sourced" project series, feel free to go back to part 1 to come up to speed.  For the less patient, here's the "what you missed last time" version:
Picture
One of the pieces of equipment that my work revolves around comes in these neat little boxes.  We had a couple that were getting scrapped, so I nabbed one of them, and gutted it down to the box, and the battery that was built into it.  I figured I would use it as a ham-radio project, but since I was undecided exactly what I wanted to build, I started putting it up to a series of votes.  Through that voting, it was decided that I should build a small/portable HF station into the box.  In the most recent installment I asked for feedback on what radio architecture to use, whether I should do a kit, build from plans, or use a pre-built radio, and whether or not I should try to squeeze a computer into the package.

Since you are probably most interested in the results, I'll share those first, but please stick around after that, because in the voting process, there were, as C+C Music Factory says, some "Things That Make You Go Hmmmm"

What Architecture of radio?

With this, we were deciding whether to go the route of an SDR radio, or something based in hardware.  I must admit that the results here surprised me, but the overwhelming majority - 70% - voted to go with a "traditional" architecture.

If a Traditional Architecture is chosen, should I still try to squeeze in a small form-factor comptuer?

This was a resounding yes, 60% of the vote.

If an SDR Architecture is chosen, should we go with a computer dependent, or a computer free option.

Since going the SDR route wasn't chosen, this question is no longer applicable, but just for fun, 55% said to use a computer, 35% said to go computer free, and 10% didn't care.

What should I use as the "Base" for the radio?

With this question, I was basically deciding if I should do a kit-built radio, build something from scratch/plans, or just buy an off-the-shelf radio that's ready to go.  This category did not have a clear winner, with 35% voting to buy something finished, 30% voting to build from a kit, and 30% voting to build from scratch/plans, and 5% that didn't have an opinion.  

Summary of the Vote

I did ask for comments along with the votes, and many individuals had input that I'll put into the next round of planning as I share the next steps.  For now though, the results of this vote, and the prior votes, bring us to this point:

I'm going to be building a small HF station into this box, and powering it from the existing battery.  The station will be based on a traditional architecture (non-SDR), with a small form-factor computer included.  Because the final vote was so close, the radio itself might be off-the-shelf, a kit, or built from plans.  

Choosing the actual radio will be what we vote on in the next installment.  For that, I will be using the input from everyone that gave it, along with some research on my own.  I will also narrow down the options to things that are feasible - some of the suggestions, while great, were either too physically large for the box, or are out of the range of what I'm willing to spend for this project.

What about those things that make you go hmmmm?

I hope you stuck around this long, because I think there are some good educational nuggets in here.  
  • It seems like there is a bit of "whats in the black box?" going on in our hobby right now, and there are still quite a few individuals that don't really know what is "under the hood."  Many people have speculated on this, but for me, there is a some proof in the pudding because a number of the votes for a "traditional" architecture included recommendations for radios and/or kits that were software defined.  The same thing happened several times the other way around as well.  If you're not familiar with SDR, I'd recommend starting with the ARRL's information.
  • I think even for those that know what SDR is, there are still some misconceptions.  As least one person in their comments said that if I go SDR, I must have a computer (they referred to the Flex Radio series). It probably bears stating that being connected to a computer isn't what makes a radio software defined - processing in software what has traditionally been done in hardware (mixers, filters, modulators, etc.) is what makes a radio software defined.  All of the software work can be (and is often) done on-board.  There are actually several options, both kit and off-the-shelf, that are software defined radio's that do not require a computer.  The easiest way to think of it is by picturing it as the radio with a very tiny computer built right in, so that you have a single-board unit with everything in one small package.
  • Just an interesting observation, with SDR marching to the forefront, and being what most radio's in the future will probably be, I'm surprised there weren't more votes for this route.  This is a good lesson though, in the fact that what we assume can often be quite different from what the "majority" thinks.
  • I also had an interesting observation confirming something in human behavior.  I've known from the start that some of my blog posts are probably "too long" because most of us just skim things and move on. Many of the voters haven't been with us from the start, and just skimmed and voted without going back to catch up.  I know this, because there were quite a few comments suggesting things that those of you who have been along from the start voted out.  There were also quite a few suggestions for things that were way too large for the box in question, or were downright silly.  No hard feelings - I do it too - it's just interesting to observe, and that's why I have to take some time between posts in this series to filter through everything.
  • We often hear the more seasoned hams complaining that no one builds anything anymore.  I think this proves that wrong, because while the vote was a dead heat between the 3 options, another way of looking at it was that only 35% chose an off-the-shelf option, while 60% chose a more home-brew option (the tie at 30% each for build from plans vs. build from kit.)  George and Jeremy (KJ6VU and KF7IJZ did their forum in Dayton on this topic)
That's all I have for now folks!  Sometime in the near future I'll have the next part in this series ready to go, and we'll decide on things like which radio and which computer to use!
Back to Part 5
Continue to Part 7
Back to Part 1
0 Comments
<<Previous

    Categories

    All
    Antenna
    Cw
    Digital-modes
    Flying-with-gear
    Home QTH
    Miscellaneous
    Mobile
    Operating Events
    Portable
    POTA
    Shack Build
    Technical


    - N3VEM -

         Welcome to my Ham Radio Blog!  This blog was started primarily to share my two concurrent shack builds - my mobile station and my home station.  Over time, this has grown to include sharing about my operations, and general radio-related thoughts that I have as a newer operator.  
         
    ​Enjoy!

    RSS Feed


    Picture
    POTA!

    Picture
    Proving that hams do indeed still build stuff!

    Picture
    100 Watts and Wire is an awesome community, based around an excellent podcast. 

    Archives

    September 2020
    July 2020
    January 2020
    September 2019
    August 2019
    July 2019
    June 2019
    May 2019
    March 2019
    January 2019
    December 2018
    November 2018
    October 2018
    September 2018
    August 2018
    July 2018
    June 2018
    May 2018
    April 2018
    March 2018
    February 2018
    January 2018
    December 2017
    November 2017
    October 2017
    September 2017
    August 2017
    July 2017
    June 2017
    May 2017
    April 2017
    March 2017
    February 2017
    January 2017
    December 2016
    November 2016
    October 2016
    September 2016
    August 2016
    July 2016
    June 2016
    May 2016
    April 2016
    March 2016
    February 2016
    January 2016
    December 2015
    November 2015


Picture
Copyright © 2015
 Vance Martin is a participant in the Amazon Services LLC Associates Program, an affiliate advertising program designed to provide a means for sites to earn advertising fees by advertising and linking to amazon.com.