NOVEMBER 3 VICTOR ECHO MIKE
  • Blog
  • Events and Activations
  • Diversions
  • About
  • Gallery
  • Contact
  • Links
  • Subscribe
  • Search
  • Blog
  • Events and Activations
  • Diversions
  • About
  • Gallery
  • Contact
  • Links
  • Subscribe
  • Search
NOVEMBER 3 VICTOR ECHO MIKE

ham radio Projects and musings from a (Relatively) new operator

Another Trip to the Roof

9/27/2017

0 Comments

 
Post Contains Affiliate Links     
Picture
     My temporary random-wire antenna and 9:1 unun have already been taken out of service.  Cheer up though - they are out of service because I was so pleased with how they were working, I decided to make a more permanent version!

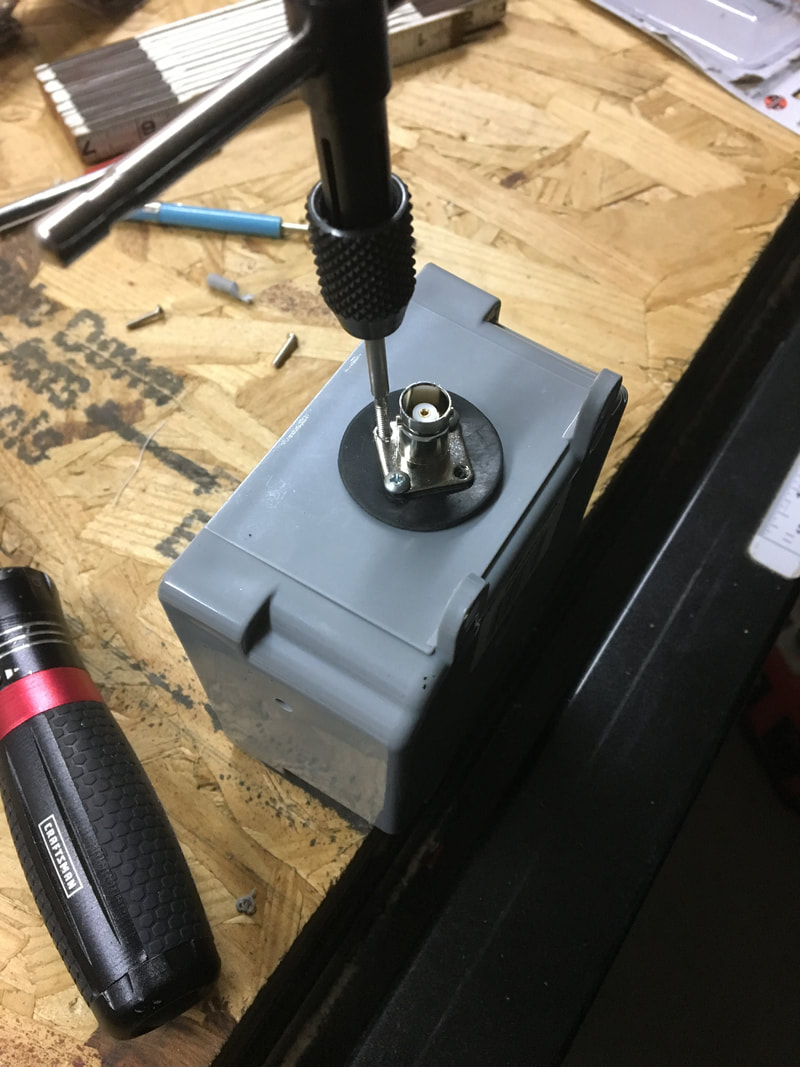
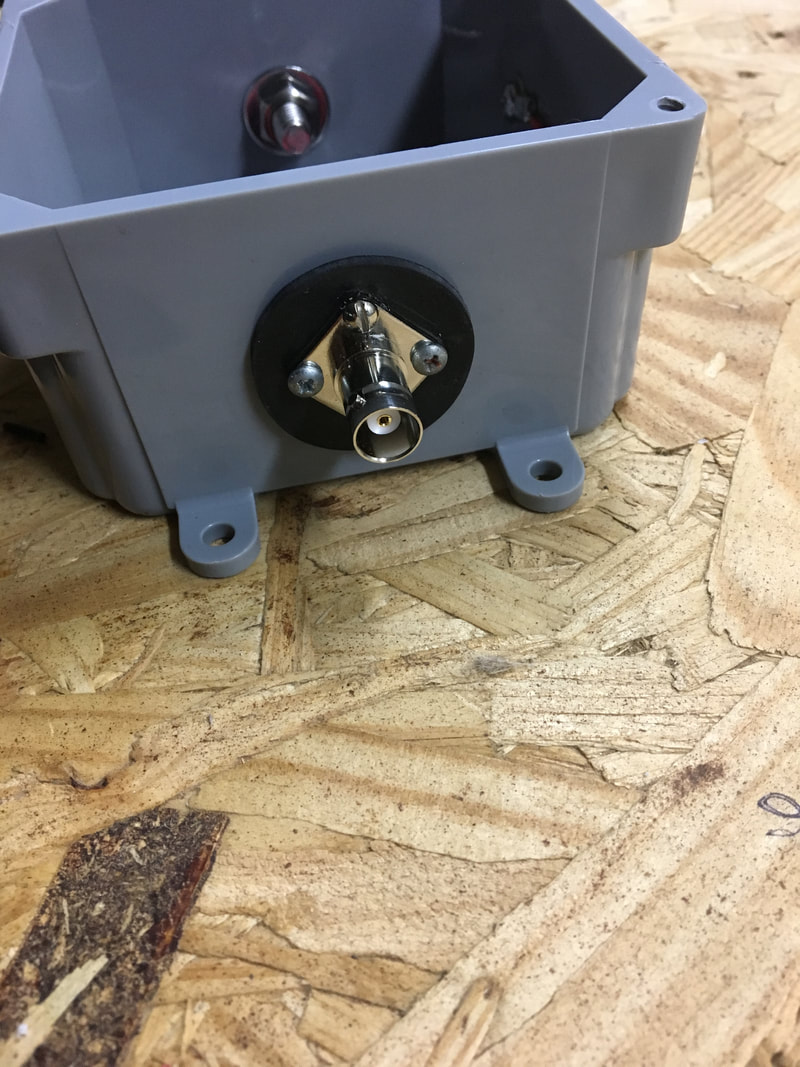
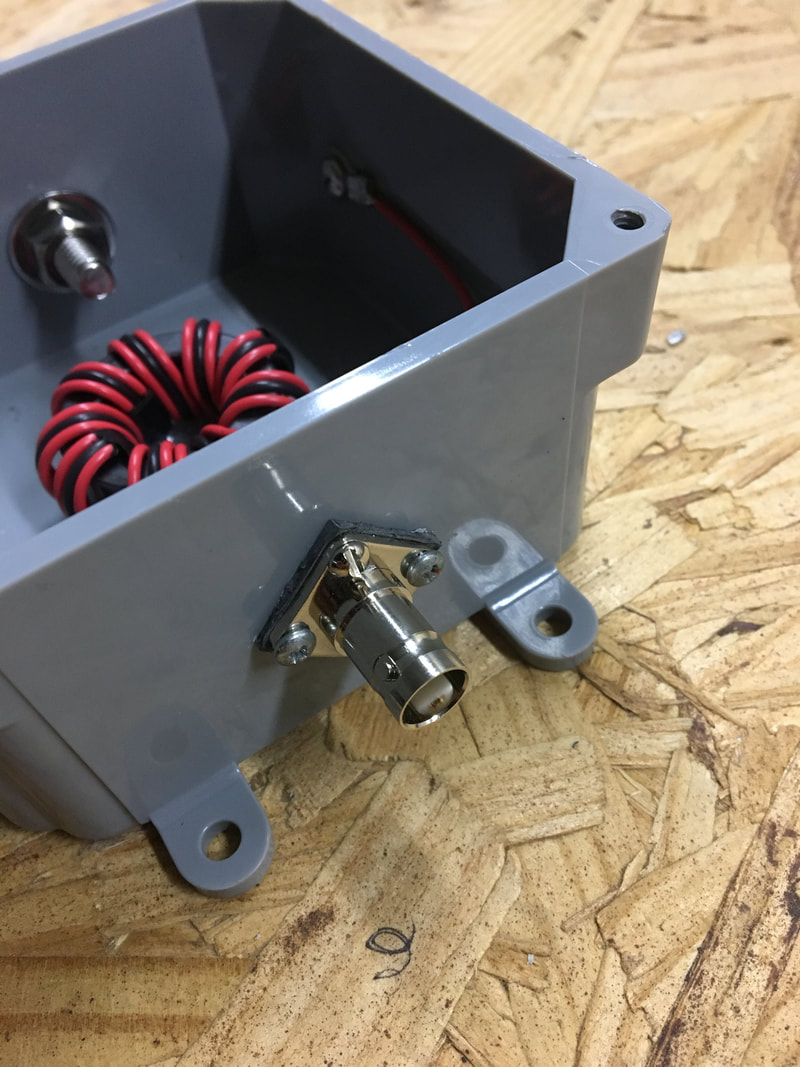
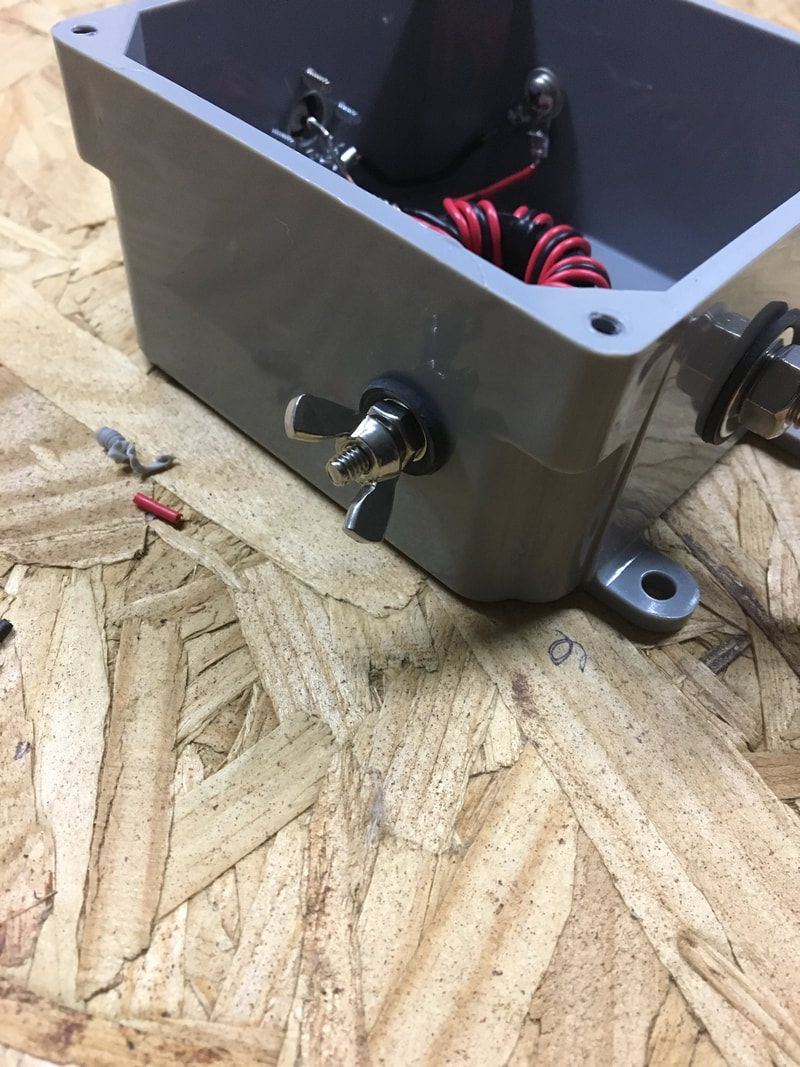
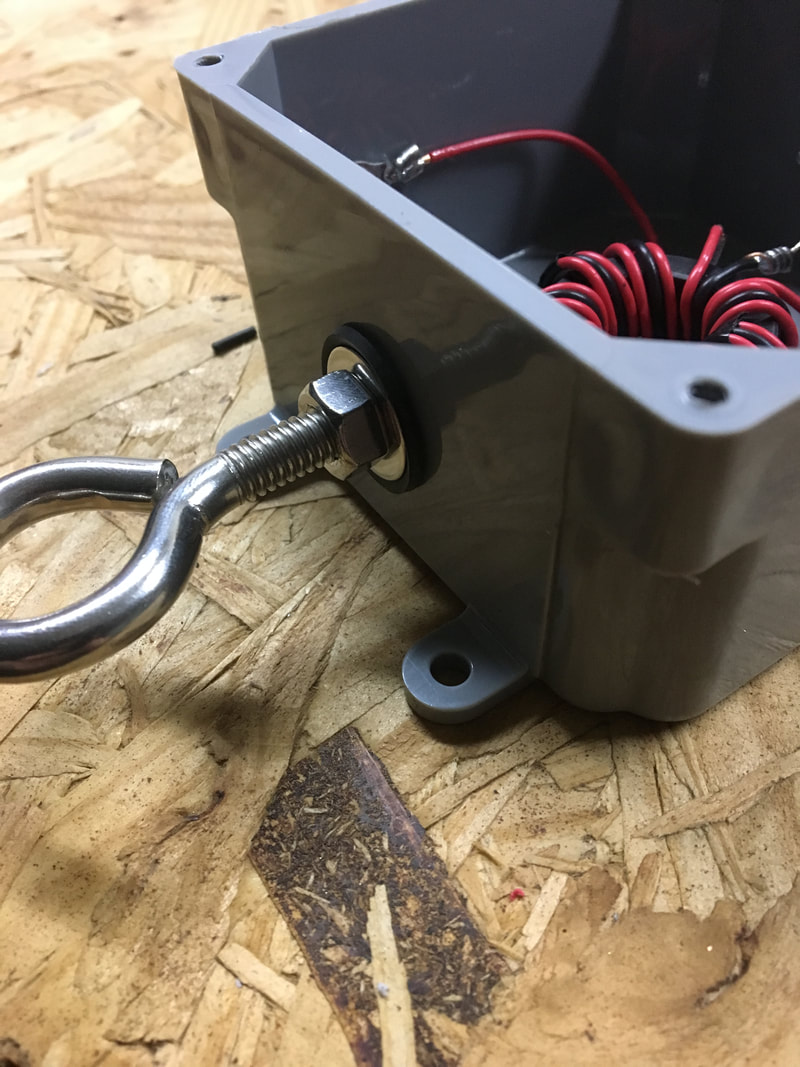
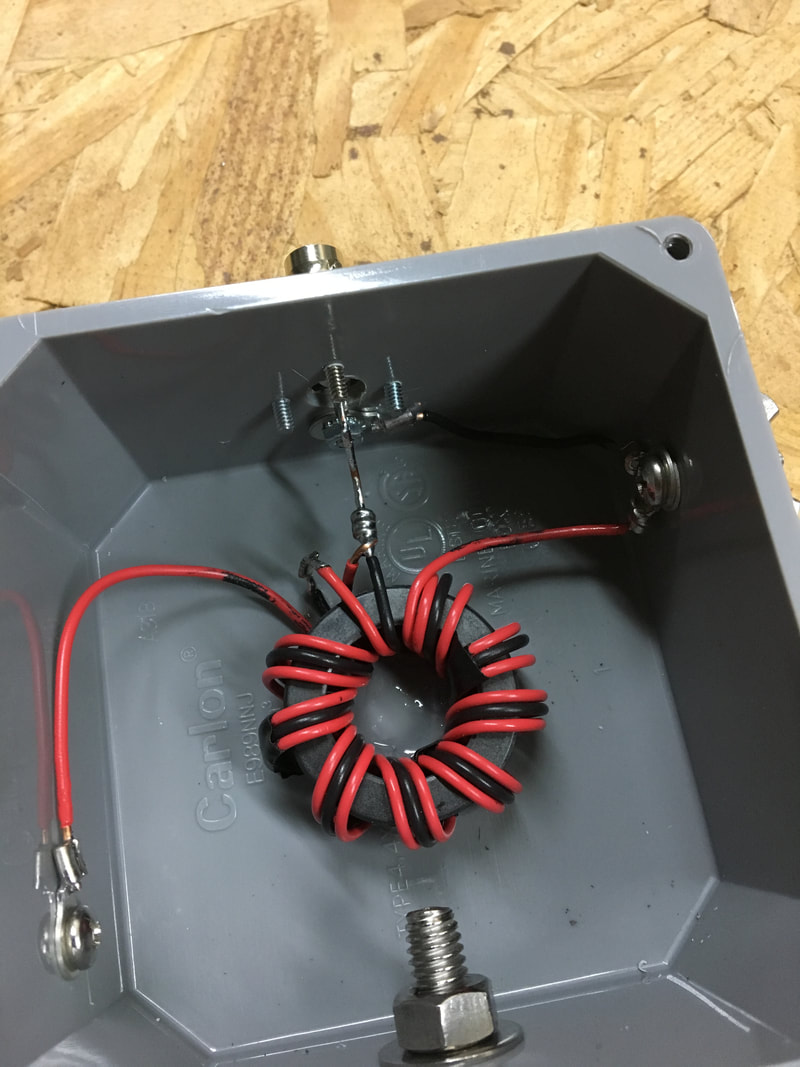
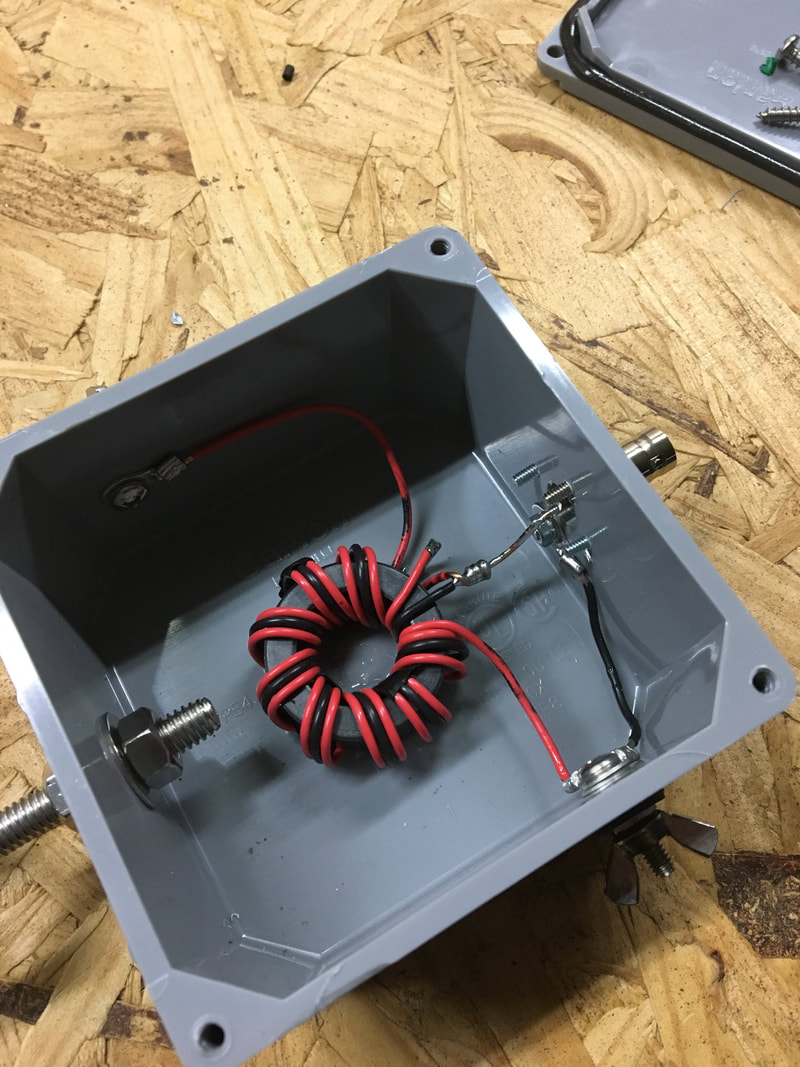
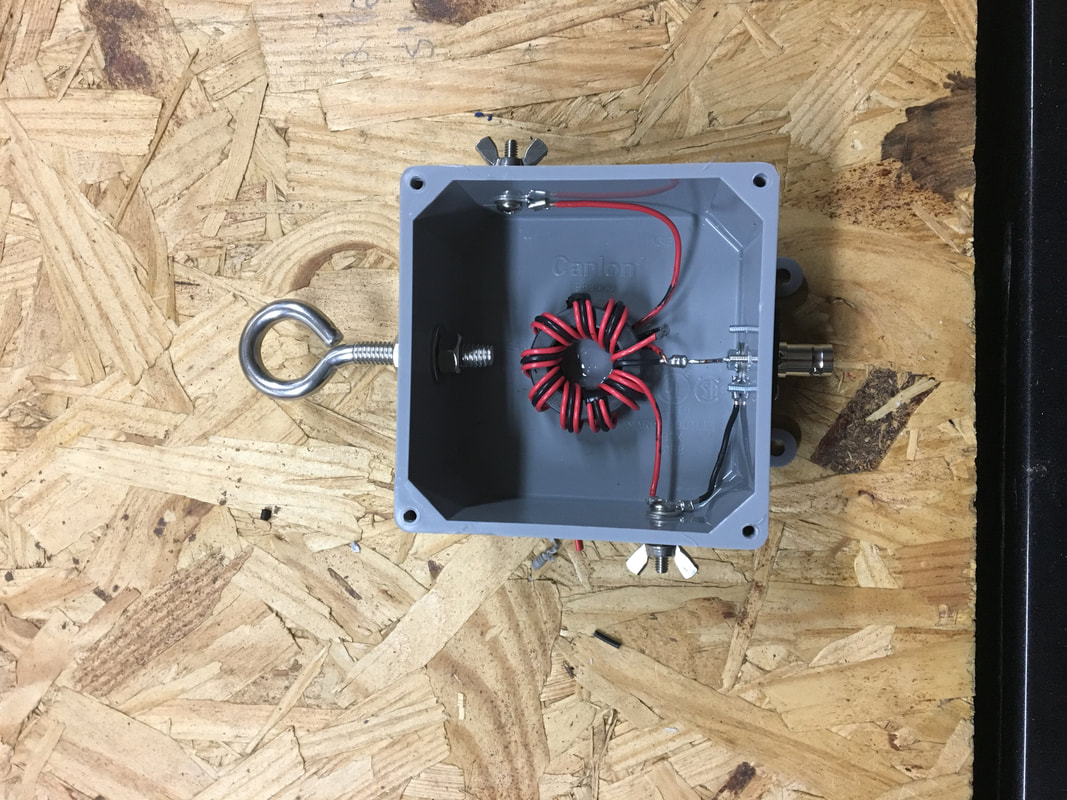
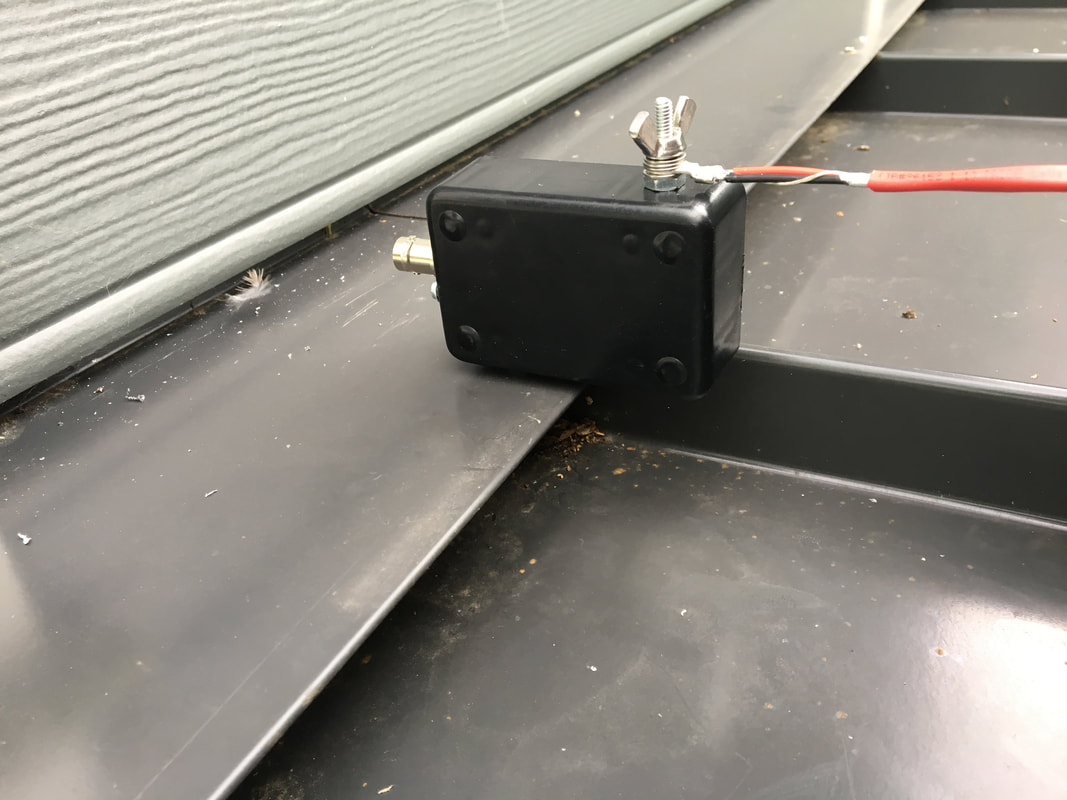
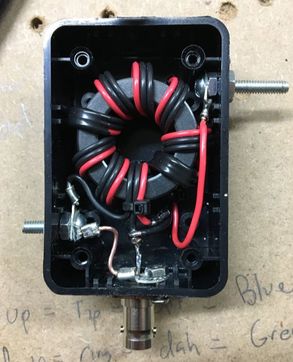
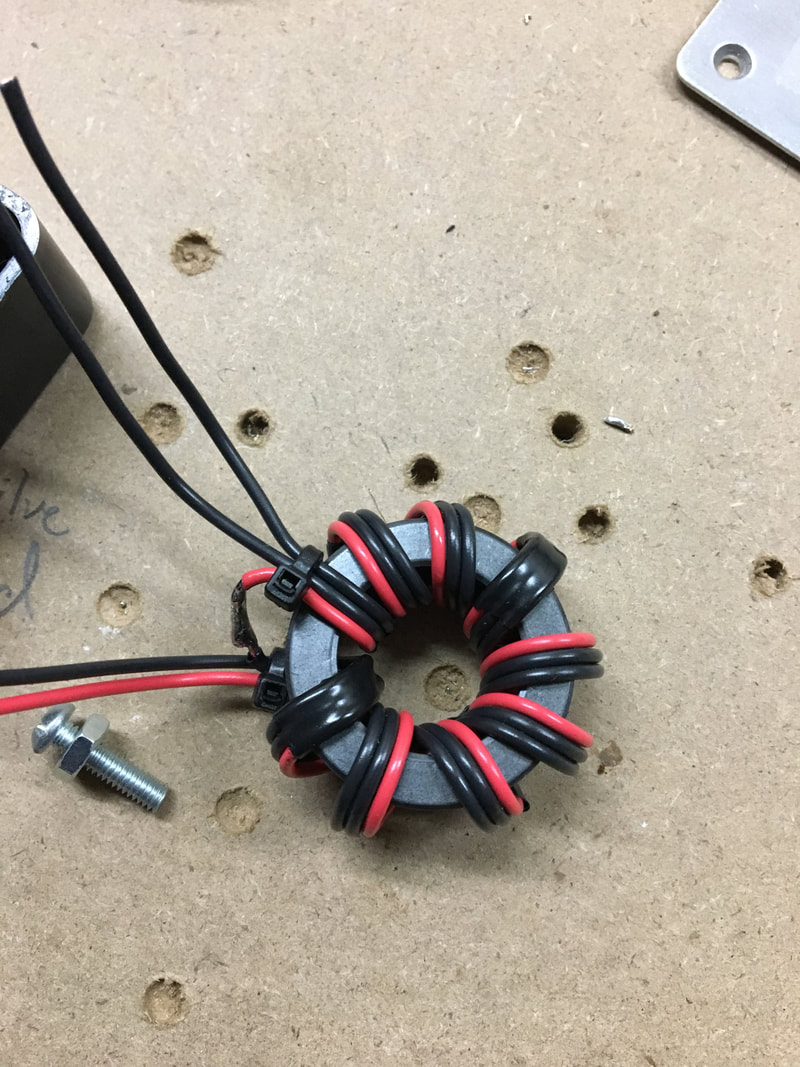
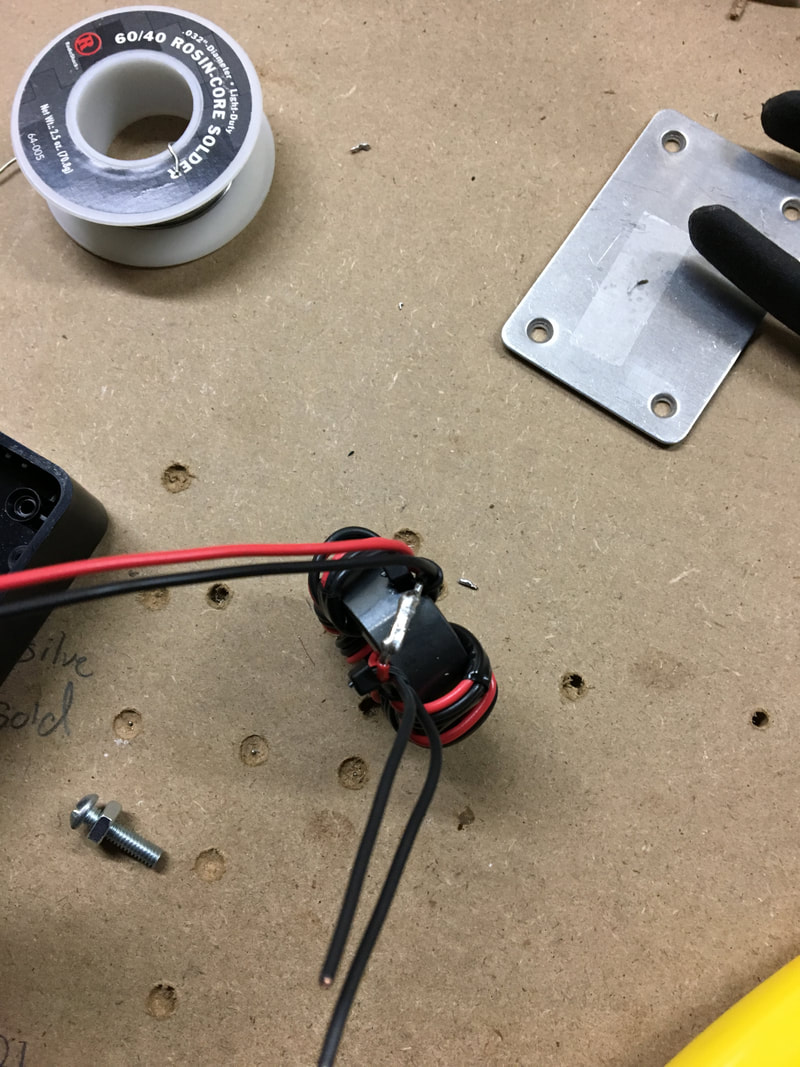
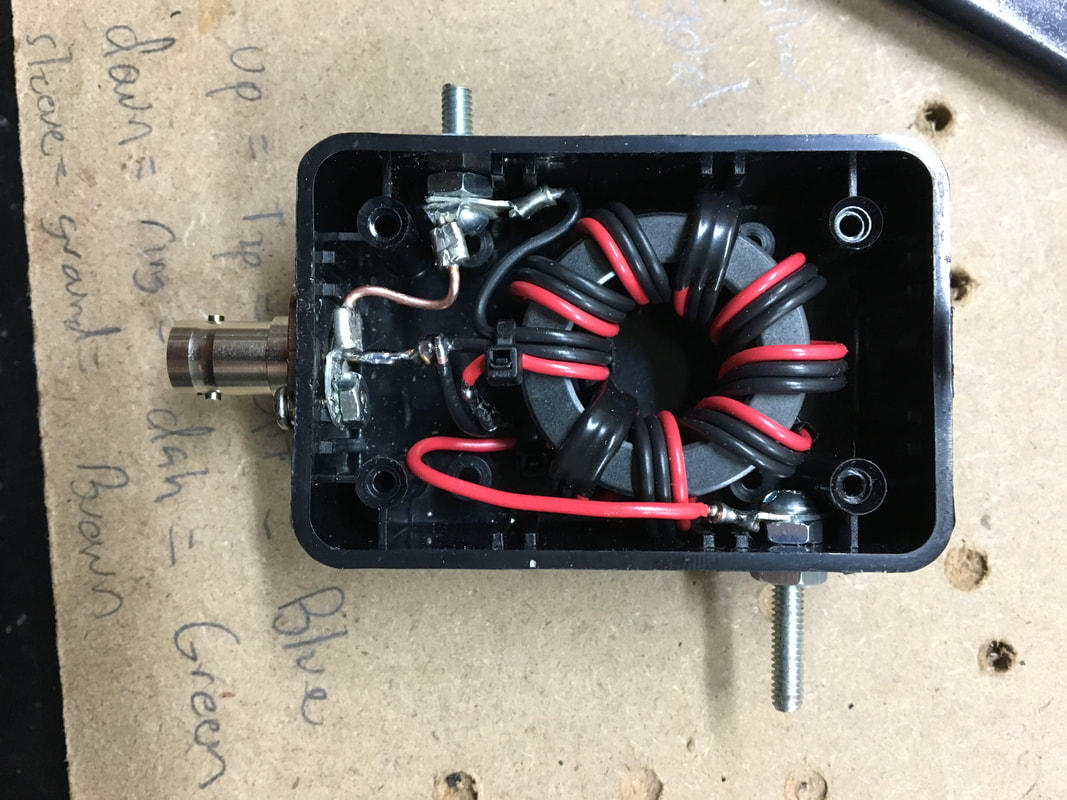
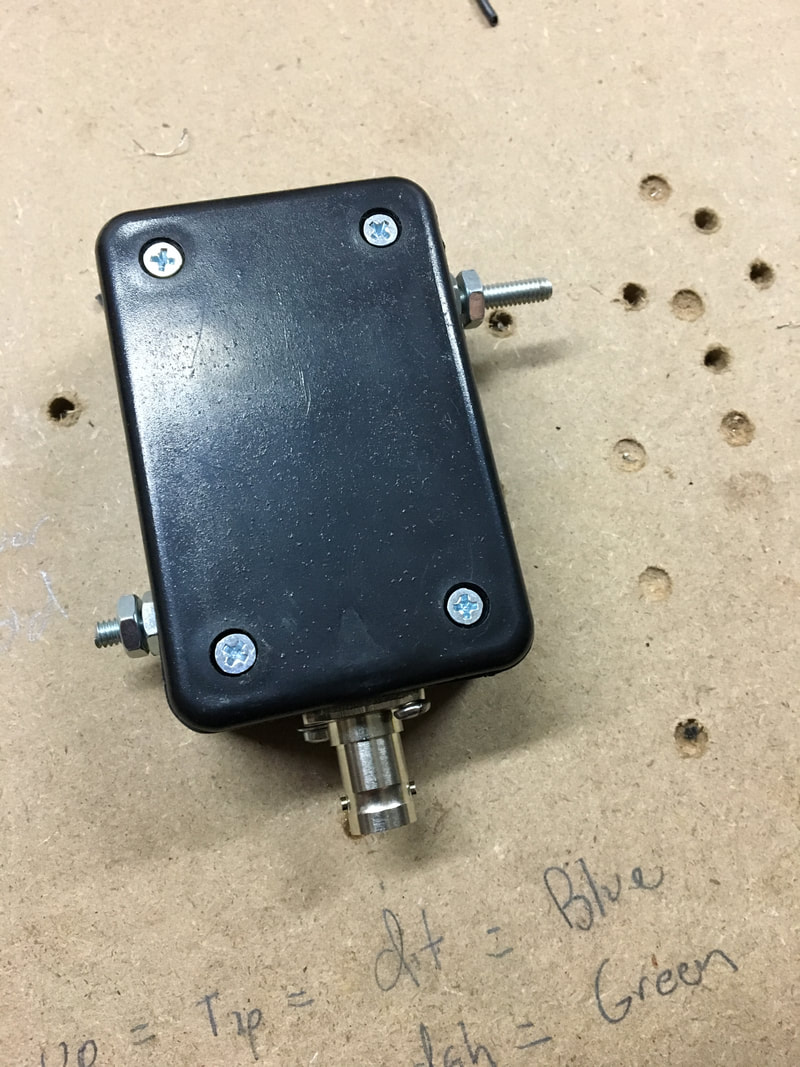
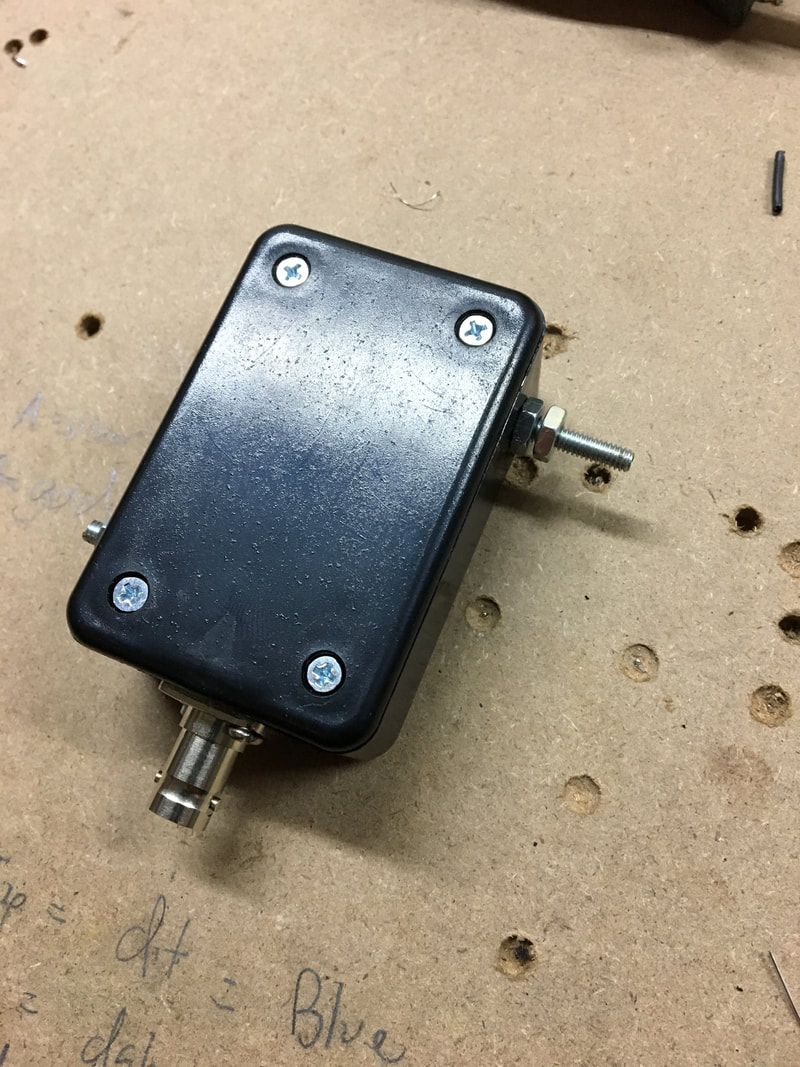
I built my permanent version of the 9:1 unun into a 4" x 4" exterior enclosure.  As for construction techniques there was very little difference in the method I used for this one, compared to what I did for my smaller, portable version.  The most obvious difference was the weatherproof box, and the addition of a large eye bolt in the "top" of the box.  Other than these obvious difference, there were a couple other things that I did with this one:
  • All hardware is stainless steel
  • Every piece of hardware that penetrates the box was mounted with rubber washers to help seal out the weather.
  • I used a dab of silicone as "glue" to help hold the torroid in place
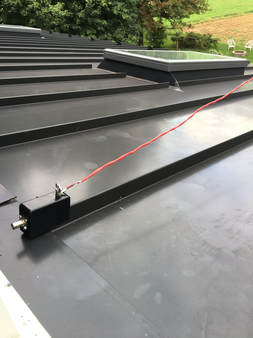
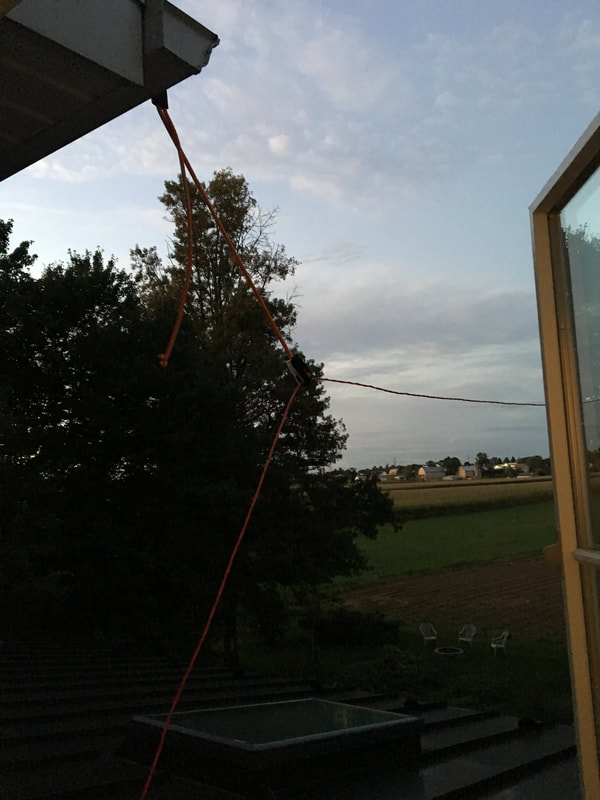
     So just like that I had a new, more rugged, weatherproof 9:1 unun.  This meant that it was time to make another trip to the roof.  The way our addition was built, when standing on the kitchen roof, you are at the gable end of the of the house, behind the garage.  This gave me a fairly easy place to mount the unun at the end of the eve.
     This spot works out very well, because it is easy to feed the unun from the temporary shack in the master bedroom closet, and when I eventually finish the basement shack, I'll be able to drop a run of coax straight down the corner of the house, to the entrance panel for the shack.  
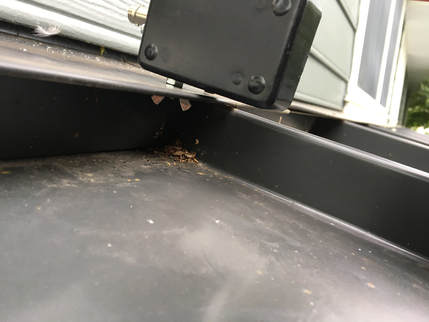
     The pictures tell you pretty much everything you need to know, but I'll give some of the highlights of the mounting on the house end.  The box was mounted using exterior screws.  I put a small dollop of silicon at each spot I was going to be running a screw in, to help seal out the weather.  The large eye bolt became the mounting point for the "house end" of the antenna.  I used a heavy duty screen-door spring and a couple of carabiners between the eye bolt and the fence insulator holding the end of the antenna.  I also left enough of a service-loop between the insulator and the unun so that the spring could stretch fully.  For the counterpoise side, I ran a solid 14 gauge wire from the unun down to the metal roof below. 
Picture
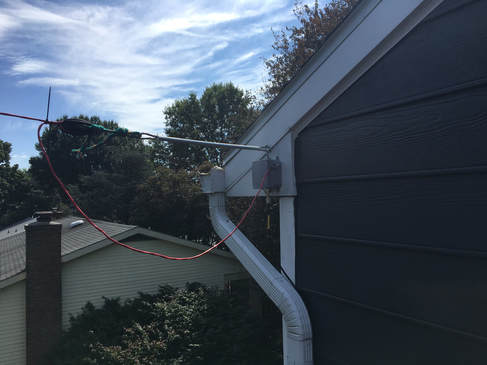
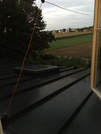
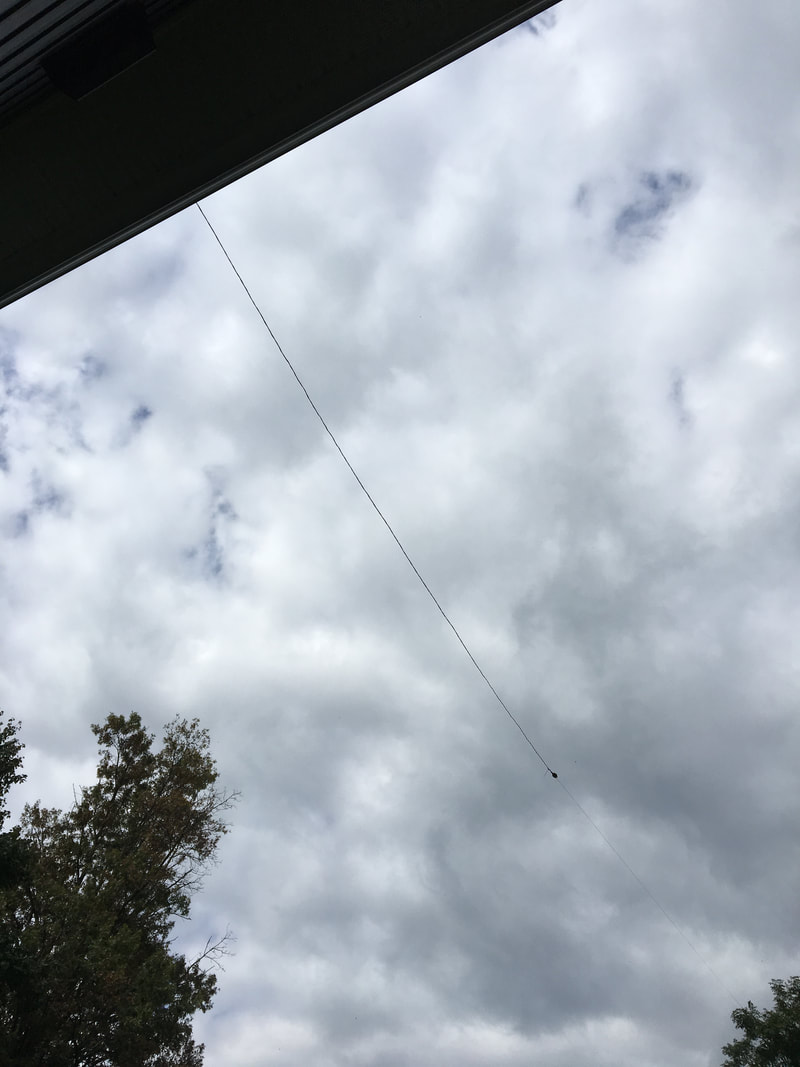
The "house-end" of my random wire antenna. To answer the question - no my house isn't that much bigger than my neighbors. Our house just happens to sit on the crest of a little hill so our neighbors on both sides are slightly lower in elevation.

     Now I'm sure there are some "bigger is better" folks out there who might ask why I didn't use heavier hardware, use a lag screw into the house instead of the eye bolt in the box, etc.  My choice in hardware was actually very deliberate.  I chose sizes that would hold everything firmly, but would also be the weak-point in the event of any type of failure.  With this arrangement, should the worst happen, the plastic box or one of the connectors should break and let everything drop, instead of pulling parts off my house!
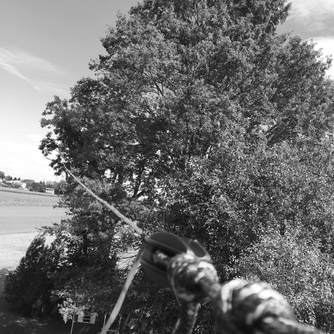
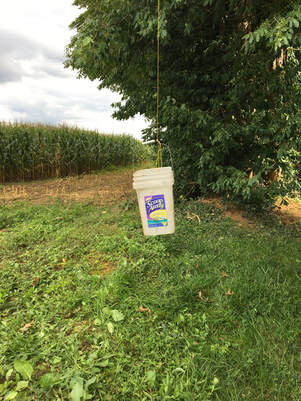
    At the other end, I also replaced the mason's line that was temporarily holding the antenna in the tree.  My first step was to use the mason's line that was in place to haul up a proper rope.  Again, because the other end is attached to my house, I didn't use the heavy duty rope that many people usually use - I used a relatively lightweight 250 lb rope.  I also ran an eye-screw into the tree at the back corner, about 10' off the ground.  Since I have kiddos running around out back, I wanted the end to be up high enough that they couldn't reach it by standing on any of their toys, but low enough that I could reach it with a step ladder.
     This was also another spot where I gave the antenna just a little bit of wiggle room.  With the antenna at full height I put a loop in the rope about 2 feet from where the eye screw was.  I then used a bungee between this loop and the eye screw.  
Picture
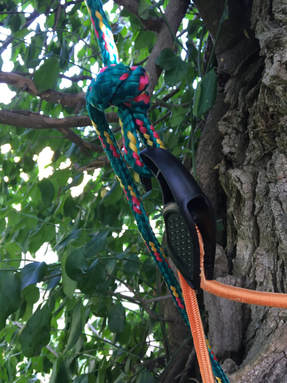
If (when) the bungee eventually gives in to the outdoors, I also made a clove-hitch with the end of the rope so that if (when) the bungee snaps, the antenna will only drop a couple of feet.  I might eventually put a screen-door spring at this end too, but for now, this will work just fine!
Picture

     So there it is - same wire in the air, but more robustly installed, since I've decided to keep it around for a while!
Picture
Picture

     One last thing before I go - please sign up for my mailing list so you can be among the first to know when I've written a new post!  I appreciate everyone that reads my blog regularly, so I'd like to return the favor by giving you the first shot at everything new that gets posted!

Bye for now!
0 Comments

Ham Radio Lullaby

9/22/2017

0 Comments

 
Before you think I made this up just to write a blog post, let me assure you that I actually sing this to my kids every night before bed.  I'm that kind of nerd....
Sing to the tune of "Rock-a-Bye Baby"

Rock-a-bye baby on the tower top
when the wind blows the gin pole will rock
when the mast breaks my baby won't fall
she had on her harness lanyard and all
Sleep tight!
0 Comments

Flying With Ham Radio

9/21/2017

0 Comments

 
​Over time I've seen questions about flying with ham radio pop up in places like Facebook and Twitter.  At some point people started asking me direct questions about it - at first I wondered why, but then it dawned on me - I have mentioned it quite often!
My YL suggested that I write up a short summary to help point people in the right direction, but it took an interview with Curtis of the Everything Ham Radio Podcast to motivate me to actually get it done.  Check it out!
Picture

​To give you the quick summary, traveling with ham radio gear is easy!  The only catch I'll add is that everything here is about domestic flights.  Flying internationally can be a different story because you can end up involved with customs and import/export regulations.  
     Below are a number of posts I've written on the subject in the past, but I'll sum up with this - just follow the TSA rules, and you're good to go!  Most of the people that have "trouble" with TSA create it for themselves.  To get on an airplane with your ham radio equipment, just remember these easy highlights:
     They are just doing their job.  They've seen weirder stuff than what you have.  You aren't "special" in their eyes, you are just another passenger they need to process through line.  If you do what you are asked and answer any questions politely, you and all your gear will be waiting at the gate before you know it!
     With that summary out of the way, check out these posts for my insights and thoughts on the subject!
Packing the Bags
Show and tell of how I pack for a work trip, HF station and all, without any checked baggage!  You don’t have to have tiny, CW only gear to do this – small 100 watt HF transceivers can fit the bill if you’re smart about your packing!

Flying Ham 
In this article I talk about my “normal” packing strategy for what is the most common luggage arrangement most people run into – 1 checked bag, 1 carry on, and 1 person item.  I also touch on TSA and ham radio equipment.  This is the thing that most hams seems to have the most concern about, but it is actually the least exciting, and easiest, part of traveling with radio gear!

Reorganization 
Where I discuss a something I learned – it’s cheaper to fly with two 50 pound bags, than it is to fly with one 70 pound bag.  I Also shared some pictures of my “personal item” which has radio body, etc. in it.
​
Pop Culture Central 
This post is mostly not about flying, but I do show one of the cables I travel with, and talk about using rental cars as my generator when I’ve flown somewhere.  If for some reason you can’t take power with you, this is an excellent way to get it once you get to where you’re going.  I also give an example of how planning to use what you’ll have on the other end (a rental car’s spare tire) can eliminate pieces that you would normally need to take along (a guy stake.)

Bummer Dude 
Another post that isn’t about flying specifically, but I do talk briefly about carrying my radio as a “personal item”, and included a picture of how I threw it in the case for this trip. 
​
William Howard Taft 
​This post is also mostly not about flying, but I also share pictures of a setup I did at a site after flying in.  This was another one where I demonstrate using the rental car as a generator.  I also learned on this trip that a cheap power inverter is NOT the way to go for laptop power.  Either travel with an inverter you know is RF quite, or just get a car charger for your laptop, if you insist on computer logging!
​I'll leave you with 1 final tip before I go: batteries.....
     TSA specifically talks about batteries here, but I'll give you a quick summary as it pertains to ham radio.  Your best bet is to carry LiFePo4 or Lithium Iron Batteries, and to put them in your carry-on.  They state that consumer batteries of up to 100 watt-hours are allowed in this manner.  This works out to about an 8ah battery.  Since they don't list a quantity, you could carry several of these.  They also generically say you can take "2 larger batteries" with airline approval, up to about 160 watt-hours, which is about a 13ah battery. If you want to power a full 100 watt rig, 2 of these will do the trick without being prohibitively heavy!
​
I hope you find some of this useful as you prepare to travel with your gear...I never leave home without mine!
0 Comments

Wire in the Air

9/15/2017

0 Comments

 
Post contains affiliate links.  ​
Within the last several days I shared the little 9:1 unun that I made for myself - if you missed it you can check it out here. This evening (well, that is the evening I started writing this - who knows when I'll finish and publish it!) I used the little unun to put some wire in the air.
I had a spool of left over cable from extending my fire alarm system into our addition when we did that project, so I cut off a length of it for my random wire. There are actually a couple neat resources available for knowing what lengths of "random" wire are likely to work best, but I used the info available here and decided to cut my wire at about 36 feet, to use on 40 - 6 meters.
I actually soldered all the wires in the twisted shielded pair together at the ring terminal, so really the shield of the cable is probably doing most of the RF work. Anyway, after I cut it and put a connector on, I hooked one end to my fence out front, and connected the other end to my unun. Without connecting a counterpoise or ground I scanned from 0 - 30 Mhz with my Rig Expert AA-54 to make sure I was in the ballpark. 
Picture
The scale of this graph isn't great, because it tops out at an swr of 5:1, but in the amateur bands, everything above that was at least under 12:1 or so.  I figured that once it was in the air, it would probably still be in line with something my tuner could handle, so I started working on getting the wire up.
Since this is a temporary antenna, I didn't want to get crazy with buying stuff to hang it up.  I've usually got mason's line around because I end up using it for projects around the house.  I needed something however, to get the end of the line over a tree.  Thanks to my bad grammar, when I posted the statement on Twitter that I was looking for something to use,I made it sound like I wanted to throw my garage over a tree...thanks to VK5OI for catching that :-)
Anyway, I ended up finding a little plastic bottle (my YL says it was from bouillon) so I filled it with gravel, tied one end of the string around it, and threw it like it was going out of style (and got it on the first try!)
Picture
Picture

Those of you that read my first post on the topic may recall that my intention with this little 9:1 unun and random wire was to use the metal roof of our addition as that counterpoise.  Rather than try to figure out a way to mount the unun, and then add a way to connect a jumper wire from the unun's ground side to the roof, I came up with something to kill both birds with one stone.
At the top of the metal roof, there is a lip that covers the roof-to-wall connection.  I drilled a small hole in the edge of this (in a spot that any water running through the hole, would just land on the metal underneath, and run down the roof.)  It was then simply a matter of sticking the counterpoise lug through the hole, and spinning the wing-nut on from the bottom (I used a star washer on the bottom to make sure I pierced the paint and got onto the bare metal.)  This accomplished the job of holding the unun in place, AND making my connection to my giant counterpoise! When I take it down I can always caulk the hole if I really feel its necessary.
Picture

I connected my antenna wire to the other terminal, and then looped the other end through an insulator.  With those details done, I tossed the end off the roof to the back yard where the end of my mason's line was waiting patiently.  Once I tied it off, I walked around to the other end of the line that was waiting for me on the other side of the tree, and hoisted the whole thing into the air!
Picture
Picture

I'm not too worried about wind, trees, etc. pulling on the wire, because mason's string is not strong stuff - at a moments protest it will just snap, letting the wire drop with no harm to the roof or house, so no worries there!  In order to give it a little wiggle room however, so it wouldn't snap in a light breeze, I didn't tie the other end off - I just used a super high-tech counter-weighting arrangement:
Picture

Remember when Costco sold Scoop Away cat litter in buckets?  That was great for two reasons - afterwards you had a useful bucket AND the buckets were a recyclable plastic.  Now their litter comes in plastic bags that are much less recyclable.  Boo on you Scoop away!

Anyway, in the bucket is half a brick to give it some weight.  In a prior life I had drilled holes in the bottom of this particular bucket, so it won't hold water and get funky!
With the wire in the air, this was the new view out of the window at my temporary operating position:
Picture
When I first put the antenna analyzer on this however, things didn't look so hot - some of the bands were so out of wack that my little LDG YT-100 tuner wasn't going to have a hope of tuning it.  I made a wild guess that because of the angle, with the metal roof directly under, I was getting some unexpected interaction between my radiating element and counterpoise.  To address that, I went to another standby in the temporary antenna arsenal - bungee cord.
Picture
Picture

This gave enough separation that the SWR curve across my targeted portion of the HF spectrum looked like something my tuner would handle!  40 meters was the worst at 8:1, but that's still tune-able. Because I only have about 3 feet of feed-line from here to the back of the rig, I'm not too concerned about feed-line loss :-)
Picture

So how does it work?  It's hard to say from just a few contacts, but I managed to catch a couple of fellow WWFFers on 40 meters (both CW and Phone) and I hopped around all the bands between 40 and 6 to make sure it would tune up.  What I can say for sure, is that it "works" and I will be able to be on the air more reliably from home from my new temporary shack (in the corner of a closet), while I finish up the basement shack project!
A Quick Update!
Less than 24 hours after publishing this post, I changed the antenna :-)  I was in the back yard working this morning, and it dawned on my that I really underestimated the distance from my house to the trees in the back corner.  After stepping it off, I decided that I could probably fit enough wire to get 80 meters into my list of "tune-able" bands.  After dropping the antenna down, adding another 37 feet of wire for a total length of about 72 feet, I now have access to everything from 80 through 6 meters on this wire!
0 Comments

Sleep is Overrated

9/13/2017

5 Comments

 
     I've been fiddling with a couple antenna things because I want to get some more permanent options in the air while I work on the home shack (you can get up to speed on that project by starting here and following the links at the end of each post.) and eventual tower project. As I was messing around, it dawned on me that the desk I am sitting right now, faces a window that looks over the top of our addition and into the back yard.  The addition has a metal roof.  Why not throw a random-wire end-fed into the trees across the back yard, and use the metal roof as a counterpoise?
     End-fed antenna's usually need an unun to transform the high impedance of the end of the wire into something that the radio or tuner will be happy with.  This usually means that a 9:1 unun is just the ticket.  With that thought, when I should have been going to bed, I was making this little number out of scraps of wire and hardware from my garage, along with a couple bits from the electronics stash:
Picture

     If you do a search on that internet thing for "9:1 unun" you'll find all kinds of diagrams, far better than what I could draw for you.  I mostly wanted to share this because I was pleased with how I was able to make myself a "mini" 9:1 unun.  I managed to squeeze the whole thing into a 3x2x1 project box. It won't handle high power, but for 100 watts or less here at home, or as another piece of ammo in the portable kit, I think it will be just the ticket!
     Once I had the thing built, I threw a 650k resistor across the terminals (because that's what I had handy), and then put the antenna analyzer on it just to make sure I had the winding correct and had it wired correctly.  It read at something in the neighborhood of 1.5:1 across the entire HF spectrum, so I'm gonna take that as a good sign!  All that will be left to do is to attach an appropriately random length of wire to it, connect the counterpoise terminal to the roof, and hook it up to the rig to see what happens when it actually has some power applied.
     Just for fun, here's a couple more pics of my handy-work as I threw it together:
. .
5 Comments
<<Previous

    Categories

    All
    Antenna
    Cw
    Digital-modes
    Flying-with-gear
    Home QTH
    Miscellaneous
    Mobile
    Operating Events
    Portable
    POTA
    Shack Build
    Technical


    - N3VEM -

         Welcome to my Ham Radio Blog!  This blog was started primarily to share my two concurrent shack builds - my mobile station and my home station.  Over time, this has grown to include sharing about my operations, and general radio-related thoughts that I have as a newer operator.  
         
    ​Enjoy!

    RSS Feed


    Picture
    POTA!

    Picture
    Proving that hams do indeed still build stuff!

    Picture
    100 Watts and Wire is an awesome community, based around an excellent podcast. 

    Archives

    September 2020
    July 2020
    January 2020
    September 2019
    August 2019
    July 2019
    June 2019
    May 2019
    March 2019
    January 2019
    December 2018
    November 2018
    October 2018
    September 2018
    August 2018
    July 2018
    June 2018
    May 2018
    April 2018
    March 2018
    February 2018
    January 2018
    December 2017
    November 2017
    October 2017
    September 2017
    August 2017
    July 2017
    June 2017
    May 2017
    April 2017
    March 2017
    February 2017
    January 2017
    December 2016
    November 2016
    October 2016
    September 2016
    August 2016
    July 2016
    June 2016
    May 2016
    April 2016
    March 2016
    February 2016
    January 2016
    December 2015
    November 2015


Picture
Copyright © 2015
 Vance Martin is a participant in the Amazon Services LLC Associates Program, an affiliate advertising program designed to provide a means for sites to earn advertising fees by advertising and linking to amazon.com.