NOVEMBER 3 VICTOR ECHO MIKE
  • Blog
  • Events and Activations
  • Diversions
  • About
  • Gallery
  • Contact
  • Links
  • Subscribe
  • Search
  • Blog
  • Events and Activations
  • Diversions
  • About
  • Gallery
  • Contact
  • Links
  • Subscribe
  • Search
NOVEMBER 3 VICTOR ECHO MIKE

ham radio Projects and musings from a (Relatively) new operator

Some updates

3/10/2016

0 Comments

 
     Nothing earth shattering here today...just wanted to share a couple tidbits about some changes to my blog.  Some of you that have checked in regularly may have noticed that the format changed.  The YL that I sometimes refer to as "the boss" is a writer, blogger, historian, and all around awesome person.  She suggested this different layout as being one that is more pleasing than the old style I was using - hopefully all of you enjoy it!
     Additionally, if you check in the sidebar, there are also now "categories" so that if you are looking for a specific topic I have written on, you can jump around without needing to read through the entire history of the blog.  That's always a plus if there is something specific you are looking for.
     Is there anything you would like to see changed on my blog?  Do you have topics you'd like to hear my thoughts on?
0 Comments

Minute man day 2

3/9/2016

0 Comments

 
Picture
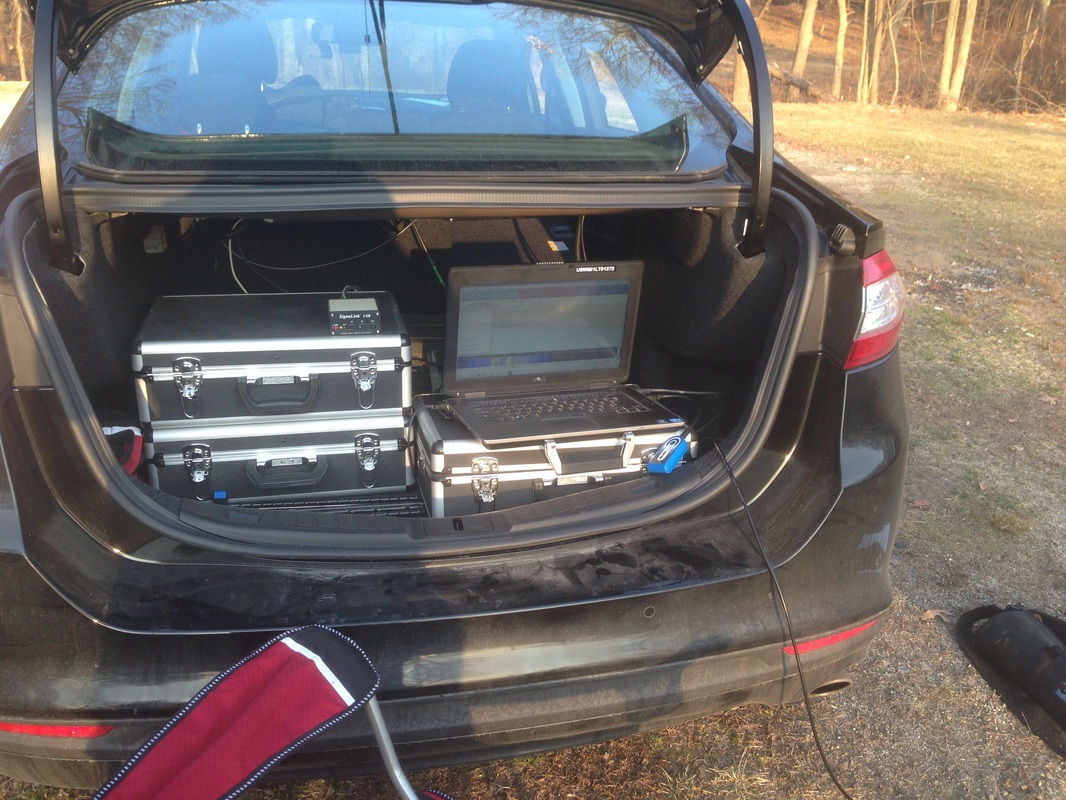
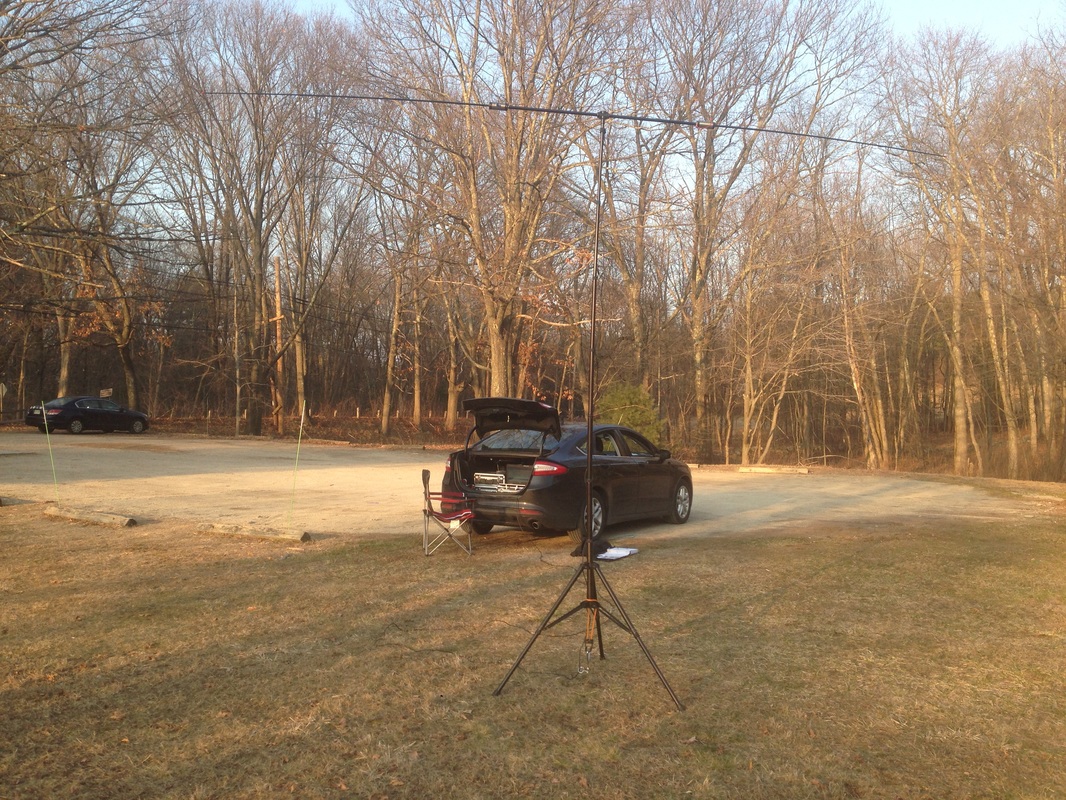
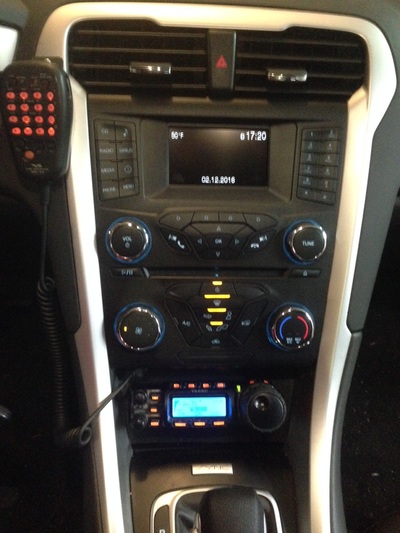
     Good evening all!  I just wanted to give everyone a quick update on my NPOTA activation at Minute Man National Historic Park.  I finished my meetings early enough today that I was able to sneak off to the park for just a little bit to continue my activation.  Because I made the minimum number of contacts needed for an activation yesterday, my goal today was just to try something different, so I decided to set up my equipment to try and make some PSK31 contacts:
Picture
Picture
     Because I only had a short time (about an hour for setup, contacts, and teardown), I was only able to make 3 successful contacts. However, that's still 3 additional folks who get credit as chasers for this park, and one of them was France, with only 30 watts! Most importantly, I got to have some fun!

     Do you ever operate portable?  How about portable digital modes?  I'd love to hear about it - leave a comment!
0 Comments

NPOTA HP27 Activation - Minuteman National Historic Park Activation

3/8/2016

2 Comments


Minute man National Park

Picture
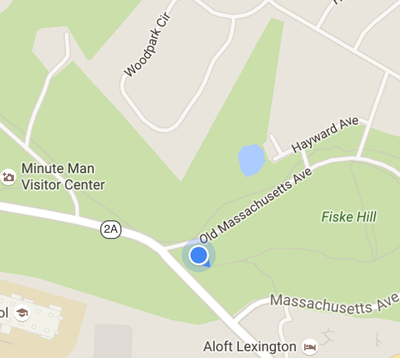
     Good evening all!  I just got finished with an activation at Minute Man National Historic Park, as part of the ARRL & the National Park Service's celebration of the Centennial of the National Park Service.  Make sure you go to the National Park Service page by clicking the link, and check out the ARRL's event by clicking the banner above.  These are two awesome organizations, and I was pumped to be part of it today!
     Thanks to traffic it took me longer to get here than I expected, but I still made it in time to get on the air for a decent bit.  I had a pretty good run for a little bit on 20 meters and had 33 contacts in approximately 40 minutes before I decided to change frequency due to some QRM.  This was my first experience on "the other side" of a radio pile-up, so I'm glad it was a relatively small one - I know it's nothing compared to the big contest stations, but it was a thrill for me!
     Because I was activating Minute Man National Historic park, I would also like to encourage you to check out their website at 
http://www.nps.gov/mima/index.htm

     Minute Man isn't a huge park geographically, but the history here is larger than life - which you can tell if you happen to bump into anyone that knows the park, like I had the wonderful opportunity to do, when I met Ranger Kevin today (more on that shortly!)  Most of you have heard the phrase - "The shot heard round the world."  That phrase wasn't so much about a specific shot, but more about the events that happened on that day, in this area - if you're ever near Concord / Lexington / Boston, etc, this place needs to be on your list!

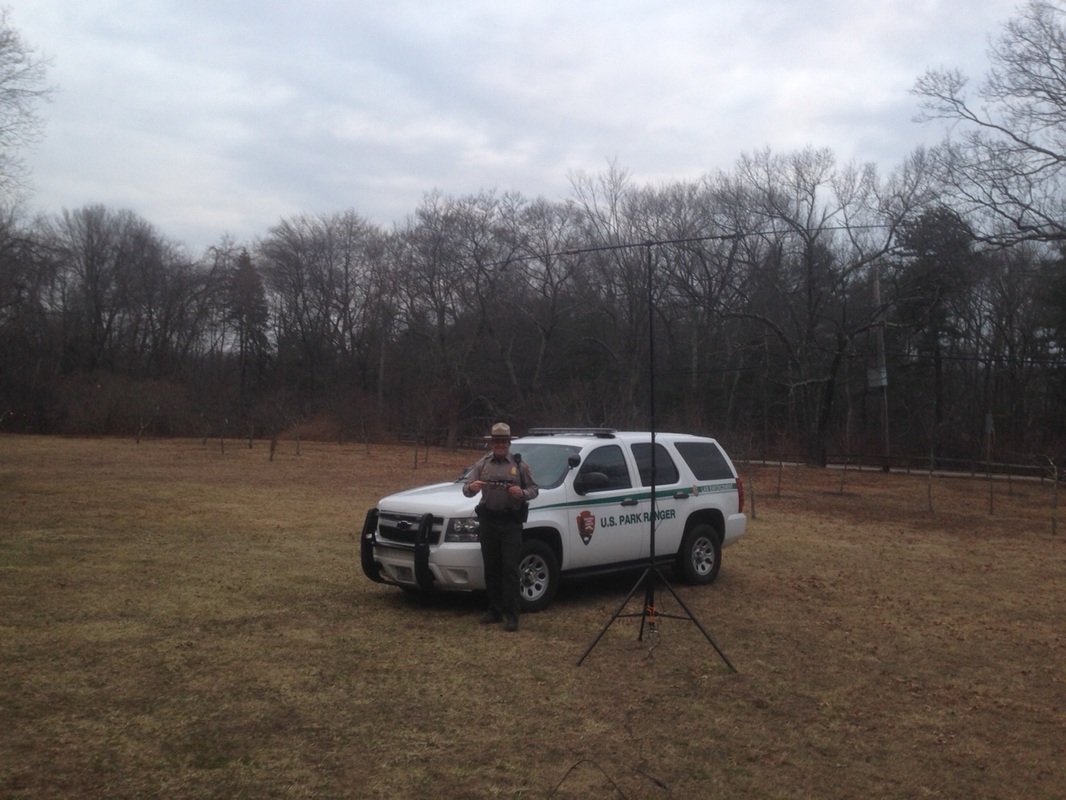
     Shortly after clearing the air waves with the last station in my mini pile-up, I had the chance to meet Ranger Kevin - he had pulled up in the lot while patrolling, and told me that as soon as he saw my antenna, he knew what I was up to, because he had seen some e-mails from the folks in his NPS unit about the event, and what was going on.  We had an awesome chat, and he even offered to let me snap a couple pictures - Thanks!
Picture
Picture
     Officer Kavanagh (Sorry if I spelled it wrong, - I remember you said there was no U, but I don't know if I got the rest of it right!) is an awesome representative for the National Park Service!  He was friendly and knew all about the history of the park - it was an educational experience for me!  I also got to share with him a little bit about ham radio.  
     For an added bonus, we had a case of "small world" that we discovered.  Officer Kavanagh and his family (whom I had the honor to meet!)  vacation in Lancaster County regularly, and they formed a friendship with some folks from the Witmer Fire Department. Witmer is a very small town (basically 1 street) which happens to be the small town around the corner, where I keep the PO Box associated with my FCC licence!
     
     With some luck I might get to visit the park again tomorrow - depending on when my meetings wrap up tomorrow, I'm planning on heading out there again for a couple hours before sunset to "tie the ribbons" on this activation.
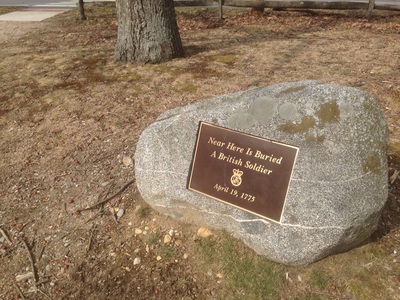
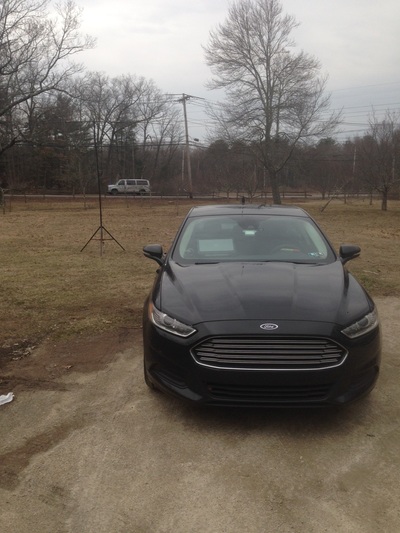
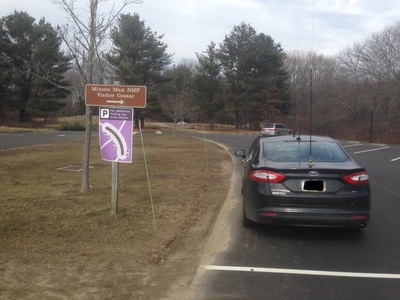
     The station I operated with today, that I will set up tomorrow if I have time, is a combination of my car, that I have detailed in other posts in my blog, and my Buddiepole antenna.  Here are some pics of my setup and a couple of things in the park, just for fun.
     Hope to put you in the log!
     Have you activated any parks?  Are you chasing parks?  Leave a comment with your NPOTA stories!
2 Comments

The "Other" Radio - Part 1

3/6/2016

0 Comments

 
Post contains affiliate links

One more radio - One more Antenna

Picture
    Some call it CB.  Some call it 11 meters - tomato tomáto.  I know that for some amateur operators, CB radio is something you look down your nose at - and there are some pretty big noses to look down out there!  In reality though, many hams got started in CB, and for those of us that have jobs that required a lot of time on the road, a CB is a nice accessory.  There are times where you can find out what's up with traffic faster with the CB than with any other method.  Also, while some hams may choose not to believe it, truckers are people too, so sometimes it is just as fun to chat with them as it is to chat with hams!
     With all that being said, this is part one of my project to get my CB installed in my car.  If you have read my past posts, you may recall that I mentioned in passing that I had installed another NMO mount (this one), in anticipation of an additional antenna.  That mount is for the Browning CB antenna that I purchased from Amazon recently.  This antenna will be located on the front passenger side quarter panel.  To orient you, the NMO mount you see in the picutre is just in front of the passenger side rear view mirror.  I routed the coax through a factory grommet located just behind this point, that ends up behind the passenger side kick panel.  For a while, the coax was just coiled up there, waiting for me to have time to get on with the rest of the project.
     The next several steps happened over the course of a couple weeks, when I was able to steal an hour here and there to work.  I decided to use the center console as the location to mount the CB (I hinted at this in a post back in November when I first got the car.) Because I don't use the CB nearly as often as my Amateur radio, I wanted it somewhere that was out of the way, but was still easily accessible when I did want to use it.  To keep it clean looking, and to have a spot to mount a couple future items (like maybe a screwdriver controller....) I decided to make a panel to fit the console, to mount the radio, and any future equipment into.  
     Step one was going to be brackets to hold the panel.  I have all kinds of stuff in my metal scrap/recycling pile, so I dug through and found this, and figured I could make it work:

Picture
     After measuring the inside of the center console, I cut 2 pieces of this to length.  I then double checked where the other end of the screws would go, and screwed the two brackets into place, to act as supports for the panel that will drop in place on top of them.
Picture
     Because the space in the center console isn't square, and I needed to be able to do some test fitting, I made a template.  I started by using strips of stiff cardboard.  I cut them to length, trimmed, and fit them into place temporarily, and when they looked like a good fit, I taped them together so that I would have an outline of the console, to trace onto the next piece.
Picture
     Next, I traced this outline onto a solid piece of cardboard, and test fit that into place.
Picture
     
     Ultimately, this pattern will be cut out of the same plastic sheet material that I used to make the mounting location for the remote head for my Yeasu 857d.  For now though, I traced this cardboard template, onto a piece of scrap OSB plywood that I had, which was the same thickness as the plastic I'll be using.
​
Picture
     I actually ended up cutting several of these as I did test fits, trimmed, test fits, etc.  Once I had the basic shape the way I wanted it, it was time to decide how the radio would mount.  
When I ordered the radio (The Uniden PRO 520XL, from Amazon),  I thought it would fit in this space standing straight up, with the display basically flush at the top of the panel (I ordered a new one because my old one was too big to fit here).  
Affiliate Link
As it turned out, the dimensions on the web site, didn't include the connectors on the back of the radio.  In order for it to fit, the radio was going to have to get installed at an angle.  I cut the opening for the face of the radio, and used a couple pieces of angle bracket to attach the radio body mount to the bottom of the panel.  The idea is that with everything attached to the panel, I should be able to lift the panel, and everything attached, in and out to have access to the back of the radio, and any future stuff that gets installed here.
     But there was a problem!  The brackets I cut (the first couple pictures in the post) were wide enough that they actually got in the way of the thumb screws (more like knobs) that hold the radio body to it's bracket.  I ended up taking those brackets out, and cutting new brackets from a fresh piece of aluminum angle stock that I picked up at Lowes.  I put them in place, a little more strategically this time.
Picture
     With some better, more properly arranged brackets, everything seems to be starting to fit nicely.
Picture
     With this part of the template process done, I connected the mic cord and opened and closed the console, to make sure there was proper clearance for everything.  Luckily, center console lids are designed knowing that people are probably going to have phones, iPods, and other electronic devices in them, so there is purpose built clearance for cords to be able to exit with the console lid closed.  In my case that works perfectly for the mic cord.
     The next thing I did was to pop off the outer trim that covers the center console, so that I could drill two holes for the power and coax to enter the compartment.  With the holes drilled, I routed the coax that I mentioned in the beginning of this post, and the power wire that I mentioned several posts back.  These wires had been coiled up behind a body panel, patiently waiting for a place to go.  Now they have home!
     

That's it for Part 1

     I had to stop there, because it was time to move on to other family things.  With any luck I'll have some early mornings before everyone wakes up, or some evenings after everyone heads to bed, to finish up.  Basically, all that's left is to:
  1. Put a PL259 on the end of the coax so that it can get connected to the radio
  2. Put Powerpole connectors on the wiring that will power the radio, and on the radio's power leads
  3. Connect up the power so the radio will actually work (that helps!)
  4. Install the antenna onto the NMO mount, and tune it up
  5. Connect the antenna to the radio
  6. Do a short road test so that I can verify that I like the location and operation of the controls with the radio in this location.
  7. unhook everything, take it out, and transfer the panel from the plywood to the black plastic HDPE sheet that will make up the final product (Luckily, I have plenty left over from the other project!)
  8. Re-install everything, and call it a day!

     Depending on the timing of when I can get this stuff accomplished, part 2 may include all of these steps, or it may get broken into part 2, 3, 4...... time for stuff like this can be unpredictable when there is both a 4 year old and a 7 week old in the house.  Even though I said at the beginning of this post that I enjoy talking to the truckers on the highway, I enjoy my kids more, so time for this project plays second fiddle at the end of the day!

     Do you do any talking on Citizen's Band, or are you strictly a ham radio operator?
0 Comments

NPOTA

3/3/2016

1 Comment


National Parks on the Air

     I'm not going to go into great detail about what NPOTA is, other than to say that the ARRL is celebrating the centennial of the the National Park Service with a radio event.  Check it out here!  I decided to dive in and try my hand as an activator - this will be my first time on "the other side" of potential pile-up, so while I'm excited about it, I'm also nervous.  Any tips from contesting, special event, and pile-up pro's would be appreciated!!  
     If you check out the NPOTA site, I'll be registering my activations there, so everyone knows what I'll be activating and when.  Because of my travels for work, I realized that I'll have lots of opportunities to sneak off to parks all over the Northeast when I am doing my business trips, so I hope to be doing a lot of these throughout 2016.  When I am doing an activation I'll be sure to do "live" posts so that you can figure out what frequencies I'm on.
     My first activation is actually going to be next week at Minuteman National Historic Park - Unit HP27.  Hopefully I'll get to put you in the log!  As a side note, i'm a big fan of 100 Watts and a Wire, and what they are all about.  I just signed up for my 100 Watts ID# yesterday, after spending the last week or so listening through all the old episodes so that I would be up to speed. Supposedly Christian K0STH is actively chasing the parks, so Christian - if I hear your call I'll work as hard as I need to in order to dig it out!  With that in mind, I might just have to give preference to any 100 Watters that I hear..... 
1 Comment
<<Previous
Forward>>

    Categories

    All
    Antenna
    Cw
    Digital-modes
    Flying-with-gear
    Home QTH
    Miscellaneous
    Mobile
    Operating Events
    Portable
    POTA
    Shack Build
    Technical


    - N3VEM -

         Welcome to my Ham Radio Blog!  This blog was started primarily to share my two concurrent shack builds - my mobile station and my home station.  Over time, this has grown to include sharing about my operations, and general radio-related thoughts that I have as a newer operator.  
         
    ​Enjoy!

    RSS Feed


    Picture
    POTA!

    Picture
    Proving that hams do indeed still build stuff!

    Picture
    100 Watts and Wire is an awesome community, based around an excellent podcast. 

    Archives

    September 2020
    July 2020
    January 2020
    September 2019
    August 2019
    July 2019
    June 2019
    May 2019
    March 2019
    January 2019
    December 2018
    November 2018
    October 2018
    September 2018
    August 2018
    July 2018
    June 2018
    May 2018
    April 2018
    March 2018
    February 2018
    January 2018
    December 2017
    November 2017
    October 2017
    September 2017
    August 2017
    July 2017
    June 2017
    May 2017
    April 2017
    March 2017
    February 2017
    January 2017
    December 2016
    November 2016
    October 2016
    September 2016
    August 2016
    July 2016
    June 2016
    May 2016
    April 2016
    March 2016
    February 2016
    January 2016
    December 2015
    November 2015


Picture
Copyright © 2015
 Vance Martin is a participant in the Amazon Services LLC Associates Program, an affiliate advertising program designed to provide a means for sites to earn advertising fees by advertising and linking to amazon.com.