NOVEMBER 3 VICTOR ECHO MIKE
  • Blog
  • Events and Activations
  • Diversions
  • About
  • Gallery
  • Contact
  • Links
  • Subscribe
  • Search
  • Blog
  • Events and Activations
  • Diversions
  • About
  • Gallery
  • Contact
  • Links
  • Subscribe
  • Search
NOVEMBER 3 VICTOR ECHO MIKE

ham radio Projects and musings from a (Relatively) new operator

Another Trip to the Roof

9/27/2017

0 Comments

 
Post Contains Affiliate Links     
Picture
     My temporary random-wire antenna and 9:1 unun have already been taken out of service.  Cheer up though - they are out of service because I was so pleased with how they were working, I decided to make a more permanent version!

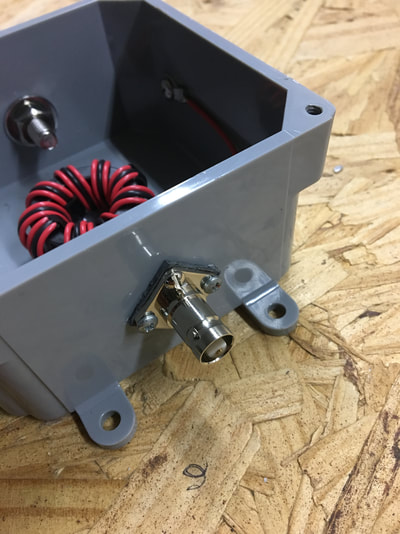
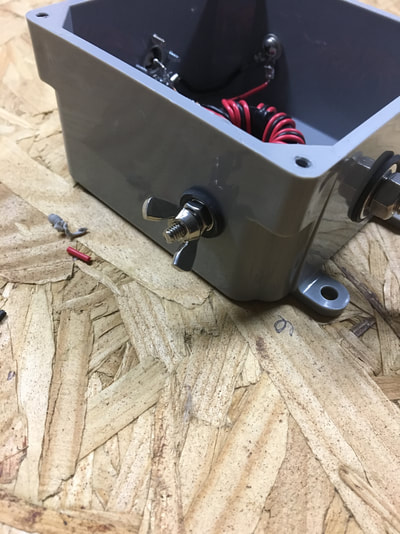
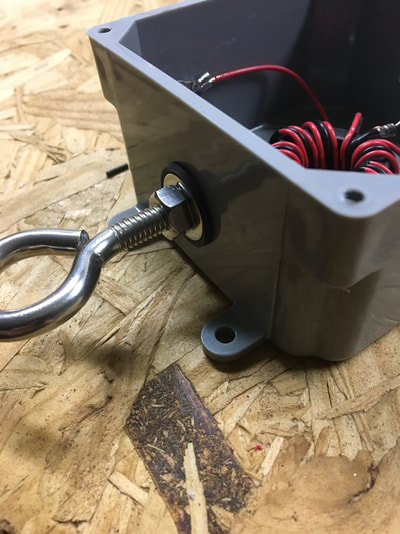
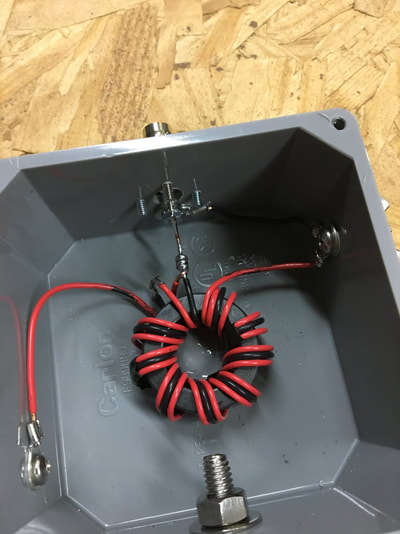
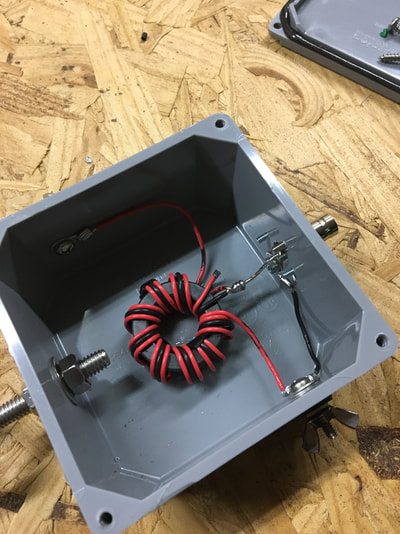
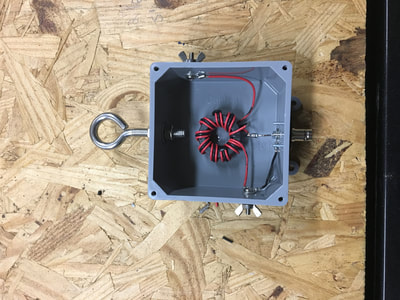
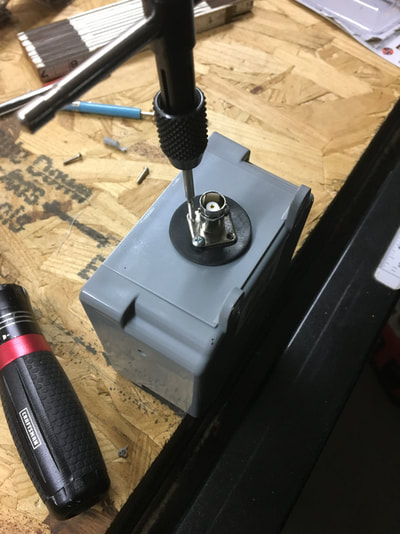
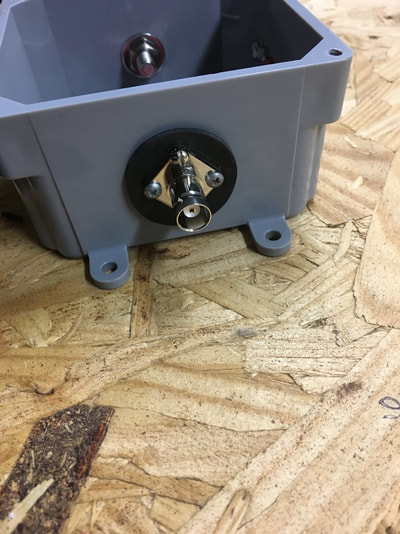
I built my permanent version of the 9:1 unun into a 4" x 4" exterior enclosure.  As for construction techniques there was very little difference in the method I used for this one, compared to what I did for my smaller, portable version.  The most obvious difference was the weatherproof box, and the addition of a large eye bolt in the "top" of the box.  Other than these obvious difference, there were a couple other things that I did with this one:
  • All hardware is stainless steel
  • Every piece of hardware that penetrates the box was mounted with rubber washers to help seal out the weather.
  • I used a dab of silicone as "glue" to help hold the torroid in place
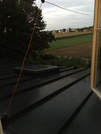
     So just like that I had a new, more rugged, weatherproof 9:1 unun.  This meant that it was time to make another trip to the roof.  The way our addition was built, when standing on the kitchen roof, you are at the gable end of the of the house, behind the garage.  This gave me a fairly easy place to mount the unun at the end of the eve.
     This spot works out very well, because it is easy to feed the unun from the temporary shack in the master bedroom closet, and when I eventually finish the basement shack, I'll be able to drop a run of coax straight down the corner of the house, to the entrance panel for the shack.  
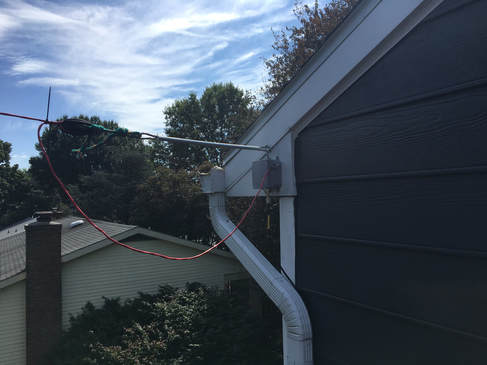
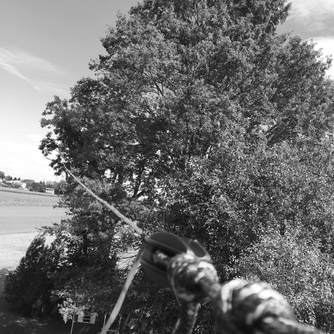
     The pictures tell you pretty much everything you need to know, but I'll give some of the highlights of the mounting on the house end.  The box was mounted using exterior screws.  I put a small dollop of silicon at each spot I was going to be running a screw in, to help seal out the weather.  The large eye bolt became the mounting point for the "house end" of the antenna.  I used a heavy duty screen-door spring and a couple of carabiners between the eye bolt and the fence insulator holding the end of the antenna.  I also left enough of a service-loop between the insulator and the unun so that the spring could stretch fully.  For the counterpoise side, I ran a solid 14 gauge wire from the unun down to the metal roof below. 
Picture
The "house-end" of my random wire antenna. To answer the question - no my house isn't that much bigger than my neighbors. Our house just happens to sit on the crest of a little hill so our neighbors on both sides are slightly lower in elevation.

     Now I'm sure there are some "bigger is better" folks out there who might ask why I didn't use heavier hardware, use a lag screw into the house instead of the eye bolt in the box, etc.  My choice in hardware was actually very deliberate.  I chose sizes that would hold everything firmly, but would also be the weak-point in the event of any type of failure.  With this arrangement, should the worst happen, the plastic box or one of the connectors should break and let everything drop, instead of pulling parts off my house!
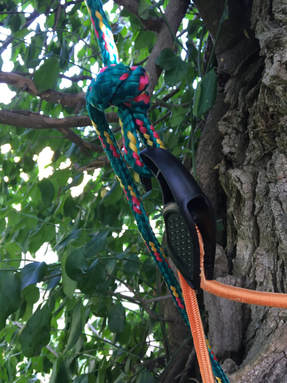
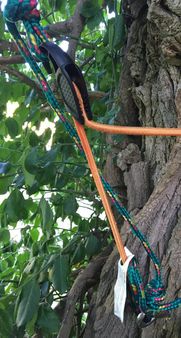
    At the other end, I also replaced the mason's line that was temporarily holding the antenna in the tree.  My first step was to use the mason's line that was in place to haul up a proper rope.  Again, because the other end is attached to my house, I didn't use the heavy duty rope that many people usually use - I used a relatively lightweight 250 lb rope.  I also ran an eye-screw into the tree at the back corner, about 10' off the ground.  Since I have kiddos running around out back, I wanted the end to be up high enough that they couldn't reach it by standing on any of their toys, but low enough that I could reach it with a step ladder.
     This was also another spot where I gave the antenna just a little bit of wiggle room.  With the antenna at full height I put a loop in the rope about 2 feet from where the eye screw was.  I then used a bungee between this loop and the eye screw.  
Picture
If (when) the bungee eventually gives in to the outdoors, I also made a clove-hitch with the end of the rope so that if (when) the bungee snaps, the antenna will only drop a couple of feet.  I might eventually put a screen-door spring at this end too, but for now, this will work just fine!
Picture

     So there it is - same wire in the air, but more robustly installed, since I've decided to keep it around for a while!
Picture
Picture

     One last thing before I go - please sign up for my mailing list so you can be among the first to know when I've written a new post!  I appreciate everyone that reads my blog regularly, so I'd like to return the favor by giving you the first shot at everything new that gets posted!
Bye for now!
0 Comments

Your comment will be posted after it is approved.


Leave a Reply.

    Categories

    All
    Antenna
    Cw
    Digital-modes
    Flying-with-gear
    Home QTH
    Miscellaneous
    Mobile
    Operating Events
    Portable
    POTA
    Shack Build
    Technical


    - N3VEM -

         Welcome to my Ham Radio Blog!  This blog was started primarily to share my two concurrent shack builds - my mobile station and my home station.  Over time, this has grown to include sharing about my operations, and general radio-related thoughts that I have as a newer operator.  
         
    ​Enjoy!

    RSS Feed


    Picture
    POTA!

    Picture
    Proving that hams do indeed still build stuff!

    Picture
    100 Watts and Wire is an awesome community, based around an excellent podcast. 

    Archives

    September 2020
    July 2020
    January 2020
    September 2019
    August 2019
    July 2019
    June 2019
    May 2019
    March 2019
    January 2019
    December 2018
    November 2018
    October 2018
    September 2018
    August 2018
    July 2018
    June 2018
    May 2018
    April 2018
    March 2018
    February 2018
    January 2018
    December 2017
    November 2017
    October 2017
    September 2017
    August 2017
    July 2017
    June 2017
    May 2017
    April 2017
    March 2017
    February 2017
    January 2017
    December 2016
    November 2016
    October 2016
    September 2016
    August 2016
    July 2016
    June 2016
    May 2016
    April 2016
    March 2016
    February 2016
    January 2016
    December 2015
    November 2015


Picture
Copyright © 2015
 Vance Martin is a participant in the Amazon Services LLC Associates Program, an affiliate advertising program designed to provide a means for sites to earn advertising fees by advertising and linking to amazon.com.