Post contains affiliate links
I made something that I want to share with you!
If you've stumbled on my blog, or ever talked to me on the air, you probably know that I do quite a bit of portable and mobile operating (actually, because of the current state of my shack project, ALL of my operating is portable and mobile at the moment.)
If you've stumbled on my blog, or ever talked to me on the air, you probably know that I do quite a bit of portable and mobile operating (actually, because of the current state of my shack project, ALL of my operating is portable and mobile at the moment.)
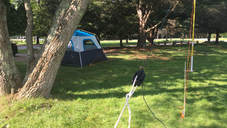
I enjoy operating in this way quite a bit, because I travel regularly for work. Recently, I learned enough Morse Code to start making contacts on the air with CW in addition to SSB. This works great when I'm portable in my tent, but I recently had a couple activations that I had to do from the car. I didn't know CW when I first did my mobile install, and I didn't think I'd ever have a reason to do CW from the drivers seat, so I didn't plan for it. Now that I'd like to be able to, I started making plans. At first I thought I would just run a cable from the radio body in the trunk, to the panel that I have my remote head and mic jack mounted in.
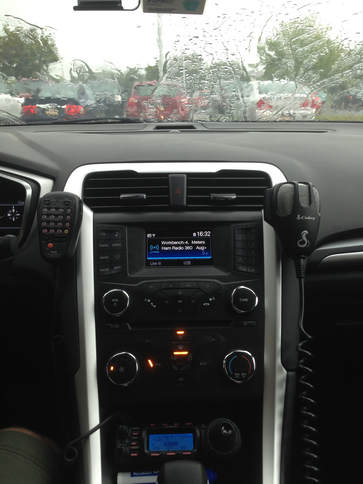
As I thought about it however, I really didn't feel like removing body panels, rolling back carpet, and all that business, so I didn't get around to it. While I was stewing on this, I got to thinking about the times I did do CW from the front seat. The Yeasu 857d (and probably the other Yeasu rigs as well) has a feature called "MICKEY." This feature lets you do Morse Code by using the mic as a weird sort of paddle. With this feature turned on, the down button acts like the dah, and the up button acts like the dit. It works, but to be honest it is a pain, so I started avoiding it.
The realization I had was this - those are just buttons. I can probably make an interface that plugs into the mic jack, and just uses the lines for those buttons, so that I can plug a key into the mic jack. The wheels started spinning.
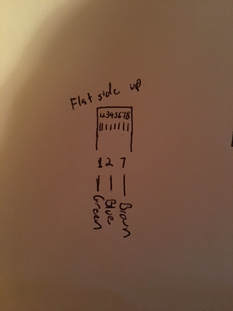
So, first I needed a pinout of the mic jack. Luckily a google image search for "Yeasu 857d mic pinout" brought up just what I needed. If you look at the jack, flat side up, the connections are, from left to right:
- Down
- Up
- +5 v
- Mic Ground
- Mic
- PTT
- Ground
- Fast
With this information it seemed obvious to me that all I needed to do was make something that went to the appropriate pins. I also wanted something that I could keep in my glove box, so that I could work CW on a moments notice. With that goal, here's what I came up with:
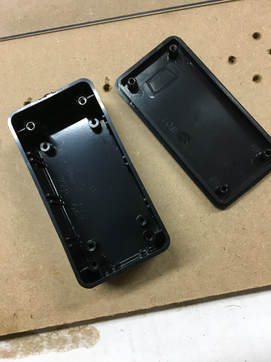
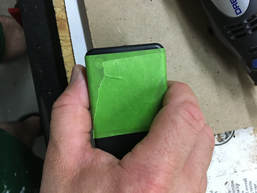
I started with a standard 4x2x1 project enclosure. The parts that will go in here would fit in something smaller, but I needed something that fit the hand nicely - you'll see why in a moment.

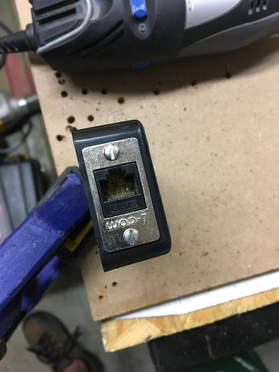
Because modern radios use an RJ45 style plug, I decided to put an RJ45 jack in the end of the interface, so that I could connect with a standard network cable, or with the mic cord that comes with the radio. I put a piece of painters tape on the end so I could measure and mark for my cut.

After a few zips with the Dremel tool and a couple different bits, the jack fit nicely into the end of the box. They make jacks with the wires already attached on the back, but I had a pass-through jack, so that's what I used.
I used my tap set to drill holes, and then carefully cut 4-40 threads right into the plastic, so that I could use screws to hold the jack in place. Don't over-tighten when screwing into plastic!
I put more tape around the box, and marked for a hole in the end for a 1/8" stereo jack, and holes on either side for buttons. You'll find out shortly what the buttons are for...
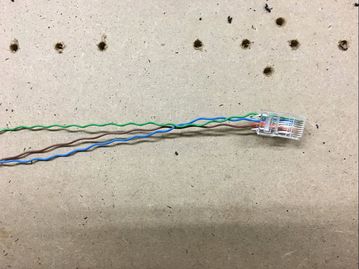
Next, I completely stripped a section of network cable. Referencing back to the mic pinout, I only needed 3 of the wires, so I picked 3 colors I liked - I put the green wire at the first pin, which would go to the "down/dah" button, I put the blue wire to the second pin, which would go to the "up / dit" button, and I put the brown wire to the 7th pin, which would be the ground. The rest of the wires I just jammed in as spacers to make it easier to slide everything into place in the plug, and then I cut them off after crimping the pins down.
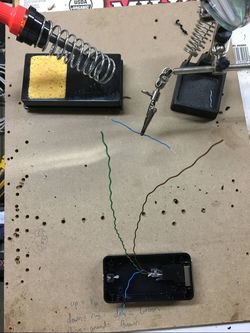
Next, it was time to start stripping and tinning some wires. Secret admission here - don't tell! - Sometimes if I'm in the garage and not near water, I spit on my sponge to moisten it. Who does that?!
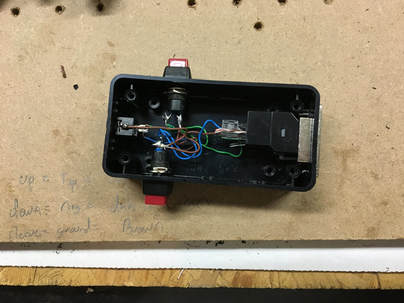
Next it was time to put in the jack and switches, and solder them up! The buttons are offset so that when holding the box, one lands nicely under my thumb, and one lands nicely under my pointer. To pick the spots I actually just held the box they way I would, and marked where my fingers hit. The pointer button got the green wire and the brown wire, the thumb button got the blue wire and a jumper from the brown wire on the other button. The jack got a jumper from the brown wire to the sleeve connection, from the blue wire to the tip connection, and from the green wire to the ring connection.
This is just a quick sketch of how I wired the plug that would be on the inside of the box.
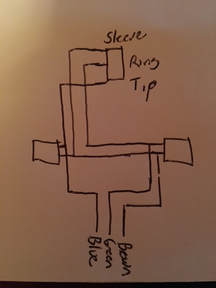
This is a quick sketch of how I wired the switches and the stereo jack.

Ready for it's lid!
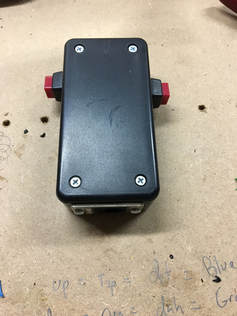
And there it is - my "CodeLink" ready for action!
Now, to make this work, the settings on the radio are important, because I am relying on the "Mickey" feature. This means that I need to have these setting correct:
- Multifunction Row J - "BK" needs to be on (this basically tells the radio to actually transmit on CW), and "KYR" needs to be on (this tells the radio to use the built in keyer)
- Menu Item 26 - needs to be set to "Mickey"
- Menu Item 30 - sets the keyer speed (keep this to the speed you can copy)
- Menu Item 59 - needs to be set to "normal" (this selects the type of mic connected)
So, with the interface made, and the settings chosen, it's time to show you how it works! Check out this short video I made to see it in action:
To wrap up, here's the parts list with links if you want to make your own. Several of these things come in quantities greater than you'll need, but it never hurts to have spares, or build up your supply!
Project Box 4x2x1
RJ45 Feed-through
2 Buttons
Stereo Jack
RJ45 plug
network cable
And, if you don't have these tools already, you might want to check them out as well. I used mine in this project, and in A LOT of other projects as well:
RJ45/RJ11 crimp tool
Dremel Tool
Bye for now!
 RSS Feed


