Now that the bad news is over - here's some random news - this weekend I was putting the "ham" in ham radio operator.....my family does their own butchering every year, and for the last 20 or so years we've done it as a demonstration of 19th century butchering techniques at a living history farm in New Jersey. If you happen to know me personally, you might be able to find me in the picture.
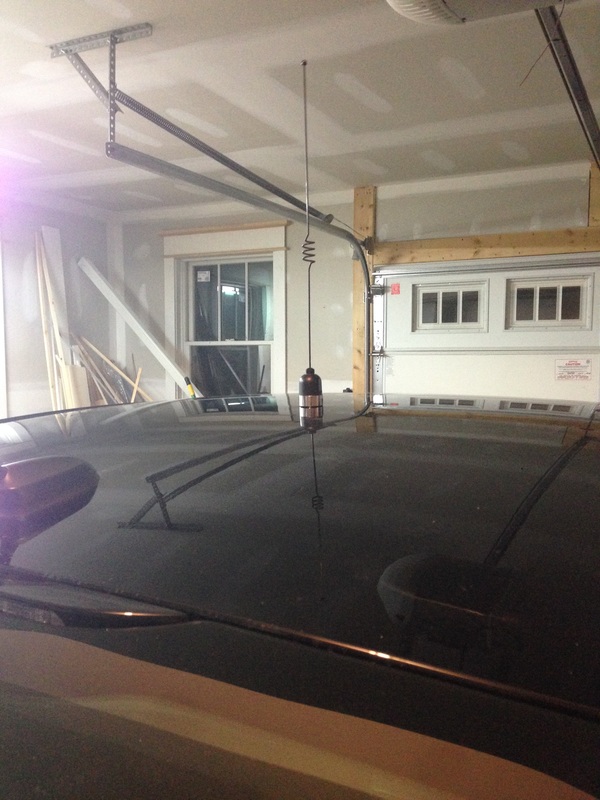
So.......I've had my car just over a week, and someone hit it already! Based on the location and type of damage it looks like someone hit it in a parking lot. I was in Pittsburg PA, Rochester NY, and Philadelphia PA this past week, and while I was in Philly it was valet parked, so who knows when it happened. Oh well. I took it to the body shop for the estimate today, and as soon as they get their estimate put together it'll get fixed up like new - that's what we get insurance for. Now that the bad news is over - here's some random news - this weekend I was putting the "ham" in ham radio operator.....my family does their own butchering every year, and for the last 20 or so years we've done it as a demonstration of 19th century butchering techniques at a living history farm in New Jersey. If you happen to know me personally, you might be able to find me in the picture. Anyway, enough of that - I'm sure you're more interested in my progress on my project. I had a little bit of time to work this evening before and after my daughter's swimming lesson. I started by popping off the door and moulding trim on the drivers side of the vehicle. With this done, I was able to peak up between the headliner and the roof of the car to see what was up - looked straightforward enough. After having a peak up there, I ran a peice of painters tape across the top of the car, from side to side, and measured to find the centerline of the vehicle. On my car this turned out to be 1' 10 3/4" from the side of the vehicle (just in case you cared....) After marking the center, I put down a bunch of tape around the area I intended to drill, and then taped the end of the hose of my small shop vac right at the location of the future hole. This way most of the metal shavings would get sucked up as I was drilling. Once the hole was made (I used a 3/4" metal hole saw), I also used the vacuum and sucked up every speck of dust that even looked like it wanted to pretend to be a metal filing. I found out the hard way with my old vehicle that if you don't get all these off you end up with little rust spots. With the hole made, I followed the dirctions that came with the Larson NMO mount to fish the coax through the hole and attach the mount. I ran the coax down the rear pillar (being carful to route the cable away from the airbags!) to the location in the trunk where the radio body will be mounted. Just a small amount of snugging with the wrench and presto! A rooftop NMO mount. I stuck an antenna on it for a quick pic also. I don't think this is the final anteanna I will use, but it's one I had laying around (that also happens to clear my garage doors.)
0 Comments
Your comment will be posted after it is approved.
Leave a Reply. |
Categories
All
- N3VEM - Welcome to my Ham Radio Blog! This blog was started primarily to share my two concurrent shack builds - my mobile station and my home station. Over time, this has grown to include sharing about my operations, and general radio-related thoughts that I have as a newer operator. Proving that hams do indeed still build stuff!
100 Watts and Wire is an awesome community, based around an excellent podcast.
Archives
September 2020
|