Post contains affiliate links
Before I start - Don't forget to vote! I'm still asking for your ideas on Step 5 in my Crowd Sourced Project. As always - keep your money, just give me your ideas! With that little ad out of the way, here we go...
Its a miracle! I started and finished a project in the same week!
I shouldn't be too rough on myself - quite a few of my ongoing projects are rather large, so progress tends to be slow, doing small amounts of work as time allows. This project however, was one that was a complete workshop tangent.
Its a miracle! I started and finished a project in the same week!
I shouldn't be too rough on myself - quite a few of my ongoing projects are rather large, so progress tends to be slow, doing small amounts of work as time allows. This project however, was one that was a complete workshop tangent.
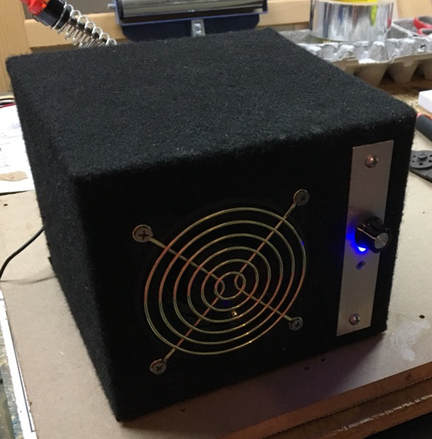
There it is - a "homebrew" speaker for ham radio use! The day I started this, I didn't even know I was going to do it. It all came about becasue I was working on another radio project (the "secret project" that I allude to from time to time) in the garage, and I wanted to be able to hear my rig over all the noise I was making. I started to look at powered speakers online, when suddenly it dawned on me that I probably had everything I needed to make one, primarily becasue the key components (a speaker and a small amplifier) I had left over from tearing this thing apart in order to work on version 2 (which still isn't done....sigh.)
So realizing that I had those parts, I started to dig in the piles in the garage and presto, within a couple days I had a small powered speaker! If you follow me on twitter you saw these pictures as I did each step, but here they are again with a few more details. Enjoy!
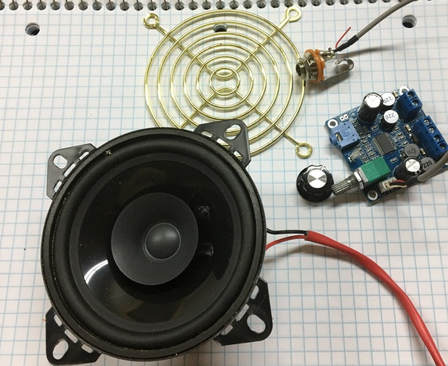
Here's some of the important parts after I dug through my bins to make sure I had what I would need. The speaker is a 4" car-audio speaker. The "grill" is a fan cover from a PC power supply. The knob came from my junk drawer, but I'm pretty sure it's from Radioshack. I also had a generic 1/4" mono jack salvaged from another scrapped project. Lastly - the amplifier. If I had skills like @SmittyHalibut I would have designed this myself, but I dont, and I had a cheapo that came from eBay or Amazon a while ago, so I just used what I had!
|
Pretty much any 4" speaker would work if you want to duplicate this. You can pick up a really cheap one like I did at any auto-parts store, or you can check out Amazon - you can find options from cheap and good-enough sounding, to expensive and impressive sounding, and everything in between. |
|
|
 |
Any 80mm fan grill should work, if the speakers you buy don't come with a grill. You just want to be certain that the grill you choose has enough clearance that the speaker surround doesn't hit it. For the cheap speaker I used, this type of grill worked perfectly.
|
 |
1/4 inch mono panel jacks aren't quite a dime a dozen, but they are less than a dollar a piece. these are the ones I used.
|
 |
Knobs are a pretty cheap commodity too. I got mine at a local Radioshack a while back, but something like these from Amazon or elsewhere should do the trick.
|
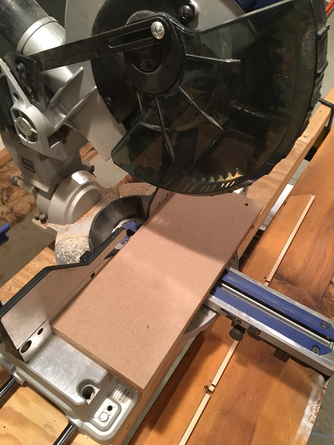
Next I needed to make the enclosure. I had some 1/2" MDF scraps from another project, so this is what I used to make the box. Just a tip - in my area at least, the Blue store only carries 3/4" MDF - if you want 1/2" go to the Orange store.
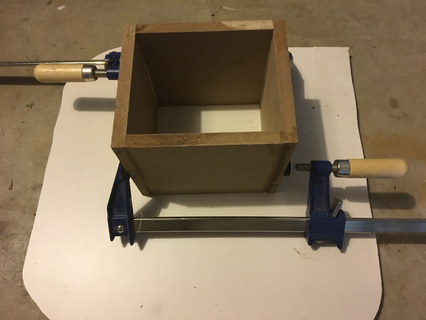
Glued up the 4 sides first. Here's a box-making tip that helps me - at these steps, cut your parts just a hair large, and glue them with a smidge of overhang. You can then do a quick zip with a flush cut router bit to get a perfect corner after the glue sets (or sand them down if you don't have a router. Same result, just takes longer.)
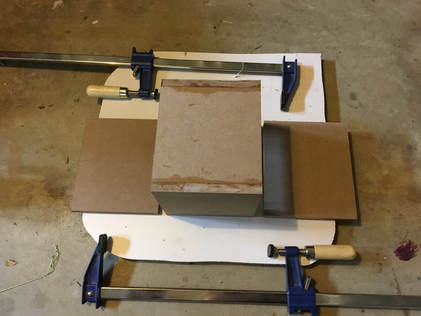
After the glue had overnight to set up, I got the front and back ready to glue in place.
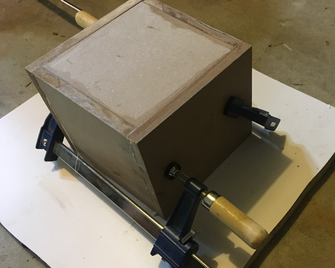
When gluing on the front and back I also cut my parts a little large and then routed them flush after the glue dried. I should probably mention that my router is one of my favorite tools. Don't worry about the fact that the box is now completely sealed shut. You'll see how I handled that shortly.
|
As I built the box, I didn't design it to any specific size. Technically, speakers usually perform best with an optimized air space behind them, but for communications quality SSB, and even basic CW, I wasn't too worried. During the banter on Twitter with KR6ZY, KD9EAS, K4CDN, and some others, Mark mentioned the enclosure designs that are specifically resonant for CW frequencies. If you're a big CW person, you might want to do a Google search for "resonant CW speaker." Another option if you want a more size-specific air space would be to get one of the rubber baffles designed to go into the hole before the speaker. I'm cheap (err... I mean frugal) so I didn't go that route.
|
|
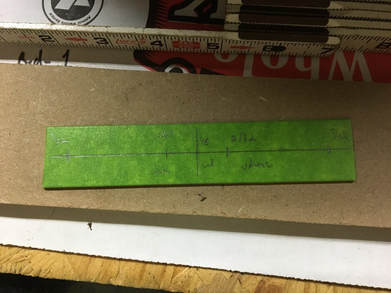
For the panel mount connectors I knew the plywood itself would be too thick, so I pulled out some aluminum scraps and cut them to size. I covered them with tape so that I could measure and mark my holes for the various connectors / knobs, etc.
If you have a hardware store near you, that is probably the best place to get MDF and aluminum, but you can order both of these things online. Shipping rates can get strange with sheets of plywood or 4' lengths of aluminum, but there are places like online metals that will cut things to size for you.
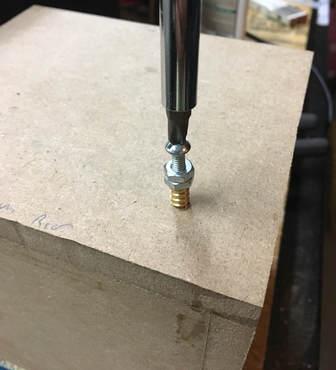
I layed out my panel parts and marked where I wanted them to go. To hold them in place I decided to use thread inserts so that I wouldn't need to access the inside of the box to hold a nut. On a woodworking forum somewhere I read to put them in this way, because trying to turn them in with a screwdriver using the built in slot always seems to break the little "ears"
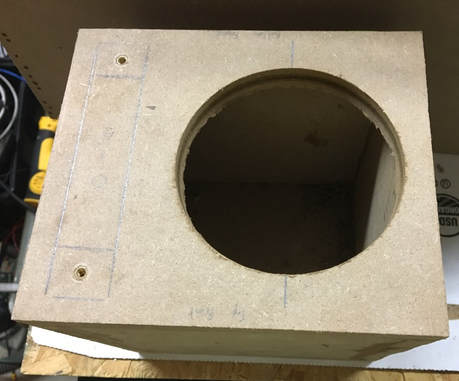
The most important part - a hole for the speaker! Thank goodness for a 4" hole saw - I could have never made a cut that round with a jig saw! You can also see one of my panel marks clearly in this picture.
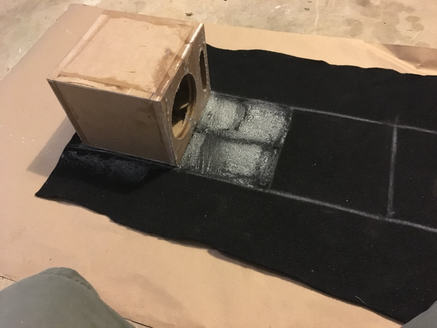
After cutting the holes for the panels I was ready to cover it in carpet, since that's the quick and easy way to finish a box like this. If you do a Google search for "carpeting a speaker box" you'll find all kinds of instructional videos and tips for this process. My biggest tip - a very sharp knife makes a world of difference!
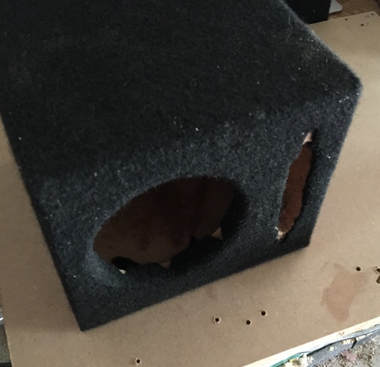
Carpet done, and holes trimmed out!

I have no idea if this step actually made a difference or not, but to try and keep RF out (and potential RFI from the little amp in) I lined the inside of the box with aluminum tape. I wasn't sure if this stuff would be conductive through the adhesive, so I checked, and it is! I might do this more often when I make small boxes for stuff, because it was pretty cheap and easy to do.
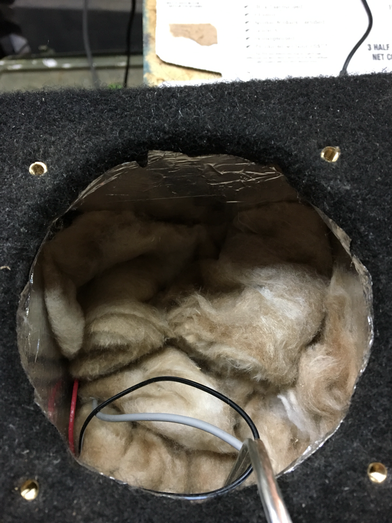
This is another step that I can't really say whether it helps or not, but quite often speaker enclosures are stuffed to keep sound reflections inside the box from doing weird stuff to what you hear on the outside. I had some imsulation scraps, so in they went (P.S. Thanks go to Will - KD9EAS for pointing out on twitter that this looks like a box full of Tribbles...)
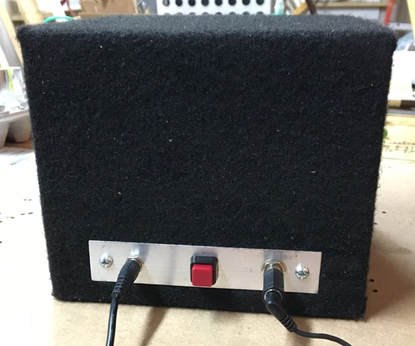
The rear panel got a 1/4 inch mono jack wired to just the left channel of the small amp. I used a coaxial power jack, mostly becasue I was out of PowerPole connectors. The positive lead runs through the switch at the center, to act as a "main power" button.
 |
Most Radio power stuff is standardizing on PowerPoles for power connections, but I used a coaxial connection for 2 reasons - I had run out of power poles, and it's easier to make a round hole in a panel then a square one. I figured I can always make a pigtail to go from this to PowerPoles the next time I order some parts.
|
 |
Any switch would work for something like this, but in situations where the item might end up sitting close to something else, I like a push-button type, because they are a little lower in profile than a big old toggle switch.
|
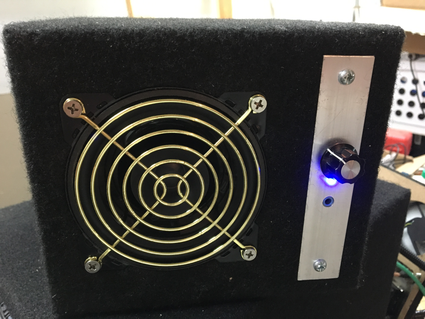
On the front, the panel was drilled to match what was needed for the little amp - the volume control, the power LED (after bending it 90 degrees) and a 3.5mm TRS connector (this connector has a bonus! Be sure to read the text below!)
 |
This is the amplifier board I used - the SMAKN® TPA3118 numeric 12V power amplifier board
|
The 3.5mm jack on the small amp turned out to have a "bonus" functionality! It was really meant (I think) to be an alternative input from the ones on the board itself. It is just wired in parallel with the other inputs, so by plugging a mono to stereo adapter (remember that I was only using the left channel). I can use traditional stero headphones to monitor the input source for the amp.
Why is that a bonus? In field-day like situations, the speaker can be plugged into the rig, and the operator can plug headphones into the speaker. The operator can then use the rig's AF gain (volume) control to set a comfortable audio level for the headphones, and then anyone who wants to listen in on the action can adjust the speaker volume until their heart is content, without impacting what the operator hears in their headphones. I think thats a slick, unplanned for feature! You could always get the same effect by plugging both a speaker and headphones into a "Y" cable, but this has a more polished feel to it.
There you have it! A powered 12 volt speaker enclosure for the times that I need more punch than I can get with a more traditional passive one, and I made it entirely from stuff that I already had on hand! If you're as luck as I am and have a good stash of parts, maybe you can do the same - if not, most of the individual part pictures in the post are Amazon links, so you can get what you need if you want the joy of rolling your own!
 RSS Feed


