NOVEMBER 3 VICTOR ECHO MIKE
  • Blog
  • Events and Activations
  • Diversions
  • About
  • Gallery
  • Contact
  • Links
  • Subscribe
  • Search
  • Blog
  • Events and Activations
  • Diversions
  • About
  • Gallery
  • Contact
  • Links
  • Subscribe
  • Search
NOVEMBER 3 VICTOR ECHO MIKE

ham radio Projects and musings from a (Relatively) new operator

Ready to Close 'em Up

11/29/2017

2 Comments

 
     The walls that is....
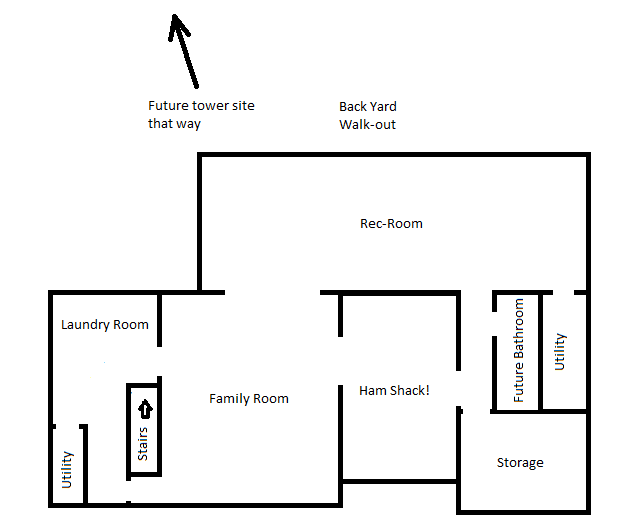
     The Thanksgiving break was a productive one for me.  I've been zeroing in on getting my shack project to the point where I'm ready to start closing up the walls with drywall.  This project is actually combined with finishing the part of the basement under our addition, so there were a few things that I wanted to run across the space that will become the rec-room before I closed things up.  To give a little perspective on the space I'm working in, so that you can picture it a little easier, here's a rough drawing of our basement.  The scale is a little out of wack, but you'll get the idea:
Picture

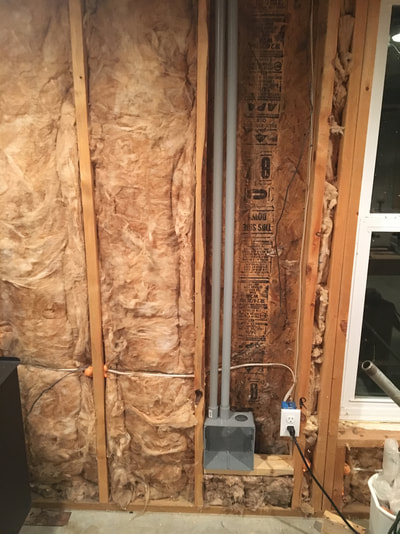
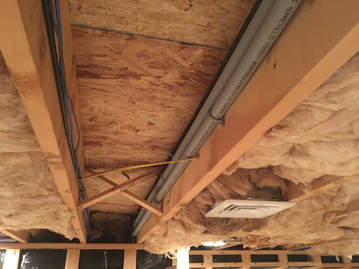
     In my last post I mentioned several things I was planning, and these were precisely the things I ended up getting done.  The first thing I put in was some empty conduit, because even though I am pulling stuff through now, it's hard to anticipate future needs.  In one section the fit was tight, so 1" conduit was the widest I could put in without a lot of concrete busting.  Because of that I made 2 runs side by side, from the back wall of the shack, to an access box that I installed in the back wall of the walk-out basement.

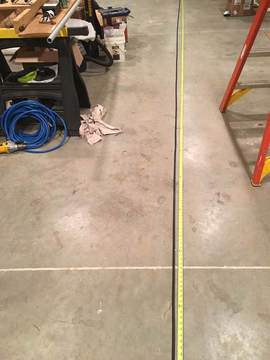
     Next up was the coax.  I ordered enough Times Microwave LMR-400 from DX Engineering to pull 4 runs across the space.  As a side note here, DX Engineering means business with their shipping! My order was big enough to get the free shipping, and it was almost 24 hours on the nose from the time I ordered it till the time it was sitting on porch - impressive!  I ordered the coax in bulk, so I rolled it out lengthwise down the long stretch of the rec-room to cut it into 4 sections.
Picture

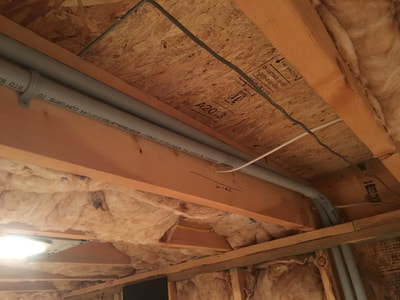
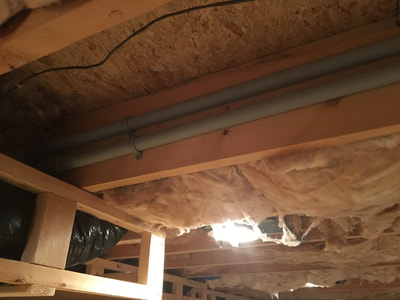
In addition to the coax, I also ordered enough for a single run of control cable, anticipating a rotor at some point in my future.  Finally, I knew I wanted some network cable running from the shack to the tower for potential future uses, so (at the suggestion of a couple different folks) I cut 2 lengths of that as well.  With all these cables cut to length, I tacked up the coax right above the conduit runs, and the control cable and network cables to the other side of the joist bay.
Picture

     In a separate area I also pulled a run of 12-2 Romex from the sub panel in the shack, to a location that I can get to from the outside.  My thought here is that if I end up needing power at the tower, I have a line ready for it, powered from the same source as everything else in the shack.
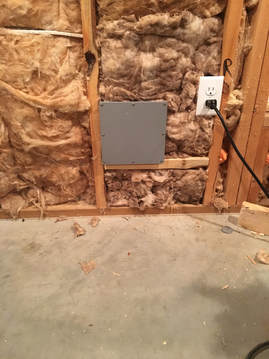
     As hard as it is to do, the next step was to stuff the insulation back in place, and hide all of my hard work!
Picture

     So with all this stuff done, I'm ready to start closing up the walls.  When I eventually do put up the tower, I'll be able to take the cover off this box, roll the coax and cables out of the way, and drill straight through the back of the box and the exterior wall, to put a conduit to an entrance panel right on the other side of this wall, with runs out to the tower.  easy-peasy!

     Next step, drywall.  I've never hung drywall before, but I decided it was finally time for me to try and tackle it on my own.  I won't be working in the blind though - I have a brother-in-law that hangs and finishes drywall, and a neighbor that used to work for a large drywall distributor, so I'll be leaning on their expertise pretty hard.  If you see anything I missed that you think I should do before I close things up, or if you have any drywall tips, please feel free to leave me a comment - It'll be a few days before I get started, and tips are always welcome!
Previous: Shack Build
Next: Shack Build
Back to Part 1
2 Comments
Phil
11/30/2017 19:42:04

Take a picture of every wall before closing up. That way if you need to run something in the future you have an idea what your up against. I'm still stymied with running antenna cables from a closet shack on the first floor to the attic. I have no idea what is in the walls... or what I have to drill thru. And the attic is covered in blown-in insulation! I have to remove some wall panels in the attic walls to get closer to where I will come up... Working in the blind! AND you can never have enough outlets... Especially in a technical room.... I'd put quads all over the place. Surface mount conduit..or drop down ceilings.... metal studs make life a little easier... Holes are drilled every so often for access down the wall!

Reply
Vance - N3VEM
11/30/2017 21:03:10

Great thought on the pictures - I think I'll do that tonight before I forget!

I'm also right there with you on the outlets etc. I roughed in more than I should need, and I added a sub panel right in the shack, so if I find I do need to add something, it won't be far to go.

Reply

Your comment will be posted after it is approved.


Leave a Reply.

    Categories

    All
    Antenna
    Cw
    Digital-modes
    Flying-with-gear
    Home QTH
    Miscellaneous
    Mobile
    Operating Events
    Portable
    POTA
    Shack Build
    Technical


    - N3VEM -

         Welcome to my Ham Radio Blog!  This blog was started primarily to share my two concurrent shack builds - my mobile station and my home station.  Over time, this has grown to include sharing about my operations, and general radio-related thoughts that I have as a newer operator.  
         
    ​Enjoy!

    RSS Feed


    Picture
    POTA!

    Picture
    Proving that hams do indeed still build stuff!

    Picture
    100 Watts and Wire is an awesome community, based around an excellent podcast. 

    Archives

    September 2020
    July 2020
    January 2020
    September 2019
    August 2019
    July 2019
    June 2019
    May 2019
    March 2019
    January 2019
    December 2018
    November 2018
    October 2018
    September 2018
    August 2018
    July 2018
    June 2018
    May 2018
    April 2018
    March 2018
    February 2018
    January 2018
    December 2017
    November 2017
    October 2017
    September 2017
    August 2017
    July 2017
    June 2017
    May 2017
    April 2017
    March 2017
    February 2017
    January 2017
    December 2016
    November 2016
    October 2016
    September 2016
    August 2016
    July 2016
    June 2016
    May 2016
    April 2016
    March 2016
    February 2016
    January 2016
    December 2015
    November 2015


Picture
Copyright © 2015
 Vance Martin is a participant in the Amazon Services LLC Associates Program, an affiliate advertising program designed to provide a means for sites to earn advertising fees by advertising and linking to amazon.com.