NOVEMBER 3 VICTOR ECHO MIKE
  • Blog
  • Events and Activations
  • Diversions
  • About
  • Gallery
  • Contact
  • Links
  • Subscribe
  • Search
  • Blog
  • Events and Activations
  • Diversions
  • About
  • Gallery
  • Contact
  • Links
  • Subscribe
  • Search
NOVEMBER 3 VICTOR ECHO MIKE

ham radio Projects and musings from a (Relatively) new operator

Crowd-Sourced Project: Brainstorming Results

8/10/2017

0 Comments

 
If this is the first you are stumbling upon my "Crowd-Sourced" project series, feel free to go back to part 1 to come up to speed.  For the less patient, here's the "what you missed last time" version:
Picture
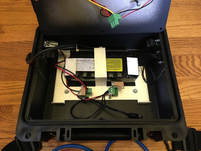
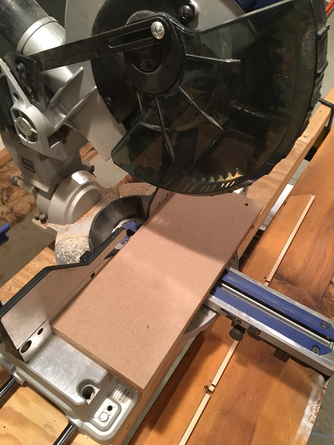
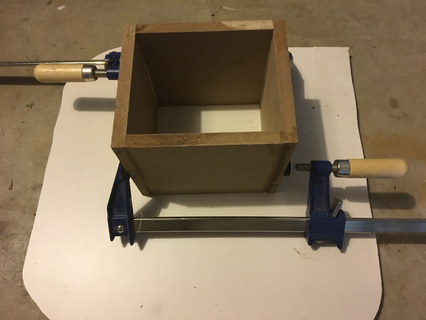
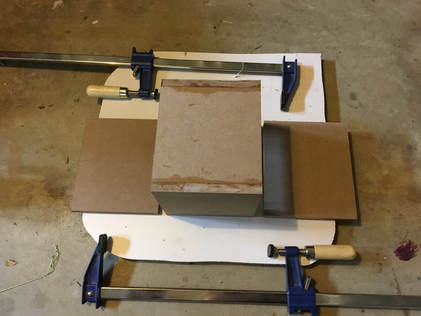
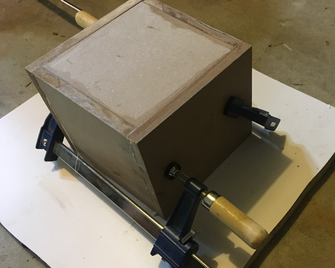
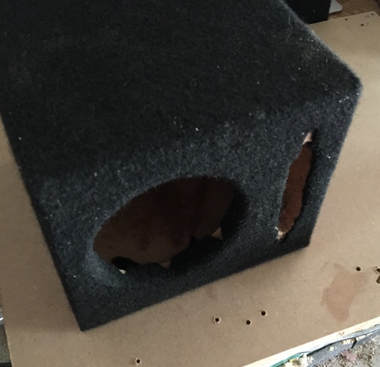
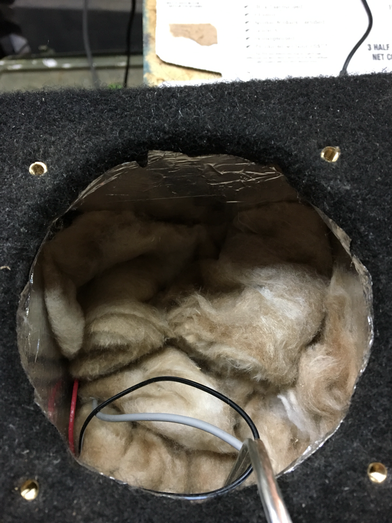
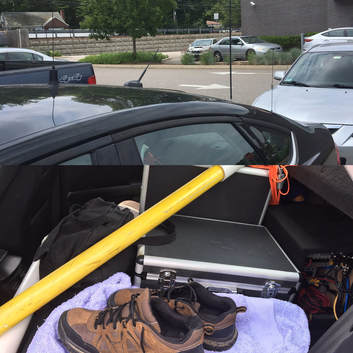
One of the pieces of equipment that my work revolves around comes in these neat little boxes.  We had a couple that were getting scrapped, so I nabbed one of them, and gutted it down to the box, and the battery that was built into it.  I figured I would use it as a ham-radio project, but since I was undecided exactly what I wanted to build, I started putting it up to a series of votes.  Through that voting, it was decided that I should build a small/portable HF station into the box.  In the most recent installment I asked for feedback on what radio architecture to use, whether I should do a kit, build from plans, or use a pre-built radio, and whether or not I should try to squeeze a computer into the package.

Since you are probably most interested in the results, I'll share those first, but please stick around after that, because in the voting process, there were, as C+C Music Factory says, some "Things That Make You Go Hmmmm"

What Architecture of radio?

With this, we were deciding whether to go the route of an SDR radio, or something based in hardware.  I must admit that the results here surprised me, but the overwhelming majority - 70% - voted to go with a "traditional" architecture.

If a Traditional Architecture is chosen, should I still try to squeeze in a small form-factor comptuer?

This was a resounding yes, 60% of the vote.

If an SDR Architecture is chosen, should we go with a computer dependent, or a computer free option.

Since going the SDR route wasn't chosen, this question is no longer applicable, but just for fun, 55% said to use a computer, 35% said to go computer free, and 10% didn't care.

What should I use as the "Base" for the radio?

With this question, I was basically deciding if I should do a kit-built radio, build something from scratch/plans, or just buy an off-the-shelf radio that's ready to go.  This category did not have a clear winner, with 35% voting to buy something finished, 30% voting to build from a kit, and 30% voting to build from scratch/plans, and 5% that didn't have an opinion.  

Summary of the Vote

I did ask for comments along with the votes, and many individuals had input that I'll put into the next round of planning as I share the next steps.  For now though, the results of this vote, and the prior votes, bring us to this point:

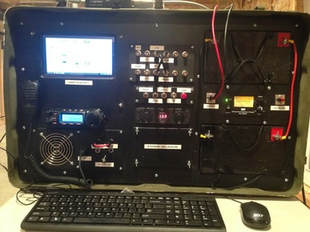
I'm going to be building a small HF station into this box, and powering it from the existing battery.  The station will be based on a traditional architecture (non-SDR), with a small form-factor computer included.  Because the final vote was so close, the radio itself might be off-the-shelf, a kit, or built from plans.  

Choosing the actual radio will be what we vote on in the next installment.  For that, I will be using the input from everyone that gave it, along with some research on my own.  I will also narrow down the options to things that are feasible - some of the suggestions, while great, were either too physically large for the box, or are out of the range of what I'm willing to spend for this project.

What about those things that make you go hmmmm?

I hope you stuck around this long, because I think there are some good educational nuggets in here.  
  • It seems like there is a bit of "whats in the black box?" going on in our hobby right now, and there are still quite a few individuals that don't really know what is "under the hood."  Many people have speculated on this, but for me, there is a some proof in the pudding because a number of the votes for a "traditional" architecture included recommendations for radios and/or kits that were software defined.  The same thing happened several times the other way around as well.  If you're not familiar with SDR, I'd recommend starting with the ARRL's information.
  • I think even for those that know what SDR is, there are still some misconceptions.  As least one person in their comments said that if I go SDR, I must have a computer (they referred to the Flex Radio series). It probably bears stating that being connected to a computer isn't what makes a radio software defined - processing in software what has traditionally been done in hardware (mixers, filters, modulators, etc.) is what makes a radio software defined.  All of the software work can be (and is often) done on-board.  There are actually several options, both kit and off-the-shelf, that are software defined radio's that do not require a computer.  The easiest way to think of it is by picturing it as the radio with a very tiny computer built right in, so that you have a single-board unit with everything in one small package.
  • Just an interesting observation, with SDR marching to the forefront, and being what most radio's in the future will probably be, I'm surprised there weren't more votes for this route.  This is a good lesson though, in the fact that what we assume can often be quite different from what the "majority" thinks.
  • I also had an interesting observation confirming something in human behavior.  I've known from the start that some of my blog posts are probably "too long" because most of us just skim things and move on. Many of the voters haven't been with us from the start, and just skimmed and voted without going back to catch up.  I know this, because there were quite a few comments suggesting things that those of you who have been along from the start voted out.  There were also quite a few suggestions for things that were way too large for the box in question, or were downright silly.  No hard feelings - I do it too - it's just interesting to observe, and that's why I have to take some time between posts in this series to filter through everything.
  • We often hear the more seasoned hams complaining that no one builds anything anymore.  I think this proves that wrong, because while the vote was a dead heat between the 3 options, another way of looking at it was that only 35% chose an off-the-shelf option, while 60% chose a more home-brew option (the tie at 30% each for build from plans vs. build from kit.)  George and Jeremy (KJ6VU and KF7IJZ did their forum in Dayton on this topic)
That's all I have for now folks!  Sometime in the near future I'll have the next part in this series ready to go, and we'll decide on things like which radio and which computer to use!
Back to Part 5
Continue to Part 7
Back to Part 1
0 Comments

Ham Radio Boom-Box

7/31/2017

0 Comments

 
Post contains affiliate links
Before I start - Don't forget to vote!  I'm still asking for your ideas on Step 5 in my Crowd Sourced Project.  As always - keep your money, just give me your ideas!  With that little ad out of the way, here we go...

​Its a miracle! I started and finished a project in the same week!

​I shouldn't be too rough on myself - quite a few of my ongoing projects are rather large, so progress tends to be slow, doing small amounts of work as time allows. This project however, was one that was a complete workshop tangent.
Picture

There it is - a "homebrew" speaker for ham radio use! The day I started this, I didn't even know I was going to do it. It all came about becasue I was working on another radio project (the "secret project" that I allude to from time to time) in the garage, and I wanted to be able to hear my rig over all the noise I was making. I started to look at powered speakers online, when suddenly it dawned on me that I probably had everything I needed to make one, primarily becasue the key components (a speaker and a small amplifier) I had left over from tearing this thing apart in order to work on version 2 (which still isn't done....sigh.)
Picture

So realizing that I had those parts, I started to dig in the piles in the garage and presto, within a couple days I had a small powered speaker! If you follow me on twitter you saw these pictures as I did each step, but here they are again with a few more details. Enjoy!
Picture
Here's some of the important parts after I dug through my bins to make sure I had what I would need. The speaker is a 4" car-audio speaker. The "grill" is a fan cover from a PC power supply. The knob came from my junk drawer, but I'm pretty sure it's from Radioshack. I also had a generic 1/4" mono jack salvaged from another scrapped project. Lastly - the amplifier. If I had skills like @SmittyHalibut I would have designed this myself, but I dont, and I had a cheapo that came from eBay or Amazon a while ago, so I just used what I had!

Pretty much any 4" speaker would work if you want to duplicate this.  You can pick up a really cheap one like I did at any auto-parts store, or you can check out Amazon - you can find options from cheap and good-enough sounding, to expensive and impressive sounding, and everything in between.
Any 80mm fan grill should work, if the speakers you buy don't come with a grill.  You just want to be certain that the grill you choose has enough clearance that the speaker surround doesn't hit it.  For the cheap speaker I used, this type of grill worked perfectly.
1/4 inch mono panel jacks aren't quite a dime a dozen, but they are less than a dollar a piece.  these are the ones I used.
Knobs are a pretty cheap commodity too.  I got mine at a local Radioshack a while back, but something like these from Amazon or elsewhere should do the trick.
Picture
Next I needed to make the enclosure. I had some 1/2" MDF scraps from another project, so this is what I used to make the box. Just a tip - in my area at least, the Blue store only carries 3/4" MDF - if you want 1/2" go to the Orange store.
Picture
Glued up the 4 sides first. Here's a box-making tip that helps me - at these steps, cut your parts just a hair large, and glue them with a smidge of overhang. You can then do a quick zip with a flush cut router bit to get a perfect corner after the glue sets (or sand them down if you don't have a router. Same result, just takes longer.)
Picture
After the glue had overnight to set up, I got the front and back ready to glue in place.
Picture
When gluing on the front and back I also cut my parts a little large and then routed them flush after the glue dried. I should probably mention that my router is one of my favorite tools. Don't worry about the fact that the box is now completely sealed shut. You'll see how I handled that shortly.
As I built the box, I didn't design it to any specific size.  Technically, speakers usually perform best with an optimized air space behind them, but for communications quality SSB, and even basic CW, I wasn't too worried.  During the banter on Twitter with KR6ZY, KD9EAS, K4CDN, and some others, Mark mentioned the enclosure designs that are specifically resonant for CW frequencies.  If you're a big CW person, you might want to do a Google search for "resonant CW speaker."  Another option if you want a more size-specific air space would be to get one of the rubber baffles designed to go into the hole before the speaker.  I'm cheap (err... I mean frugal) so I didn't go that route.
Picture
For the panel mount connectors I knew the plywood itself would be too thick, so I pulled out some aluminum scraps and cut them to size. I covered them with tape so that I could measure and mark my holes for the various connectors / knobs, etc.

If you have a hardware store near you, that is probably the best place to get MDF and aluminum, but you can order both of these things online.  Shipping rates can get strange with sheets of plywood or 4' lengths of aluminum, but there are places like online metals that will cut things to size for you.
Picture
I layed out my panel parts and marked where I wanted them to go. To hold them in place I decided to use thread inserts so that I wouldn't need to access the inside of the box to hold a nut. On a woodworking forum somewhere I read to put them in this way, because trying to turn them in with a screwdriver using the built in slot always seems to break the little "ears"
Picture
The most important part - a hole for the speaker! Thank goodness for a 4" hole saw - I could have never made a cut that round with a jig saw! You can also see one of my panel marks clearly in this picture.
Picture
After cutting the holes for the panels I was ready to cover it in carpet, since that's the quick and easy way to finish a box like this. If you do a Google search for "carpeting a speaker box" you'll find all kinds of instructional videos and tips for this process. My biggest tip - a very sharp knife makes a world of difference!
Picture
Carpet done, and holes trimmed out!
Picture
I have no idea if this step actually made a difference or not, but to try and keep RF out (and potential RFI from the little amp in) I lined the inside of the box with aluminum tape. I wasn't sure if this stuff would be conductive through the adhesive, so I checked, and it is! I might do this more often when I make small boxes for stuff, because it was pretty cheap and easy to do.
Picture
This is another step that I can't really say whether it helps or not, but quite often speaker enclosures are stuffed to keep sound reflections inside the box from doing weird stuff to what you hear on the outside. I had some imsulation scraps, so in they went (P.S. Thanks go to Will - KD9EAS for pointing out on twitter that this looks like a box full of Tribbles...)
Picture
The rear panel got a 1/4 inch mono jack wired to just the left channel of the small amp. I used a coaxial power jack, mostly becasue I was out of PowerPole connectors. The positive lead runs through the switch at the center, to act as a "main power" button.
Most Radio power stuff is standardizing on PowerPoles for power connections, but I used a coaxial connection for 2 reasons - I had run out of power poles, and it's easier to make a round hole in a panel then a square one.  I figured I can always make a pigtail to go from this to PowerPoles the next time I order some parts.
Any switch would work for something like this, but in situations where the item might end up sitting close to something else, I like a push-button type, because they are a little lower in profile than a big old toggle switch.
Picture
On the front, the panel was drilled to match what was needed for the little amp - the volume control, the power LED (after bending it 90 degrees) and a 3.5mm TRS connector (this connector has a bonus! Be sure to read the text below!)
This is the amplifier board I used - the SMAKN® TPA3118 numeric 12V power amplifier board 

The 3.5mm jack on the small amp turned out to have a "bonus" functionality! It was really meant (I think) to be an alternative input from the ones on the board itself. It is just wired in parallel with the other inputs, so by plugging a mono to stereo adapter (remember that I was only using the left channel). I can use traditional stero headphones to monitor the input source for the amp.

Why is that a bonus? In field-day like situations, the speaker can be plugged into the rig, and the operator can plug headphones into the speaker. The operator can then use the rig's AF gain (volume) control to set a comfortable audio level for the headphones, and then anyone who wants to listen in on the action can adjust the speaker volume until their heart is content, without impacting what the operator hears in their headphones. I think thats a slick, unplanned for feature! You could always get the same effect by plugging both a speaker and headphones into a "Y" cable, but this has a more polished feel to it.
There you have it! A powered 12 volt speaker enclosure for the times that I need more punch than I can get with a more traditional passive one, and I made it entirely from stuff that I already had on hand!  If you're as luck as I am and have a good stash of parts, maybe you can do the same - if not, most of the individual part pictures in the post are Amazon links, so you can get what you need if you want the joy of rolling your own!
0 Comments

Pota/WWFF Logging & More with HamLog

7/28/2017

11 Comments

 
Post contains affiliate links
[ed. I updated this post, to reflect the fact that these setting and options will work for both the POTA and WWFF park activation programs]
​
Before I get started - have you voted yet? - I'm currently at part 5 of my "Crowdsourced" project, where I have been soliciting for your input into an ongoing project I've been slowly kicking down the road. 

​With that out of the way, on with the show!
Picture
There are quite a few ham radio apps out there, but if you are an iOS user, you can probably download this one app and be done.  This is because there is not much you could ever want a ham radio app to do, that isn't included in this one.  Look at the insanely low price along with everything this app does, and you'd have to be a crazy person to not download it.  I'm going to be up front with you and let you know that this app does SO MUCH that this is a loooong post.  


You can skip to the end of this article for a list of all of the amazing things that this app will do, and I won't be offended, because most of this post will focus on the feature that I just "found" in the app that has helped me immensely with one of the things I love doing in ham radio - portable operating for the Parks on the Air and World Wide Flora and Fauna programs.

Logging

A topic that comes up regularly for these types of programs is logging while operating portable.  When portable, one of the biggest concerns is power, so while logging on a laptop might be nice, it is often times power prohibitive.  Many people choose to log on paper and then transcribe their contacts into a program when they return home.  If you're like me, free time is at a premium, so an option that lets you get the contacts logged in the proper format as you make them is always preferable.  Since many of us now carry around a portable device that operates for a number of hours on relatively low power, using it for ham radio logging is an obvious choice.
What makes Hamlog so great for logging?  It has a "hidden" feature called "Create A Log" that lets you build a log sheet with exactly the fields you need, no more, no less.  For POTA and WWFF this is awesome, because there are a couple of fields in the ADIF format that the (currently being built) POTA database, and logsearch (the WWFF database) uses, that are not included in the "standard" layout of most (any?) iOS based logging apps.  Hamlog lets you create logs with exactly the data you need.  This makes it easy for you, but also for the program administrators when they upload your logs (they'll thank you for it!)  
What ADIF data fields do POTA and WWFF need, and how are they used?  Here they are, with a brief description of each - but don't be intimidated!  I'll explain how hamlog makes this very easy later in this article.
  • STATION_CALLSIGN
    • ​This field is used for the call sign that is getting "credit" for the activation.  Usually, we are activating by ourselves, so it is just our own call-sign.  There might be times however, where you are activating with a club or something similar.  In this case the club callsign would be the one you enter here.
  • OPERATOR
    • ​This is the filed where the person making the contacts puts their callsign.  When we are operating by ourselves, it is usually just our own callsign a second time.  It may be different then the "station_callsign" however, if you are activating with a club or with someone else.  This is also a place to put the callsign of a guest operator if another ham happens to stumble by, and you put them on the air.
  • MY_SIG
    • ​This is one of the fields that databases use, that might not seem to make sense based on the name of the field, until you relaize that SIG is not signal - it's short for "Special Interest Group."  You can think of it like being a field to put the name of the program into (i.e. POTA, WWFF, SOTA, IOTA, etc.)  Every contact in your log should have the same value here.
  • MY_SIG_INFO
    • ​Once you understand MY_SIG, it's easy to think of MY-SIG_INFO as being the details - i.e the park number.  Programs maintain a list of their park numbers and designations, so just be certain to use the right park number!  (Luckily, most programs are flexible, so if you activate a location that qualifies under multiple things - i.e. you activate a SOTA peak, that is on an IOTA Island, that is in a park, that is part of both POTA and WWFF, you can usually indicate when submitting logs where you were, making you able to submit the same logs to multiple groups (an example of the above is Cadillac Mountain on Mount Desert Island in the Acadia National Park.)
  • CALL
    • ​This is the field where you type the callsign of the person that contacted you.  That's pretty straightforward!
  • QSO_DATE
    • ​This is the field that contains the date the contact was made (if you're logging as you go, its just today's date, in UTC)
  • TIME_ON
    • ​This is the field that contains the time the contact started, in UTC.
  • BAND
    • ​This field contains the band of operation.  Different log uploading tools seem to handle this differently, but for award purposes, pretty much universally, you don't need the exact frequency, just the band.  What we need here is simply the band, followed by the letter "m".  As an example, if I made the contact on 20 meters, I would be entering "20m" in this field.  The "m" is important (learned the hard way with the help of Jeff Dahn!) because this is what lets logging databases. know that you have entered a band and not a specific frequency.  Don't forget the "m"!
  • MODE
    • ​This is where you enter the mode of the contact.  Pretty much all of the standard abbreviations (SSB, CW, DIG, RTTY, etc.) are accepted.
  • SIG
    • ​Special Interest Group of the person you are contacting. for POTA and WWFF, we use this field to indicate the "program" that the person chasing you is participating in.  Normally it will be blank, but if they also happen to be in a park doing an activation (known as a park-to-park contact) this is where you put the letters "POTA" or "WWFF" to indicate that this chaser is also doing a park activation.
  • SIG_INFO
    • ​The final Special Interest Group field.  This field is complimentary to the one above.  If this is a Park-to-Park contact as indicated above, this is where you put the designation of the park that the other person is in. 
  • ​NOTES
    • ​No logging databases that I know of actually need anything in this field, but since we often like to type little tidbits about our contacts, it gets included in nearly every logging package as a "catch-all" field.
You may notice that their are some fields not included, that we commonly exchange, like signal reports.  Here's a little secret - very few logging databases care whether or not you use signal reports.  When portable, the name of the game is to do only what you need to do, no more.  So yes, while I may give signal reports as a courtesy while I am activating, I don't actually put them in my log.

Hamlog Makes Recording Exactly the Data We Need Easy!

Through the "Create-a-log" feature, hamlog lets you build templates, so I made a template for WWFF, which will also work for the newer POTA program, that gives me exactly what I need using the fields above.  The template also lets you give custom names to the fields we discussed, so we can call them something that makes more sense, to help us remember what each field is for. After I set up the template the first time (I'll help you with that in just a little bit) doing my logging is now super easy!  Just follow along in the gallery below for the step by step of what this is like in practice.

Did I convince you to use Hamlog?

    If so, I'll even help you out by making it easy to set up your custom template!  Right in the app, on the "Create A Log" main screen, you can click help for detailed directions on how to create and set up your template.  The first step is creating the template, which is done using a CSV file, but I'll make that easy for you - here it is!  Feel free to download it and use it so you don't have to create it from scratch. Both of these are the same internally, but if you're picky about names and organization, choose whichever you like:
To use the template, you first add it to your iPhone using iTunes File Sharing.  To quote the help file in the app:
cal_pota.csv
File Size: 0 kb
File Type: csv
Download File

cal_wwff.csv
File Size: 0 kb
File Type: csv
Download File

  • Connect your iPhone (or iPad) to your computer
  • Open iTunes
  • Navigate in iTunes to your devices
  • Select the "Apps" tab
  • Scroll down to the bottom of the view to find "iTunes File Sharing"
  • Select HamLog
  • Drag and Drop your template into the file area
  • To verify the upload, open the App on your phone, go to Tools, and Create A Log as described above, and you should see the template, just like you saw in my pictures.
I highly recommend this app for anyone doing activations that has an iPhone.  It couldn't be any easier once you are all set up!

And finally, all the other stuff it does too!

I apologize for the length of this post already, but this app has so much awesomeness in it, that it takes a long post just to skim the surface!  I'll finish up with a quick (kind of...) list of everything else that is built into the app:
  • ​Audio Recording - Allows you to record audio clips, but at the time of this writing, this feature didn't seem to be working on my phone (I don't use this one anyway...)
  • Azimuth Calculation - Automatically gets your grid square info from your location, and allows you to enter any other grid square, to determine the bearing between you and the other station.
  • Azimuthal Equidistant Maps - Lets you create slick world maps centered on your location, via AZProj that was authored by WM7D.  You can generate these on the fly, from wherever you happen to be, using the location data from your phone - very handy for portable operations!
  • Band Plans - This gives you the international band plans, as created by the various organizations like IARU, DARC, ARRL, etc.
  • CW Generator - Generates CW!  Depending on your rig, you might be able to make an interface of some sort to use this as an auto-keyer.  I havn't played around with it much, other than having it sound out my callsign to me via the phone's speaker.
  • CW Helper - A basic chart of the CW characters, that will also play the sounds of them when you click on each letter.
  • Callsign Lookup - Does what it says :-)
  • CloudSync V2 - This is an extra feature that allows cloud backup of your Hamlog data. (requires a subscription)
  • Contact Charts - This gives you some analytics about your contacts in your main log, complete with graphs by count, mode, states, countries, etc.  Pretty slick!
  • Contest Calendar - Gives you a view of the contest calendar data from WA7BNM
  • Create A Log - lets you create custom logs for things like WWFF, SOTA, IOTA, etc.
  • DTMF Memories - This lets you save and store DTMF commands.  Do you operate a repeater or regularly use echolink / allstar?  You can save the commands you use most often as Macro's and play them through your mic to send commands.  Pretty slick to have if you find yourself trying to send commands to a repeater from a radio that doesn't have a DTMF keypad!
  • DTMF Tone Generator - this is a basic keypad that lets you generate DTMF tones.  this is very useful if you need to send repeater commands but don't have a DTMF keypad on your mic - just hold your phone up to the mic, press your PTT, and type the command!
  • DX Cluster - Enter the server and port info for your favorite DX cluster server and viola - you're connected!
  • DX Spots - Gives you DX clustuer spots from DX Summit
  • DXCC Entities - gives you a lis of the entities including ITU and CQ zones, continent, etc.
  • DXpedition Calender - at the time of the writing this feature was not active.
  • Delete All Log Entries - I'm scared to click this - I will just assume it does what it says (it does give you an "are you sure" pop up, so don't worry about accidentally bumping it)
  • Dupe Finder - Searches your main log for potential duplicate entries.
  • EtherPig - This function is not currently active
  • Export Log Entries - Lets you export entries from your main log for uploading to your favorite site - LOTW, eQSL, etc.
  • Field Day - This gives you a log specifically formatted for the field day exchange.  It also has the option of connecting to a "field day server" that you can set up, so that multiple operators can use their own devices to log, and automatically consolidate the logs in a single location.
  • Grid Calculator - lets you find the Grid Square of a manually entered latitude and longitude.
  • Grid Square GPS - gives you your FULL grid square, latitude, longitude, and altitude using the GPS built into your device.
  • Grid from Map - gives you a clickable map that you can use to find grid square designations.
  • Grid to Map - lets you type in a grid square, and then shows you on a map where that grid is located.
  • HF Net List -Displays the very comprehensive net list and schedule from N1YZ
  • HamQTH lookup - allows you to do lookups in the HamQTH database, if you provide your HamQTH user name and password
  • HamStack Lite - Remote station control and monitoring via Sierra Radio (I'm pretty sure this is the  company that the George half of George and Jeremy from Hamradio 360 Workbench Podcast is involved with!)
  • IARU Prefixes - A quick way to look up where someone is from when you hear that strange call sign prefix - very hand to know if it is worth pausing in the middle of an activation to try and catch a "rare" one!
  • IRLP Node Status - gives the status of IRLP notes, including the RF frequency that the node is associated with, and it's location.
  • ITU Phonetic Alphabet - handy for those times when you can't remember if R is supposed to be Romeo or Radio...
  • Import ADIF - allows you to import ADIF files into your log.
  • LAT/Long to Deg/Min - calculates degrees and minutes for you from a manually entered latitude and longitude
  • Length Converter - are you talking to one of those weird Americans that doesn't use the metric system like the rest of the world?  Enter the distance he/she says and convert it to cm/m/km.  (oh, it works the other way around too.  Just had to remind my fellow 'muricans' that we're the odd ducks here, not everyone else.)
  • Net notifications - lets you save net info so that your phone will remind you when it's net time!  I personally use my phone's built in alarms for this, but you could do it this way as well.
  • Notes from the Author - Read what Nick has to say!
  • PSKReporter.info - lets you view the data from pskreporter within the app.
  • Part 97 - yes, its simply part 97.  But this is great, because technically we're supposed to have a copy of this in our "station."  You're covered, just in case the FCC shows up at your campsite while you are operating portable! (I know, this would probably never happen, but who knows - maybe you just want to review it before climbing into your sleeping bag at night...)
  • PigMac - lets you send customer command macros to your Piglet and connected radio.  Info on the piglet interface which gives you wireless rig control from the app is here
  • Pigtail - connections to a hardware device you can connect to your rig to get wireless rig control from the app.
  • Pigtail Tracker - combines features of the Pigtail with TNC and a map to show APRS data.
  • Podcasts - gives a list of some of the more popular ham radio podcasts - as a note, this list is currently out of date.
  • Q Signals - A handy reference when you are trying to remember the difference between QRN, QRM, and QSB OR if the other person says/sends "QSZ" and you're trying to decide if that's actually a thing (hint...it is...but saying it on phone would be goofy...)
  • QRP Spots - Handy link to QRPSPOTS.com for those of you that might like chasing QRPers.  (See the tool above if you don't know what QRP means!)
  • QRZ xml lookup - looks up callsigns and retrieves the operators information (in text format) from QRZ.com using XML.
  • QRZ.com lookup - displays the QRZ web page for the callsign you enter.
  • RST Explained - a quick reference chart explaining how RST is supposed to work.  It's a handy refresher in today's wam-bam-thank-you-ham 5-9 world. It's nice to be reminded of what real signal reports are:-)
  • Reverse Beacon Network - takes you to the reverse beacon network.  If you're not familiar, this is a slick interface that skims the airwaves listening for CQ calls in CW, and "spots" them automatically.  It's a slick way to see if your signal is getting out, or just to see who is calling CQ via Morse Code at any given time.
  • Ring the Phone - This just makes the sound of a ringing phone.  If you're talking to "that guy" you can hit this, and he'll hear a phone ringing in the background, to which you can say "gotta go!  phone's ringing!"
  • SOTA Watch - Takes you to the SOTA Watch web site.  Handy if you like chasing summits!
  • SWR calculator - Enter forward and reflected power to determine SWR, just in case you failed division in high school...
  • Six Addict - takes you to the Six Meter spotting network. If you like VHF dx this is handy.  It's also useful if you're operating portable because it can help you decide if its worth throwing up that 6 meter antenna, or if you should just stick to HF.
  • Solar Data - this gives you a text summary of the solar conditions from HamQSL.com
  • Temp Converter - Talking to that US ham who say's it's 90 degrees, and you instantly conjure up images of fire and brimstone before realizing that American's use that funny Fahrenheit stuff?  You can use this to convert it to the "real" temperature.  (Just another reminder to my fellow US operators that we're the weird ones here, not the other way around...) Oh, and yes, like the distance tool, this one works the other way around too.  And also shows you temperature in Kelvin - you know, just because.
  •  US Band Plan - This gives the band plan commonly used in the US, complete with the "gentlmen's agreements" about which sections of the band are commonly used for which modes, and calling.
  • US Third Party Op Agreements - This is a quick reference for which countries we have third party agreements with.  If you plan on ever having guest operators while portable this is a great reference to have, in case a dx station answers your guest operator's CQ - you can do a quick look to see if the guest operator can take the call, or if you need to grab the mic and take over. (I'm always intrigued about why we do and don't have agreements with certain countries...)
  • UTC Clock - What you see is what you get here.
  • Voice Macros - This would in theory let you use the app like a voice keyer, but at the time of this writing, this feature wasn't working on my phone.
  • WWV Prop Report - This gives you a text display of the most recent WWV propogation report and basic solar conditions.
  • Wavelength Calc - Entering the frequency gives you wavelengths.  This could be handy for cutting wire in the field, or just to use for any reason you see fit.
  • Weather - Gives basic weather forcast data for any entered zip code
  • Where Am I - uses the phone's GPS to determine Lat, Lon, state, city, and street address, of your current location. 
Wow.  Can't believe I'm finally done.  Sorry for how crazy long that was!  (I won't be offended if you didn't read the whole thing!)  

Summary

The hamlog app does a TON of stuff.  Before you spend a bunch of money on different apps, check this one out, because odds are, it's cheaper, and does whatever the "other" app does plus some!  Pretty much the only things this app doesn't do are give you a repeater directory, or give you an audio modem that you can use for digital modes.  With all of the stuff it does, and especially because of the "Create-A-Log" feature it is perfect for your POTA, WWFF, SOTA, IOTA, etc. operations!
Picture
11 Comments

Crowd-Sourced Project: BrainStorming

7/27/2017

1 Comment

 
Welcome to 5th installment of posts centered around my crowd-sourced project!  Before I get to far, I just want to remind everyone that this ongoing project is crowd sourced, NOT crowd funded.  Keep your money.  Just share your ideas!  See Part 3 of this series if you need some details about crowd-sourced vs. crowd-funded (hint - they are NOT the same thing!)
If you are just joining us, you can go back to part 1 to come up to speed, or you can just read on for the quick summary.  For everyone else, sorry for the long delay between part 4 and this update - life happens!  

​Basically, what we have going on here, is that I ended up with a pretty neat box, complete with a Lithium Iron Phosphate battery, because it housed a piece of equipment at my work that was getting scrapped.  
Picture

As a ham, it was obvious to me that this box needed to turn in to a project.  Rather than just strike out on my own, I solicited input from the internet at large, to get ideas for what to do with the box.  The overwhelming majority said that I should built it out into a small HF station.  With that decision made, it's time to revisit this, and put some additional details around how we should go about that.  This means that it is once again time to put it to a vote!  If you have a couple of minutes, I'd recommend going back and reading the scope in part 1, so that you have it fresh in mind when you vote, but if don't, feel free to just start voting!

Voting is now closed - results coming soon!


Thanks for your input! 
Back to Part 4
Part 6
Back to Part 1
1 Comment

Mashamowhatnow?

7/21/2017

0 Comments

 
Believe it or not, as I start to write this post, I am sitting in my tent, at Mashamoquet Brook State Park. (It took me 3 days after that to finish it...)

​I have to start by apologizing because even though I asked the ranger that checked me in (Amie) how to pronounce it, I still can't get it right ( but I'm pretty sure that it sounds like "mash-muck-it.") Anyway, if it was still daylight, this would be the view from where I am sitting, but its dark, so what I actually is a whole lot of nothing...
Picture
View from my Tent at Mashamoquet Brook State Park

​This was almost a non-acrivation, because this was a work trip that had a slightly unusual schedule. As it turned out, I did get a chance to operate for a while in the afternoon leading up to my last night here. I only made about 20 contacts, but even so, this was one of my most memorable activations! How's that you say? Here's how!
First, 20 contacts isn't a bad showing for the amount of time I had to operate, the time of day it was, and the way conditions were. Thanks 'ol Sol! 20 is plenty for the awards in the US portion of the WWFF program, and I'll be back for 3 more days in August, so I should have no trouble getting to the 44 needed for the international awards and rankings (or getting in a few more CW contacts - I'm still slow, but I try to get a couple each time!)
The second thing that made this trip memorable was the ham-encounters I had! The reason for this trip was some meetings with folks in the Hartford, CT and Boston, MA offices of the company I work for. When I pulled up at the Hartford office I noticed someone noticing my antenna's, which in turn led to me noticing his! It turns out one of the system designers in Hartford is a fellow ham!  We chatted for a little bit about operating styles and what we do in ham radio.  He said that he is mostly a VHF guy, monitoring, and occasionally talking on, the simplex frequencies as he travels to and from work.
As exciting as it is to realize a co-worker is a fellow ham, I had a second encounter that was even more interesting.  In many of the state park campgrounds, when you arrive, you just head to the camp site you reserved, and as the rangers make their rounds, they stop by and check you in.  Mashamoquet Brook State Park is one just like this.  Shortly after getting my tent set up (Which doesn't take me long - check out the video in this post) the evening shift ranger stopped by.  Whenever I talk to rangers as I get checked in at campgrounds, I always find a way to sneak into the conversation that I am a ham radio operator, and that I usually play around with my radio stuff while I'm camping.  This helps give them a heads up so that when they see antenna's and radio equipment, they already know what's going on.   
Picture
So, this time around, when I started my spiel and said "I'm a ham radio operator - that's why I have all the antenna's on my car." the ranger responded very quickly "Oh!  I'm KB1WRN." So there was another chance ham-encounter!  Let's all give a collective - Nice to meet you Amie!
After the realization we were both hams, we chatted for a little bit about radio.  I told her about the World Wide Flora and Fauna program, and she told me about some places in the park that would make good spots to set up.  I also invited her to stop by while she was doing her rounds the next evening, once I had my equipment out.
The next afternoon I set my radio up on the picnic table, and started making my contacts.  Amie - KB1WRN - did stop by then and listen in to a couple contacts.  Since she is a technician class licensee, I offered to let her put out a few CQ calls if she wanted, but she did seem a little mic shy.  I didn't want to over-pressure her, so we chatted a few minutes again, and then she continued on her rounds. 
The third and final thing that made this contact very unique was one of the contacts I made into New Jersey.  The worst part is that I forgot to make a note about which contact this was, and since I had a couple contacts into New Jersey I can't recall which of them it was.  Anyway, one of my contacts into New Jersey was with a ham running 1200 watts - from his mobile!  He described his setup to me, and I was quite impressed.  He basically has very short runs of 4/0 cable to an extra set of batteries and his equipment, to be able to handle the 160 amps that he can potentially need.  He also has some impressive filtering to keep the power clean, which is pretty important at those levels!  That was definitely a first for me!
To wrap up, I like to learn something with every activation I do. I think I learned two things from this one:  
  • Keep a script on a piece of paper with your radio equipment!  This way if you want to help someone get on the air, you can hand them the outline of what to say and what to do, to help encourage them through any mic-fright they may have.  Many people do something like this for their GOTA stations during field day, and I think it's a great idea for any situation where we might interact with the public during our radio operations.
  • I need to record some sound clips on my iPhone so that I can use the "Annalink" interface that my Daughter and I built as a way to let me use my iPhone as a voice keyer.  When conditions aren't great the lengthy calling time between QSO's can really wear out your pipes. 
Till next time, Happy Hamming!
Picture
Stopped for dinner not far from the park. My stuff was all packed and ready to head home!
0 Comments
<<Previous
Forward>>

    Categories

    All
    Antenna
    Cw
    Digital-modes
    Flying-with-gear
    Home QTH
    Miscellaneous
    Mobile
    Operating Events
    Portable
    POTA
    Shack Build
    Technical


    - N3VEM -

         Welcome to my Ham Radio Blog!  This blog was started primarily to share my two concurrent shack builds - my mobile station and my home station.  Over time, this has grown to include sharing about my operations, and general radio-related thoughts that I have as a newer operator.  
         
    ​Enjoy!

    RSS Feed


    Picture
    POTA!

    Picture
    Proving that hams do indeed still build stuff!

    Picture
    100 Watts and Wire is an awesome community, based around an excellent podcast. 

    Archives

    September 2020
    July 2020
    January 2020
    September 2019
    August 2019
    July 2019
    June 2019
    May 2019
    March 2019
    January 2019
    December 2018
    November 2018
    October 2018
    September 2018
    August 2018
    July 2018
    June 2018
    May 2018
    April 2018
    March 2018
    February 2018
    January 2018
    December 2017
    November 2017
    October 2017
    September 2017
    August 2017
    July 2017
    June 2017
    May 2017
    April 2017
    March 2017
    February 2017
    January 2017
    December 2016
    November 2016
    October 2016
    September 2016
    August 2016
    July 2016
    June 2016
    May 2016
    April 2016
    March 2016
    February 2016
    January 2016
    December 2015
    November 2015


Picture
Copyright © 2015
 Vance Martin is a participant in the Amazon Services LLC Associates Program, an affiliate advertising program designed to provide a means for sites to earn advertising fees by advertising and linking to amazon.com.