NOVEMBER 3 VICTOR ECHO MIKE
  • Blog
  • Events and Activations
  • Diversions
  • About
  • Gallery
  • Contact
  • Links
  • Subscribe
  • Search
  • Blog
  • Events and Activations
  • Diversions
  • About
  • Gallery
  • Contact
  • Links
  • Subscribe
  • Search
NOVEMBER 3 VICTOR ECHO MIKE

ham radio Projects and musings from a (Relatively) new operator

New & Improved

2/12/2016

0 Comments

 
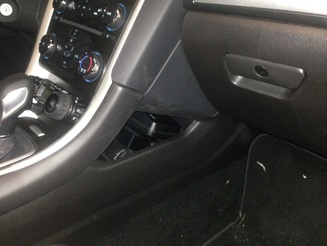
     One of the first parts of my mobile shack project that I shared was how I made the panel to fit in the space under the climate controls in my car, to give me a location to mount the control head of my radio.  It looked pretty good, but over time, I started to notice 2 things:
Picture
  1. I fastened the part in place with silicone adhesive. I thought that between the tight friction fit and this adhesive the part would be fairly permanent, but alas, the glue started coming loose, and I noticed some wiggling when I manipulated the radio controls.
  2. The plastic I used to make the part was a cheap cutting board - the material was great, but apparently it doesn't hold paint well, and the paint started to flake off.

Panel  2.0

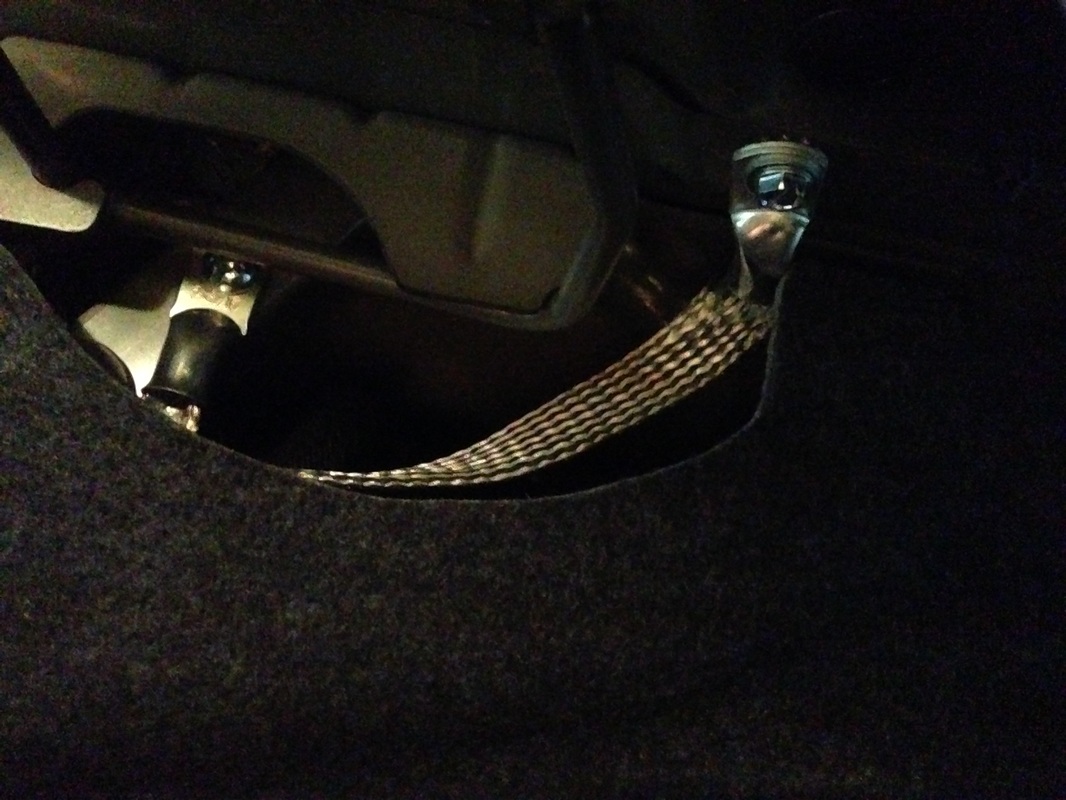
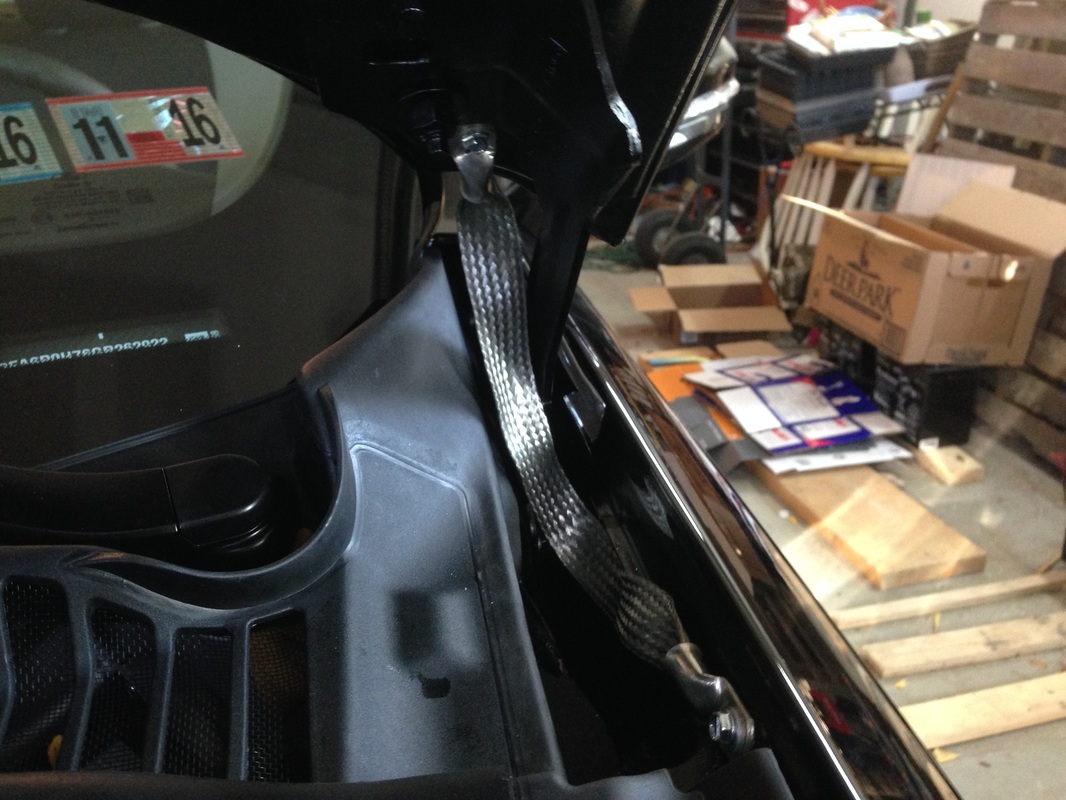
     The first thing I did was to pop the old part out, and clean all the adhesive off the trim where it had been mounted.  While this was off, my first order of business was to fashion a way to attach the new panel a little more firmly.  
Picture
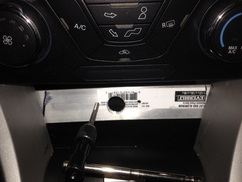
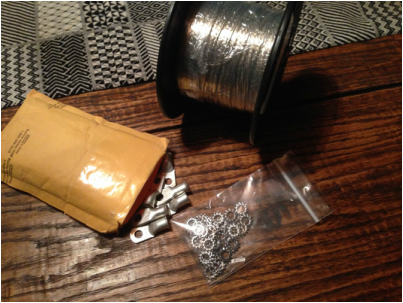
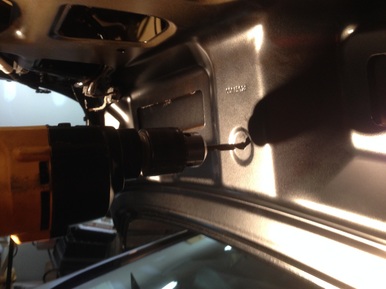
     I decided to go hard core, and screw something fast.  I had a piece of aluminum bar left over from another project.  I cut it to length, so that I could screw the ends of it to the back of the trim on either side of the panel, and then I would be able to use the metal to attach whatever mounting arrangement I came up with for the panel.  I didn't even bother taking the bar code sticker off, because this would end up hidden behind the new panel part, so in the pictures showing the aluminum bar, you can plainly see the label proclaiming that this is, in fact, the brand of aluminum bar you can get at any of the big box home centers.  Where did we buy our random stuff before Lowes and Home Depot?  Oh wait....the hardware store!  Almost forgot about that place!

Picture
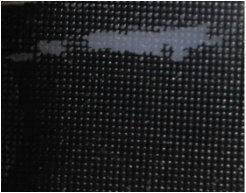
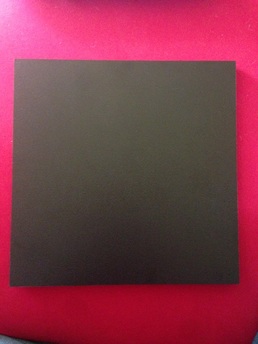
     Once I had this done and screwed in place, I traced the outline of the old panel onto this new piece of plastic, ordered from Tap Plastics.  For the material and size this place was the best price I found in my short search.  It's the same type of material as cutting boards (HDPE) and is marketed for use in marine applications.  I liked it because I knew the material was the type I wanted, and I could order it in black, so I wouldn't have to worry about paint chipping.  As a bonus, I like the texture on this better than the texture on the cutting board that I had used previously.
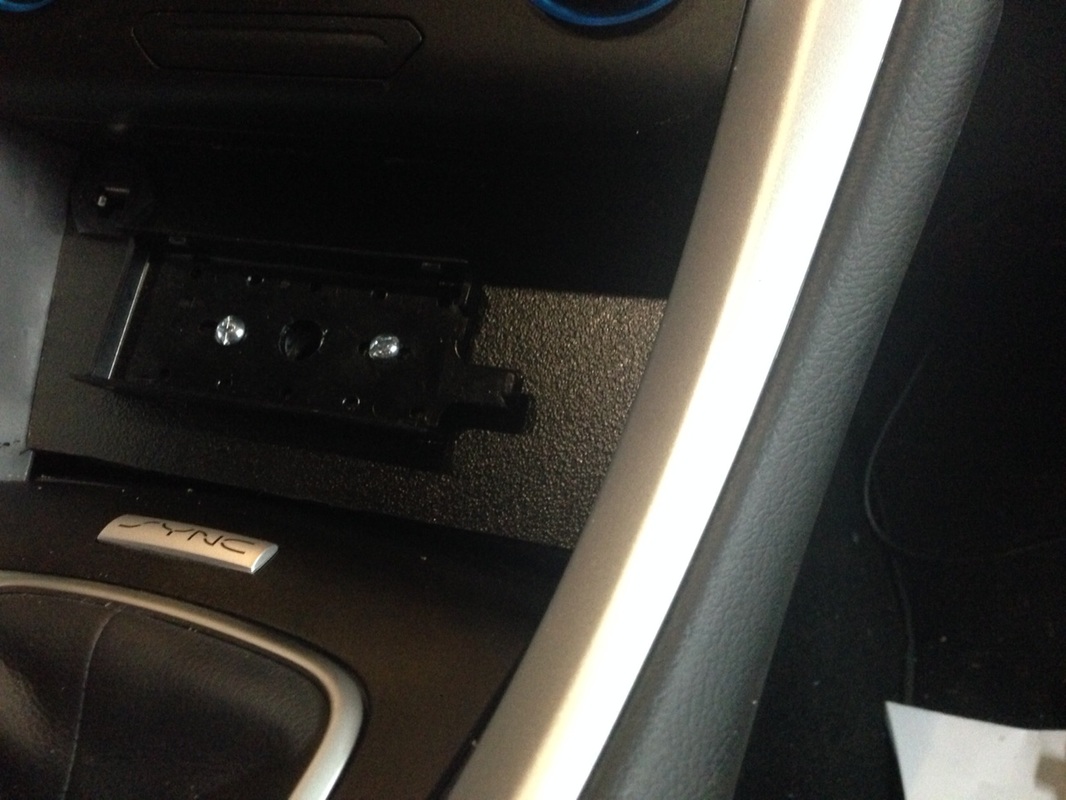
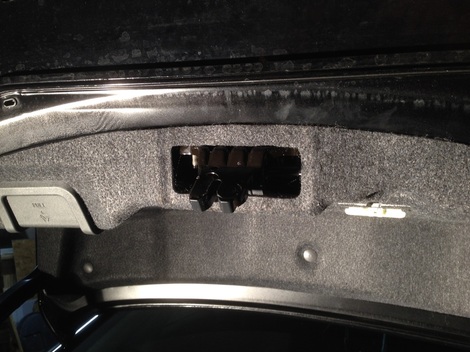
     After tracing the outline of the old panel, I drilled a hole in the upper left hand corner of the new one, for the bulkhead RJ45 connector.  After having it in the lower left on the first one, I realized that I wanted more wiggle room for my fingers on the buttons on top of the radio, so to shift the radio down, I needed to move the mic jack up.  I also decided that I would use the same screws that attach the radio head to the panel, to attach the panel to the aluminum bar.  This way all the mounting screws would be hidden from view, and I would only need 2 screws to attach both the panel and the radio head.  With this thought in mind, I drilled holes in the new panel for the screws to pass through and hold the remote head mount.  I also drilled a larger hole for the control cable to come through to the back of the radio head.  I then pressure fit the part in place, to use it as my drilling guide to transfer all the same holes to the aluminum.
Picture
     I didn't randomly pick my hole sizes.....I used a drill bit that fit my 10-24 tap, so that the screws that hold the panel and the remote head mount could just thread into this, instead of having to work with nuts, wrenches, etc. in the small tight space behind this location. After doing this, I popped the panel back in place, verified that my holes lined up, and then put the screws in.

Picture
Picture
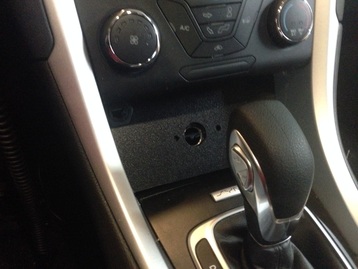
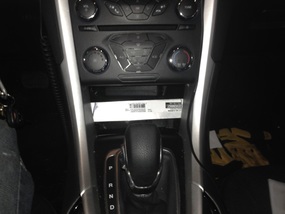
     After doing this, it was just a simple matter of feeding the control wire through, hooking everything up, and popping the control head back onto it's mount:
​
Picture
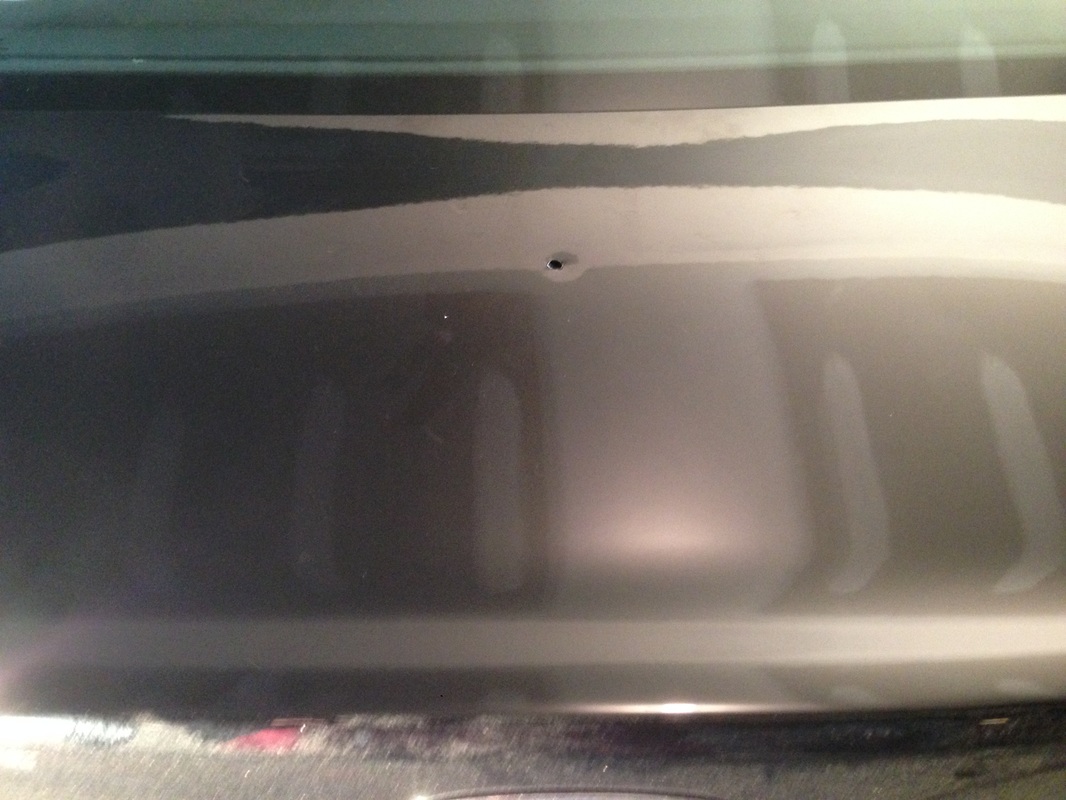
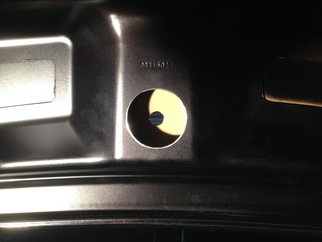
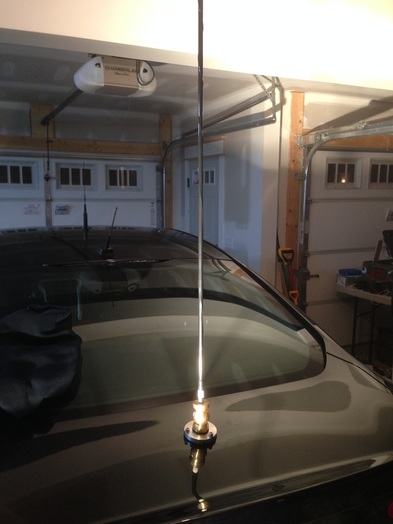
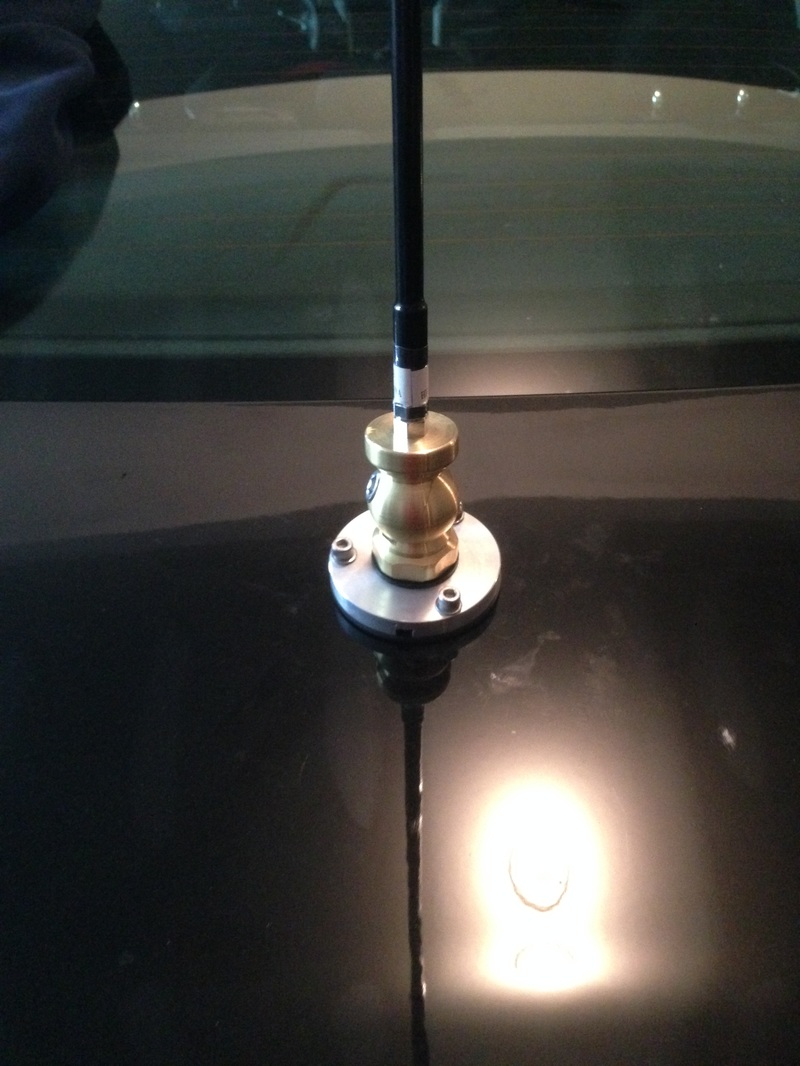
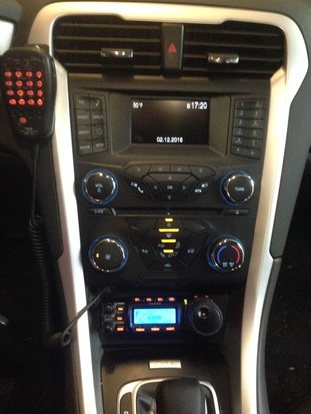
     I guess it doesn't look much different than it did in the original pictures, but it looks better than it did yesterday, with the paint flaking off the first part I made.  It also feels a lot more solid - everything is screwed fast, and staying put.
     P.S.  I also drilled another hole and put in another NMO mount recently - I'll fill you in on that part of the project as soon as get to finish it....


di-di-di dah-di-dah
0 Comments

Sounds Better!

12/27/2015

0 Comments

 
​     A week or so ago I had a meeting at my company's main offices.  For those of you who know me, you know that this also means that I was very close to one of the Ham Radio Outlet stores.  Hooray!
​     If you look at my blog post titled "A Failed Experiment" from December 1st, you'll find out that I was not super thrilled with the receive audio in my mobile station.  I took advantage of the proximity to HRO on my recent business trip, to purchase a mobile speaker.  This one actually:
Picture
     All I can say is, I wish I had done that earlier.  In previous cars I just assumed that there was no way anything could sound better than the car's built-in audio system.  Now that I am using one of these speakers, I must say that it sounds waaaaay better.  I'm not an audiophile, so I don't know all the fancy terms, but I'm assuming that because this is a communications speaker, it does a better job with the frequencies specific to the spoken voice, when compared to the audio from the car, which is designed for music, AND had some less than optimal "conversions" of the audio to get it to the car in the first place.
     Anyway, since I blocked the access to the funny map pocket in the center console of my car, I stuck the speaker in that empty space.  It works well there, and sounds good, but I'm not sure yet if that will be the permanent location - this is mainly because I had planned on using that space differently in the upcoming "Phase 2" of my mobile shack.  
     Here's a pic of the speaker in its cubby-hole for the curious:

Picture
     While I was at HRO I also grabbed some ferrite beads that I needed for my coil of coax that is serving as a choke, à la the method described by KB0G that I referenced in my post back on 12/6/2015.  Maybe I'll be able to sneak some time this week to snap them on......

​Happy Hamming!
0 Comments

What a Bond

12/6/2015

0 Comments

 
     During my last post I mentioned that I was waiting on a couple parts from Amazon (I think I mentioned that....?)  The small items I was waiting on finally arrived at the end of the week last week - yippiee!  Only two of them were actaully from Amazon however....
Picture
     For anyone that is curious, the two things that came from Amazon were the ring terminals, and the external tooth washers.  The bix box store by me apparently doesn't carry external tooth washers - only internal, and only in tiny sizes.  The ring terminals I wanted they also only sell in packs of 2 for what I think is a crazy amount, so I bought both of these items online.  The spool is actaully 1 inch wide copper strap from Georgia Copper.  Of all the places I checked, they seemed to have the best deal for the quantity I wanted.  If you want a very good, and extensive article on bonding, check out K0BG's article here.  For the 30 second version, read on.
     Basically, any vertical antenna needs a ground plane.  For mobile VHF/UHF, there is often enought sheet metal to satisfy this, wherever you mount the antenna (as long as it is mounted properly!)  For HF, there is pretty much never enough metal in the car to make a ground plane.  The ground plane ends up being the ground under the car, and the car acts like a kind of capacitor between the antenna and the ground plane, so the more metal the better.  Unfortunately, the way modern cars are built, all the metal parts aren't really connected together that well (as far as RF energy is concerned) so we have to help it out, by bonding the various metal parts of the car together.  For my car this project was two straps between the hood and the front fenders, two straps across the trunk hinges, 1 strap on each of the 4 passenger doors, and a strap from the engine block to the frame.  I also wanted to put straps on the exhaust, but I don't fit under this car like I did my last one!  The exhaust straps will have to wait till I can borrow a jack and some jack stands from my buddy (or sneak my car onto the lift at his work - he's an auto mechanic).
     Here are just a couple of the pictures of my bonding straps, and my fancy soldering method for putting these together.  For soldering these I do a quick and dirty method.  Since there is no insulation to worry about melting, I don't really to worry about getting the parts just a little too hot.....

     With that done, it was time to tune up my Ham Sticks.  Between the straps and the antenna tuning, I put a 9 hour day into it!  The bad news....I am getting ignition noise on my receive audio on HF (VHF/UHF is fine).  Luckily the noise blanker on my transceiver knocks it right out, but I have a couple things I want to exeperiment with to see if I can get rid of it without relying on DSP.
  1. Getting the Bonding straps on the exhaust.  The exhaust on cars can act like a giant antenna, and re-radiate noise.  Bonding stops this.  If I'm lucky, the noise I'm hearing is re-radiated from the exhaust, and will go away at that point.
  2. Playing around with my engine strap.  The bonding strap on the engine is a bit longer than I would prefer, so there is a slight chance that it is causing more problems than it is solving.  I might play around with taking it off, and/or finding a different place to put it so it can be much shorter.
  3. Finish the RF choke on my coax.  When I installed the antenna, right where the antenna is mounted I put 6 turns of coax.  I still need to add a ferrite bead or 2 in order to make this choke more effective at knocking down common mode currents, which can also cause some noise issues.
For now though, I have working HF!  I even spent a little time with a dummy load connected, and watching the meters bounce while I adusted my mic gain.  Now I just need a few spare minutes to actaully make a contact!  Is anybody free to help me with a test run tomorrow?  If so, you might hear me calling CQ somewhere on 20 meters.
     So whats next on the agenda?  What about the home shack?  See below:
  1. A trip to HRO, or an online order to get a speaker (See my failed experiment post)
  2. A couple additional antenna toys that I plan to get and install (stay tuned for this)
  3. A CB radio & antenna install (because I spend a lot of time on the highway, a CB is still nice to have for talking to the truckers to find out whats up with weird traffic)
  4. "Phase 2" of the mobile install - plans to be revealed when I finish items 1, 2, and 3 above.
  5. The Home Shack - no actual physical progress here.  My "home project" time has been used up on trying to button up the trim in the new master bedroom, and working on the new master bathroom (projects left over from the addition we did a while back.)  Once those are done, my efforts will go back down to the concrete cube in my basement.

​73!
0 Comments

A Failed Experiment

12/1/2015

0 Comments

 
     So.....I'm not entirely pleased with my plan B for the receive audio portion of my mobile shack.  If you read my earlier posts, you'll see that I was shocked to find out that my 2016 Ford Fusion does not have a standard 1/8" Aux input for the stero like all of my prior Fords did (a 2012 Fusion, a 2013 Fusion Hybrid, a 2014 Fusion Hybrid, and a 2015 Escape.)  Why the folks at Ford would have taken this out of the newer model, I have no idea - but I'm stuck with it.  
     My plan B, that I am using now, is a bluetooth adapter that plugs into the 857d's audio output, and then transmits the audio via bluetooth to the Ford Sync Bluetooth Audio input.  Here's what I'm finding I don't like about this arrangement:
     1.  For some reason the Bluetooth Module never connects back up to the car right away, even if it was the last device I was using.  Also, for some reason, it only seems to work if some other bluetooth signal was already communicating with the car first.  This means that every time I get in the car I have to turn on the little bluetooth module, connect my phone via bluetooth audio to the car so that it starts playing music through the bluetooth stream, then I have to switch the bluetooth source from my phone to the module, while playing, before I can hear the receive audio.  That's a lot of screwing around before I even get out of the driveway!
     2.  The bluetooth module needs to be charged every so often, or used while plugged in to USB power.  No biggie I thought - there is a 12v power jack behind the location that I mounted the remote head.  I figured I could just plug everything in, and leave it plugged in.  NOT!  The noise that is introduced in the audio while the bluetooth module is charging is horrific!  this means that I can't use it and charge it at the same time, unless I want to listen to all kinds of noise on my receive audio.
     3.  The audio quality is noticeably worse through the bluetooth module.  If I tune the car's radio to an FM broadcast station, and then tune my 857d to receive the same broadcast FM station, the sound quality is noticeably worse when I switch back and forth between the two.  
     4.  The audio through the bluetooth is delayed.  I'm used to pushing a button on the radio and getting an instant beep, confirming my button push.  Going through the bluetooth, there is about a 1/2 second delay.  

     While I'm sure I could adjust to item 4, the combination of all of these things made me decide to attempt Plan C. 

Audio Plan C

Picture
       So, I was skeptical about plan C from the start, but I stumbled on these things while poking around Amazon.  They are basically ment to be a small USB sound card, so I figured it would only work when connected to a PC.  This one in particular though, said that it was completely plug and play, and would work without the need to install drivers in a very extensive list of operating systems, inluding various forms of Linux.  Maybe, just maybe, the SYNC operting system is based on one of those operating systems? As a bonus, someone had actaully asked the question (as you can do through Amazon) "Does this work in a car?"  To which there were various versions of the answer "Yes."  Several of these yes answers were more like "It should" or "I wouldn't see why not" but it was worth a try, right?  This little guys does have a mono mic input, so I figured I would try connecting the radio's audio output (which is mono) to the mic input on this guy (which is mono) and then I would plug this thing into the USB port for the Sync system that is designed to take audio from an iPod or MP3 player or something similar.  I plugged it all in, fired up the radio, hit the button for USB input and got this message: 
     "Unsupported Device"
Darn.  
​     I quickly jumped on the Amazon listing and added my answer to the question - as someone with personal experience - this will NOT work with a car - at least not a Ford with Sync.

Plan D

     As much as I wanted to run the audio through the car's audio system, I think I'm just going to move to Plan D.  I'm just going to by one of the small communications speakers, and stick it in the empty space behind the radio control head.  It will be hidden from sight, but I should be able to hear it just fine.  Besides, if I do that I'll be able to listen to Broadcast or Sirius radio AND monitor the Amature airwaves at the same time!  Does anyone have any suggestions for a mobile speaker?  I'm considering the standard Yeasu model, because it gets decent reviews, and is reasonably priced, at less than $50  from HRO.
Picture
0 Comments

Here Comes HF!

11/28/2015

0 Comments

 
     Over the long Thanksgiving weekend I started working on installing the mount for my HF antenna(s).  The mount I ordered was from breedlove, who makes some pretty hefty mounts - solid brass, aluminum and delrin for the insulating parts.  I chose the mount I did, because it will work with the hamsticks that I already have, that I used on my last vehicle, and it is also hefty enough for the smaller screwdriver antenna's, which I plan to switch to at some point, when the budget allows.  
     To start, I removed the carpeted liner from the trunk lid.  To do that was fairly easy, I just had to pop out the little plastic snaps, pop off the latch cover (already off in this picture), and take off the plastic handle (to the left, not yet removed):
Picture
     With the carpeted liner removed, it is easy to see the cross member that runs down the center of the trunk lid (from front to back.)   I knew this was there from peeking in here a while ago, and I had ordered my mount accordingly - normally I would have liked the mount with the 4" base, but that wouldn't fit in the space, so I ordered one of the mounts with a 3" base.  Basically, the support member and the sheet metal of the trunk lid make a sort of tunnel, so I knew the back of my mount was going to have to fit inside this "tunnel."
     To drill the holes for the mount, I started by using a factory hole in this "tunnel" that was centered on the vehicle from side to side.  I  chose a drill bit that fit this hole perfectly, that would reach the whole way through to the top of the trunk lid.  I then used this to drill my pilot hole.  Below you can see me lining up my drill from the inside, and the resulting pilot hole as seen on the top of the trunk lid.  The picture of the top of the trunk lid is a little confusing to look at, because you can see the unfinished drywall of my garage ceiling reflected on the closed trunk...sorry for that!
Picture
Picture
     With the pilot hole drilled, I stepped up to a 5/8" drill bit for the hold in the top, which is what was needed for the center bolt of the mount I used.  I then used a 2 1/2" hole saw on the inside, to create a larger "access" hole to work from underneath the mount.
Picture
     At this point, I was able to install the HF mount using just the center bolt, so that I could turn things side to side, and adjust the ball front to back, until everything was plumb.  To get everything plumb, I stuck the fiberlass bottom section of a 6 meter hamstick into the mount, and used my level against that.  After I had it plumb, I used the mount as a guide to drill the other holes, to lock everything in place.  After tightening all the nuts and bolts down, here's how it looked:
Picture
Picture
     The morning after doing this, I connected the coax to the mount, and ran it to the antenna.  I covered the coax in split loom and routed it along the trunk hinge on the right, so that it would match the factory wiring that runs along the trunk hinge on the left.  I also then filled the "tunnel" with expanding foam so that it would stiffen everything up, and provide extra stability to help keep the sheet metal on the top from wanting to flex as the wind catches the antenna while driving down the highway.  Before spraying in the foam, I packed rolled up bubble wrap around the edges of the access hole, so that the foam wouldn't cover the antenna connections, or bulge out through the access hole for working on the antenna connections.  As for the type of foam, I used the stuff from the big box store that is designed for large gaps, and holy smokes did it ever do the trick!  I can now grab this mount and shake the whole car, with barely any deflection the sheet metal it is mounted on.
     At this point I have 2 primary things to do, in order to have somewhat decent HF capability in the car.  The first is to install bonding straps between the various sheetmetal parts of the car.  Some of the hardware I need for that I ordered from Amazon today, so that will probably be a project next week sometime.  Once the bonding is done, I can do final tuning on the antennas.  At that point I'll have working HF......but I'll be far from done with this project.  Check back soon to see what's coming!
0 Comments
<<Previous
Forward>>

    Categories

    All
    Antenna
    Cw
    Digital-modes
    Flying-with-gear
    Home QTH
    Miscellaneous
    Mobile
    Operating Events
    Portable
    POTA
    Shack Build
    Technical


    - N3VEM -

         Welcome to my Ham Radio Blog!  This blog was started primarily to share my two concurrent shack builds - my mobile station and my home station.  Over time, this has grown to include sharing about my operations, and general radio-related thoughts that I have as a newer operator.  
         
    ​Enjoy!

    RSS Feed


    Picture
    POTA!

    Picture
    Proving that hams do indeed still build stuff!

    Picture
    100 Watts and Wire is an awesome community, based around an excellent podcast. 

    Archives

    September 2020
    July 2020
    January 2020
    September 2019
    August 2019
    July 2019
    June 2019
    May 2019
    March 2019
    January 2019
    December 2018
    November 2018
    October 2018
    September 2018
    August 2018
    July 2018
    June 2018
    May 2018
    April 2018
    March 2018
    February 2018
    January 2018
    December 2017
    November 2017
    October 2017
    September 2017
    August 2017
    July 2017
    June 2017
    May 2017
    April 2017
    March 2017
    February 2017
    January 2017
    December 2016
    November 2016
    October 2016
    September 2016
    August 2016
    July 2016
    June 2016
    May 2016
    April 2016
    March 2016
    February 2016
    January 2016
    December 2015
    November 2015


Picture
Copyright © 2015
 Vance Martin is a participant in the Amazon Services LLC Associates Program, an affiliate advertising program designed to provide a means for sites to earn advertising fees by advertising and linking to amazon.com.