NOVEMBER 3 VICTOR ECHO MIKE
  • Blog
  • Events and Activations
  • Diversions
  • About
  • Gallery
  • Contact
  • Links
  • Subscribe
  • Search
  • Blog
  • Events and Activations
  • Diversions
  • About
  • Gallery
  • Contact
  • Links
  • Subscribe
  • Search
NOVEMBER 3 VICTOR ECHO MIKE

ham radio Projects and musings from a (Relatively) new operator

Crowd-Sourced Project: Does this Compute?

10/11/2017

2 Comments

 
Post Contains Affiliate Links     
     Thanks to everyone who voted on what to base this little station around!  With all of your input, the overwhelming decision was that I should build around the BITX40.  If that sentence leaves you completely baffled, you might want to go back to part 1 and come up to speed :-)  After you do that, please head over to the subscribe page so that you can stay up date on all my projects!  The final results of the voting put the rigs we identified in the following order, highest scoring to lowest:​
  1. BITX40
  2. uBITX
  3. Mountain Topper 3b
  4. Elecraft KX1
  5. Hendricks PFR-3b
  6. W7EL Optimized QRP Transceiver
  7. Bayou Jumper
  8. ConnectSystems CS108GS / Xiegu X108G 
​ 
     So with the decision on the rig made, I sent my payment off to HFSigs.com and now I just have to wait for the package to arrive!  While I wait, I want you to once again help me decide on the next component of this project - the Computer!
Picture

Okay, so maybe not THAT computer, but you get the idea!  In some of our earlier voting the general opinion was, if there's room for a small computer, try to get one in there.  With the radio that ended up being chosen, there will definitely be space to get something in there, so rather than drag things out, here are the options:
Raspberry Pi
Picture
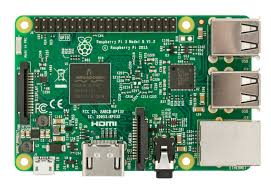
If you don't know what this is, go ahead and climb out from under that log, dust yourself off, trim the beard you've been growing while sleeping for the last decade, and head over here to read about them.  After that, go here to buy it before everyone finds out you didn't already have one (or 2, or 3)
BeagleBone
Picture
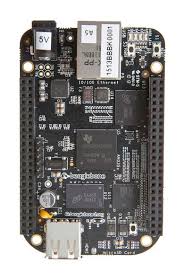
I won't be hard on you if you don't know about this one.  These are another option in the single board computer market, but they haven't gotten the popularity craze that the Raspberry Pi has. They are a little more capable, but I guess people just like Pi more than they like Beagles...
If you're interested in a good article comparing the Beaglebone to the Raspberry Pi you can check out this article over at techlila.
Kangaroo +
Picture
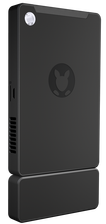
Say what now?  Aren't kangaroos those things hopping our friends in VK land?  Well, yes...but they are also a product that the company bills as being a "mobile desktop PC."  Basically, its a tiny, out of the box computer.  Just plug it into a monitor, add your favorite interface device (mouse, keyboard, etc.) and start computing.  The slick thing here, is that it has a built in battery, which would take some load off the battery in the box, leaving more amp-hours for the rig, and it is much more powerful than either of the single board PC's above.  You can check out the full scoop on these here.
One of Those Cheap Android Tablets
There are quite a few android tablets on the market, and some of them are pretty inexpensive.  The downside of a tablet is that I would be more restricted in software options, since I would be tied to using mobile apps.  The benefit though, is that a tablet would be an all in one solution and most tablets have fairly robust internal batteries.  Just like the Kangroo+, having internal batteries gives the benefit of saving more battery power for the rig.  All that would need to be done would be to figure out a mounting method in the box.
Final Thought Before the Vote
Just a quick thought before the official voting - you may have noticed that I didn't really touch on monitors or interface devices to go with these computers. I'm doing a "presumptive close" on that aspect.  Due to our scope requirement for everything to fit in the box, there isn't really room for a mouse and keyboard, unless we went with a rather non-elegant, fold/up, roll/up type, which ultimately would just take room from something else.  Since small touchscreen monitors are relatively inexpensive for all these options, that is the route I will pursue.  If anyone feels strongly that I should do something other than this however, feel free to comment or reach out to me via any of the methods on my contacts page. 

Voting is now closed!


Thanks for voting!
Back to Part 7
Continue to Part 9
Back to Part 1
2 Comments

Wire in the Air

9/15/2017

0 Comments

 
Post contains affiliate links.  ​
Within the last several days I shared the little 9:1 unun that I made for myself - if you missed it you can check it out here. This evening (well, that is the evening I started writing this - who knows when I'll finish and publish it!) I used the little unun to put some wire in the air.
I had a spool of left over cable from extending my fire alarm system into our addition when we did that project, so I cut off a length of it for my random wire. There are actually a couple neat resources available for knowing what lengths of "random" wire are likely to work best, but I used the info available here and decided to cut my wire at about 36 feet, to use on 40 - 6 meters.
I actually soldered all the wires in the twisted shielded pair together at the ring terminal, so really the shield of the cable is probably doing most of the RF work. Anyway, after I cut it and put a connector on, I hooked one end to my fence out front, and connected the other end to my unun. Without connecting a counterpoise or ground I scanned from 0 - 30 Mhz with my Rig Expert AA-54 to make sure I was in the ballpark. 
Picture
The scale of this graph isn't great, because it tops out at an swr of 5:1, but in the amateur bands, everything above that was at least under 12:1 or so.  I figured that once it was in the air, it would probably still be in line with something my tuner could handle, so I started working on getting the wire up.
Since this is a temporary antenna, I didn't want to get crazy with buying stuff to hang it up.  I've usually got mason's line around because I end up using it for projects around the house.  I needed something however, to get the end of the line over a tree.  Thanks to my bad grammar, when I posted the statement on Twitter that I was looking for something to use,I made it sound like I wanted to throw my garage over a tree...thanks to VK5OI for catching that :-)
Anyway, I ended up finding a little plastic bottle (my YL says it was from bouillon) so I filled it with gravel, tied one end of the string around it, and threw it like it was going out of style (and got it on the first try!)
Picture
Picture

Those of you that read my first post on the topic may recall that my intention with this little 9:1 unun and random wire was to use the metal roof of our addition as that counterpoise.  Rather than try to figure out a way to mount the unun, and then add a way to connect a jumper wire from the unun's ground side to the roof, I came up with something to kill both birds with one stone.
At the top of the metal roof, there is a lip that covers the roof-to-wall connection.  I drilled a small hole in the edge of this (in a spot that any water running through the hole, would just land on the metal underneath, and run down the roof.)  It was then simply a matter of sticking the counterpoise lug through the hole, and spinning the wing-nut on from the bottom (I used a star washer on the bottom to make sure I pierced the paint and got onto the bare metal.)  This accomplished the job of holding the unun in place, AND making my connection to my giant counterpoise! When I take it down I can always caulk the hole if I really feel its necessary.
Picture

I connected my antenna wire to the other terminal, and then looped the other end through an insulator.  With those details done, I tossed the end off the roof to the back yard where the end of my mason's line was waiting patiently.  Once I tied it off, I walked around to the other end of the line that was waiting for me on the other side of the tree, and hoisted the whole thing into the air!
Picture
Picture

I'm not too worried about wind, trees, etc. pulling on the wire, because mason's string is not strong stuff - at a moments protest it will just snap, letting the wire drop with no harm to the roof or house, so no worries there!  In order to give it a little wiggle room however, so it wouldn't snap in a light breeze, I didn't tie the other end off - I just used a super high-tech counter-weighting arrangement:
Picture

Remember when Costco sold Scoop Away cat litter in buckets?  That was great for two reasons - afterwards you had a useful bucket AND the buckets were a recyclable plastic.  Now their litter comes in plastic bags that are much less recyclable.  Boo on you Scoop away!

Anyway, in the bucket is half a brick to give it some weight.  In a prior life I had drilled holes in the bottom of this particular bucket, so it won't hold water and get funky!
With the wire in the air, this was the new view out of the window at my temporary operating position:
Picture
When I first put the antenna analyzer on this however, things didn't look so hot - some of the bands were so out of wack that my little LDG YT-100 tuner wasn't going to have a hope of tuning it.  I made a wild guess that because of the angle, with the metal roof directly under, I was getting some unexpected interaction between my radiating element and counterpoise.  To address that, I went to another standby in the temporary antenna arsenal - bungee cord.
Picture
Picture

This gave enough separation that the SWR curve across my targeted portion of the HF spectrum looked like something my tuner would handle!  40 meters was the worst at 8:1, but that's still tune-able. Because I only have about 3 feet of feed-line from here to the back of the rig, I'm not too concerned about feed-line loss :-)
Picture

So how does it work?  It's hard to say from just a few contacts, but I managed to catch a couple of fellow WWFFers on 40 meters (both CW and Phone) and I hopped around all the bands between 40 and 6 to make sure it would tune up.  What I can say for sure, is that it "works" and I will be able to be on the air more reliably from home from my new temporary shack (in the corner of a closet), while I finish up the basement shack project!
A Quick Update!
Less than 24 hours after publishing this post, I changed the antenna :-)  I was in the back yard working this morning, and it dawned on my that I really underestimated the distance from my house to the trees in the back corner.  After stepping it off, I decided that I could probably fit enough wire to get 80 meters into my list of "tune-able" bands.  After dropping the antenna down, adding another 37 feet of wire for a total length of about 72 feet, I now have access to everything from 80 through 6 meters on this wire!
0 Comments

Health and Welfare (and Progress)

9/1/2017

0 Comments

 
Post contains affiliate links
     Welcome to part number (who knows?) of my shack build!  In my last update here on my blog, I had just hung up the plywood panels that will become the "walls" of my operating position, through which, and into which, I will eventually be mounting my radio equipment.
Picture

If you follow me on Instagram or Twitter (and I recommend you do - check out the links at the top of the sidebar!) you got to see some pictures of the next phase of things that I just wrapped up.  
In Lancaster, PA, where I live, we apparently sit on top of significant natural uranium deposits.  We also have very porous topsoil.  These two factors together mean that Radon is very prevalent in our area.  Our home however, was built before radon was really discovered, so when it was built, radon mitigation wasn't a thing.  I always assumed that our levels were probably fine, because our house sits on a little bit of a hill with a daylight exposure basement.  In theory, this usually means radon can't accumulate because it seeps out through gaps around doors, windows, etc.  A while back though, we decided to test and it turns out the levels in our basement were HIGH.  
With the amount of time I am planning on spending in my basement ham shack, I figured I better deal with it!  For many reasons, we often recommend that ham shacks be in the basement, but we never talk about making sure the basement is a safe place!  I STRONGLY urge you to test the radon levels in your basement, especially if that is where your shack is, or if you spend any significant amount of time down there! 
When we built our addition, the foundation and basement slab in the new section were equipped for radon mitigation when we did the project.  This meant that I just needed to add a couple of additional suction points in the existing house, (where the shack will be) and tie them into the piping in the new section.  The first step to accomplish this was to get out the hammer drill and make some holes.
Picture
The first hole I made was in the wall between the original house and the addition, so that my new radon piping (in the old section of the house) could pass through to tie in to the radon mitigation piping in the addition.
After making a hole in the wall, I needed to make 2 holes in the floor - one for each of the suction points I would be adding in the main part of the house.  To make the holes, I just used my hammer drill to make a series of smaller holes in a circle, and then used my sledge hammer and a chisel bit in the hammer drill to knock out the center.  With this done, if you were the radon under my house, this is the new view you would have:
Picture

In my opinion, the most tedious part of the suction points was excavating out the stuff from under the slab, to make the air pocket big enough.  I found that a combination of a hand trowel and my big shop vac was just the trick for this.  Scrape Scrape Suck, Repeat.
With the new holes in place, it was time to start running pipe!  Radon systems use either 3" or 4" piping, depending on the size of the runs etc.  There are calculators available to determine what you need based on lengths of runs etc.  Short of that, many outfits will just use 4" piping so they don't have to worry about it.  In my case, because the system was being retrofit, there were some spaces where 4" pipe just wouldn't fit, so I had to go with 3".  This means I have to use a slightly more expensive fan to keep airflow where it needs to be, but that was a better option then tearing a lot of stuff apart, or doing nothing at all!
Picture

I think the most unique thing about my install however, was dealing with the section of the pipe that needed to be exposed.  Because of ceiling heights etc. there are some things in the shack that will be exposed conduit and pipe.  This can actually be a neat look, so I'm just going with it.  With that thought in mind however, white plastic pipe doesn't quite fit the bill as "looking neat" so here's what I did for the section that would be exposed:
The first thing I did was measure, cut it to length, and do a dry test fit.  Once I knew I had it the right size I masked the ends, where it would need to be glued. I also used some 120 grit sandpaper to rough up the PVC and get the glossy sheen off of it everywhere that wasn't masked.  With that prep work done, I hammered a piece of conduit into the backyard so I could slip my pipe over it, to stand it on end.  (If you saw my Instagram post, this is what I was up to when I was getting strange looks from the neighbors...)
Picture

With a beautiful view in the background, I started spray painting!  In keeping with the look I was after, I used black paint with a textured finished.  The goal was to have it still look like a pipe, just not a cheap plastic one!  I have used the Rust-Oleum "Hammered" paint in the past, so I knew it would give me the texture I was after.
Picture

After 2 coats of paint I pulled the tape off the ends, and had this fancy looking thing standing in my back yard for a couple hours to dry:
Picture

Once the paint was dry enough to handle, this last section of pipe got put in place, so now instead of a cheap looking white pipe going through my shack, I have something that "looks the part" just a little bit better:
Picture

With the last section of pipe in place, I finished up my afternoon by putting pipe straps and hangers in place, and sealing up the holes around the suction points.  All that's left to do is to install the new Radon fan in the pipe outside the house, do a fresh radon test to check the new levels, and I should have a radioactive-free space, to be radio-active.
Previous: Shack Build
Next: Shack Build
Back to Part 1
0 Comments

Crowd-Sourced Project: Brainstorming Results

8/10/2017

0 Comments

 
If this is the first you are stumbling upon my "Crowd-Sourced" project series, feel free to go back to part 1 to come up to speed.  For the less patient, here's the "what you missed last time" version:
Picture
One of the pieces of equipment that my work revolves around comes in these neat little boxes.  We had a couple that were getting scrapped, so I nabbed one of them, and gutted it down to the box, and the battery that was built into it.  I figured I would use it as a ham-radio project, but since I was undecided exactly what I wanted to build, I started putting it up to a series of votes.  Through that voting, it was decided that I should build a small/portable HF station into the box.  In the most recent installment I asked for feedback on what radio architecture to use, whether I should do a kit, build from plans, or use a pre-built radio, and whether or not I should try to squeeze a computer into the package.

Since you are probably most interested in the results, I'll share those first, but please stick around after that, because in the voting process, there were, as C+C Music Factory says, some "Things That Make You Go Hmmmm"

What Architecture of radio?

With this, we were deciding whether to go the route of an SDR radio, or something based in hardware.  I must admit that the results here surprised me, but the overwhelming majority - 70% - voted to go with a "traditional" architecture.

If a Traditional Architecture is chosen, should I still try to squeeze in a small form-factor comptuer?

This was a resounding yes, 60% of the vote.

If an SDR Architecture is chosen, should we go with a computer dependent, or a computer free option.

Since going the SDR route wasn't chosen, this question is no longer applicable, but just for fun, 55% said to use a computer, 35% said to go computer free, and 10% didn't care.

What should I use as the "Base" for the radio?

With this question, I was basically deciding if I should do a kit-built radio, build something from scratch/plans, or just buy an off-the-shelf radio that's ready to go.  This category did not have a clear winner, with 35% voting to buy something finished, 30% voting to build from a kit, and 30% voting to build from scratch/plans, and 5% that didn't have an opinion.  

Summary of the Vote

I did ask for comments along with the votes, and many individuals had input that I'll put into the next round of planning as I share the next steps.  For now though, the results of this vote, and the prior votes, bring us to this point:

I'm going to be building a small HF station into this box, and powering it from the existing battery.  The station will be based on a traditional architecture (non-SDR), with a small form-factor computer included.  Because the final vote was so close, the radio itself might be off-the-shelf, a kit, or built from plans.  

Choosing the actual radio will be what we vote on in the next installment.  For that, I will be using the input from everyone that gave it, along with some research on my own.  I will also narrow down the options to things that are feasible - some of the suggestions, while great, were either too physically large for the box, or are out of the range of what I'm willing to spend for this project.

What about those things that make you go hmmmm?

I hope you stuck around this long, because I think there are some good educational nuggets in here.  
  • It seems like there is a bit of "whats in the black box?" going on in our hobby right now, and there are still quite a few individuals that don't really know what is "under the hood."  Many people have speculated on this, but for me, there is a some proof in the pudding because a number of the votes for a "traditional" architecture included recommendations for radios and/or kits that were software defined.  The same thing happened several times the other way around as well.  If you're not familiar with SDR, I'd recommend starting with the ARRL's information.
  • I think even for those that know what SDR is, there are still some misconceptions.  As least one person in their comments said that if I go SDR, I must have a computer (they referred to the Flex Radio series). It probably bears stating that being connected to a computer isn't what makes a radio software defined - processing in software what has traditionally been done in hardware (mixers, filters, modulators, etc.) is what makes a radio software defined.  All of the software work can be (and is often) done on-board.  There are actually several options, both kit and off-the-shelf, that are software defined radio's that do not require a computer.  The easiest way to think of it is by picturing it as the radio with a very tiny computer built right in, so that you have a single-board unit with everything in one small package.
  • Just an interesting observation, with SDR marching to the forefront, and being what most radio's in the future will probably be, I'm surprised there weren't more votes for this route.  This is a good lesson though, in the fact that what we assume can often be quite different from what the "majority" thinks.
  • I also had an interesting observation confirming something in human behavior.  I've known from the start that some of my blog posts are probably "too long" because most of us just skim things and move on. Many of the voters haven't been with us from the start, and just skimmed and voted without going back to catch up.  I know this, because there were quite a few comments suggesting things that those of you who have been along from the start voted out.  There were also quite a few suggestions for things that were way too large for the box in question, or were downright silly.  No hard feelings - I do it too - it's just interesting to observe, and that's why I have to take some time between posts in this series to filter through everything.
  • We often hear the more seasoned hams complaining that no one builds anything anymore.  I think this proves that wrong, because while the vote was a dead heat between the 3 options, another way of looking at it was that only 35% chose an off-the-shelf option, while 60% chose a more home-brew option (the tie at 30% each for build from plans vs. build from kit.)  George and Jeremy (KJ6VU and KF7IJZ did their forum in Dayton on this topic)
That's all I have for now folks!  Sometime in the near future I'll have the next part in this series ready to go, and we'll decide on things like which radio and which computer to use!
Back to Part 5
Continue to Part 7
Back to Part 1
0 Comments

Operating Position

5/26/2017

2 Comments

 
Post Contains Affiliate Links
I have another update to share on the progress in my shack! The operating position received the treatment that will make up the "wall" behind the desk. My little helper wanted to demonstrate what it would look like when someone was sitting in the chair, so use your imagination and pretend she is sitting on a comfortable office chair, with a desktop/work surface around her, along with the dim glow from all the radio equipment:
Picture
Here are a couple more pictures, and then I'll describe my slightly unorthodox method to hang this, what I used, and what the plan is:
While this might not look like much at the moment, it actually represents something that I put a bit of forethought into. I like a clean look, so I knew that for my operating position, I wanted the equipment recessed into the wall, so that from the desk you would just see the faces of the equipment through purposefully sized cutouts. What you see here is actually 3/4 inch maple plywood, that will be stained, since that is in keeping with the look I'm after for the room.  The wood wall will give me the look I'm after, while giving me the ability to mount the equipment they way I want.
The framing that this plywood is on was framed with studs 24 inches on center instead of the standard 16 inches, so that there would be room for equipment to slide in between the studs. This also gives me plenty of space between studs to use some rack mount hardware, or potentially even put racks behind, with the faces flush with the wall. I have also mentioned previously, but now you can better see, that I framed the wall about 4 feet from the back of the room.  This gives me a utility space that I can walk into, which will give me access to the back of all the equipment, and a place to put the "non-glamorous" components, like back-up batteries, etc.
Picture

I hung these plywood panels in a non-traditional way. Since these panels will be stained, and will be the visible "wall", I didn't want to see screw heads.  To make this happen I borrowed a tool from my YL (I'm pretty sure I've used it more than she has...)

​For those that don't know, this thing is called a Kreg Jig. It lets you create perfect holes for pocket screws, which is a pretty slick way to hide fasteners. The most common application is probably for making the face frames for cabinetry, since they are an easy and fast way to join material that is butted together. In my case, when combined with some construction adhesive between the stud and plywood, it was a perfect way to screw my panels from the rear, while being sure that the tips of the screws wouldn't poke through the face!
Picture

The way the height works out, once I build the desktop, the desktop and splash guard will hide the seam between the top panel and the one below. The end result will be a seamless wall the I can mount equipment in, that is strong enough to hold anything that I might reasonably hang on it (TV / PC monitors) that gives me a finished look, while at the same time giving me very easy access to the rear of the equipment!
I'm pleased with how it's coming along! If you were doing a similar project, what features would you build in while you had the chance?
P.S.  I found a use for the cutoff ends of this plywood, to build something that my YL has wanted for a while, that has a bit of a ham radio tie-in.  I'll share that soon!
Previous: Shack Build
Next: Shack Build
Back to Part 1 of this Project
2 Comments
<<Previous
Forward>>

    Categories

    All
    Antenna
    Cw
    Digital-modes
    Flying-with-gear
    Home QTH
    Miscellaneous
    Mobile
    Operating Events
    Portable
    POTA
    Shack Build
    Technical


    - N3VEM -

         Welcome to my Ham Radio Blog!  This blog was started primarily to share my two concurrent shack builds - my mobile station and my home station.  Over time, this has grown to include sharing about my operations, and general radio-related thoughts that I have as a newer operator.  
         
    ​Enjoy!

    RSS Feed


    Picture
    POTA!

    Picture
    Proving that hams do indeed still build stuff!

    Picture
    100 Watts and Wire is an awesome community, based around an excellent podcast. 

    Archives

    September 2020
    July 2020
    January 2020
    September 2019
    August 2019
    July 2019
    June 2019
    May 2019
    March 2019
    January 2019
    December 2018
    November 2018
    October 2018
    September 2018
    August 2018
    July 2018
    June 2018
    May 2018
    April 2018
    March 2018
    February 2018
    January 2018
    December 2017
    November 2017
    October 2017
    September 2017
    August 2017
    July 2017
    June 2017
    May 2017
    April 2017
    March 2017
    February 2017
    January 2017
    December 2016
    November 2016
    October 2016
    September 2016
    August 2016
    July 2016
    June 2016
    May 2016
    April 2016
    March 2016
    February 2016
    January 2016
    December 2015
    November 2015


Picture
Copyright © 2015
 Vance Martin is a participant in the Amazon Services LLC Associates Program, an affiliate advertising program designed to provide a means for sites to earn advertising fees by advertising and linking to amazon.com.